
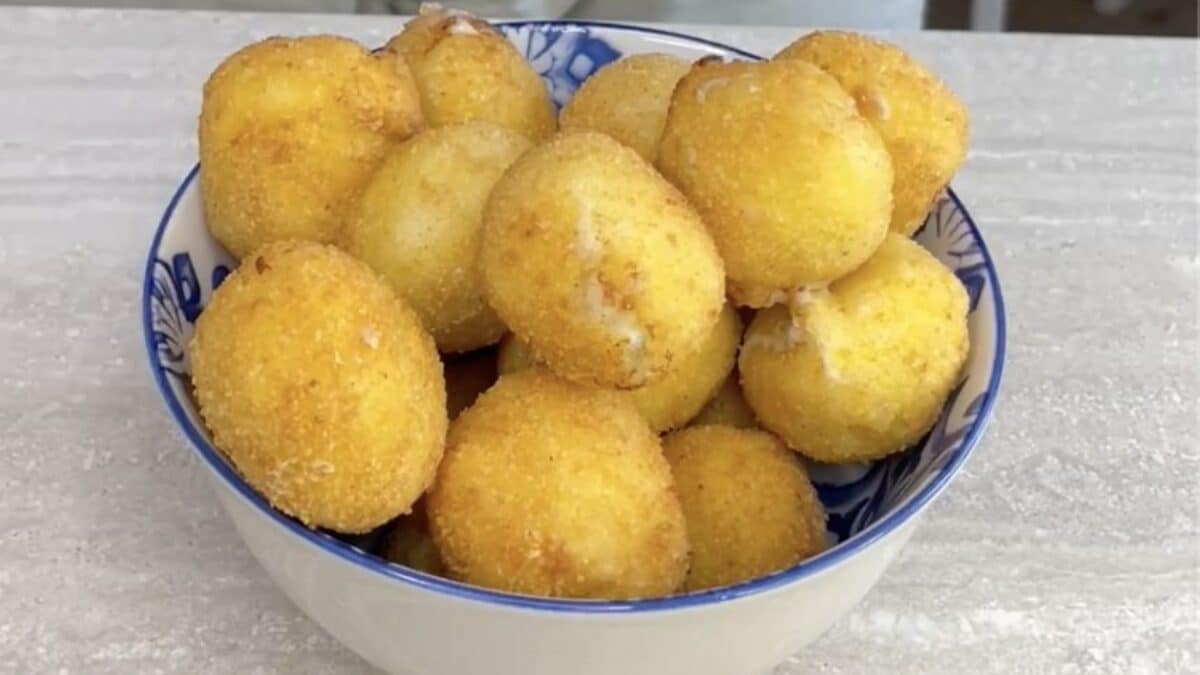
Some flavor combinations just work, and Gorgonzola and pears are one of them. The bold, creamy cheese pairs beautifully with the delicate sweetness of ripe fruit, creating a contrast that's especially delicious inside a crispy, golden croquette.
These Gorgonzola and pear croquettes take that classic Italian pairing one step further. A thick, onion-flavored béchamel forms the base, while the center hides extra Gorgonzola and tender pear pieces cooked with a little sugar and white vinegar.
Once breaded and fried, the croquettes develop a crunchy exterior that gives way to a rich, creamy filling. They're elegant enough for a dinner party but comforting enough to enjoy as a homemade treat.
What Are Gorgonzola and Pear Croquettes?
Gorgonzola and pear croquettes are fried, breaded bites made with a thick cheese béchamel and a sweet-savory filling.
Unlike potato croquettes, which use mashed potatoes as their base, this version relies on a firm béchamel mixture that becomes easy to shape once completely cooled.
The combination of Gorgonzola and pears is a familiar pairing in Italian cooking. It appears in risotto, pasta dishes, savory pastries, and appetizers because the fruit's sweetness complements the cheese's salty, tangy character.
Gorgonzola itself is an Italian blue cheese with a protected designation of origin. It comes in different styles, including the softer, creamier dolce variety and the firmer, more intensely flavored piccante variety.
For these croquettes, creamy Gorgonzola dolce is a particularly good choice, although a stronger variety can be used for a more pronounced flavor.
Why Everyone Will Love This Recipe
The first bite is all about texture. The breadcrumb coating turns beautifully crisp in hot oil, while the béchamel filling stays soft and creamy.
Then there's the flavor. Gorgonzola adds a distinctive tangy richness, but the pears bring sweetness and a little acidity that help balance the cheese.
These croquettes are also easy to serve. Their small size makes them ideal for sharing, whether arranged on an appetizer platter or served as a warm starter before dinner.
And because the filling can be prepared ahead and chilled, most of the assembly can be done before it's time to fry.
Tips for Making the Best Gorgonzola and Pear Croquettes
- Let the béchamel cool completely. The mixture needs to become firm enough to shape. If it's still warm or soft, the croquettes may be difficult to fill and seal.
- Cook off excess moisture from the pears. The pear mixture should be tender but not watery. Too much liquid inside the croquettes can weaken the coating.
- Seal the filling carefully. Make sure the béchamel completely surrounds the cheese and pears, with no exposed filling that could leak into the oil.
- Keep the frying oil hot but controlled. Aim for approximately 340–350°F (170–175°C). Fry in small batches so the croquettes brown evenly without absorbing too much oil.
Frequently Asked Questions
What Type of Gorgonzola Is Best for Croquettes?
Gorgonzola dolce is ideal if you want a creamy filling with a relatively mild blue cheese flavor. Gorgonzola piccante works too, but it produces a stronger, sharper taste.
What Are the Best Pears to Use With Gorgonzola?
Firm-ripe pears such as Bosc or Anjou are good choices because they hold their shape when diced and briefly cooked. Avoid very soft, overripe pears, which can turn mushy.
Why Are My Cheese Croquettes Falling Apart While Frying?
The béchamel may not have cooled enough, the croquettes may not be sealed properly, or the frying oil may be too cool. A firm filling, complete breadcrumb coating, and properly heated oil help prevent breakage.
Can You Bake Gorgonzola and Pear Croquettes Instead of Frying Them?
You can try baking them, but the results will be different. Because the filling is based on béchamel rather than potatoes, the croquettes are delicate and may spread or leak before the coating becomes crisp. Frying is the more reliable method for this recipe.
Can You Prepare the Croquettes Ahead of Time?
Yes. You can prepare the béchamel and pear filling in advance, refrigerate them separately, and assemble the croquettes once everything is cold. Breaded croquettes can also be refrigerated briefly before frying.
What Should You Serve With Gorgonzola and Pear Croquettes?
These croquettes are delicious on their own, but they also pair well with a crisp green salad, bitter greens such as arugula, or a simple appetizer platter. Their rich filling benefits from fresh, lightly acidic accompaniments.
How to Store
Allow leftover cooked croquettes to cool slightly, then transfer them to an airtight container and refrigerate promptly.
Store in the refrigerator for up to 3 days.
To reheat, arrange the croquettes on a baking sheet and warm them in a preheated 350°F (175°C) oven until heated through and the coating becomes crisp again. For food safety, reheat leftovers to an internal temperature of 165°F (74°C).
Avoid reheating in the microwave if possible, as it can soften the breadcrumb coating.
How to Freeze
Gorgonzola and pear croquettes can be frozen before frying, although the béchamel filling may become slightly softer after thawing.
For the best results, assemble and bread the croquettes, then arrange them in a single layer on a parchment-lined tray. Freeze until firm before transferring them to a freezer-safe container or bag.
Freeze for up to 1 month for the best quality.
Cook the croquettes directly from frozen in small batches, allowing additional time for the center to heat through. Monitor the oil temperature carefully, and ensure the filling is thoroughly hot before serving.
Ingredients
How to make Gorgonzola and Pear Croquettes

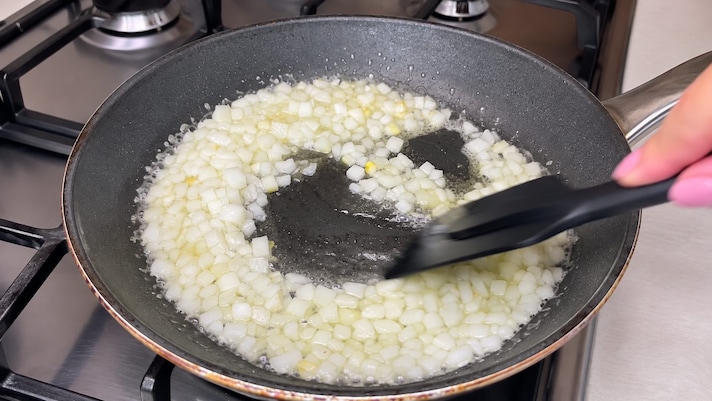
Start by preparing the Gorgonzola béchamel, which forms the base of the croquettes. Peel the onion and chop it very finely so it blends smoothly into the mixture.
Melt the butter in a medium saucepan over medium-low heat. Add the chopped onion and cook gently, stirring occasionally, until softened and translucent. Avoid browning it too much, as the goal is a delicate, sweet onion flavor.
Start by preparing the Gorgonzola béchamel, which forms the base of the croquettes. Peel the onion and chop it very finely so it blends smoothly into the mixture.
Melt the butter in a medium saucepan over medium-low heat. Add the chopped onion and cook gently, stirring occasionally, until softened and translucent. Avoid browning it too much, as the goal is a delicate, sweet onion flavor.

Add the flour directly to the saucepan and stir continuously to combine it with the butter and onion. Cook briefly, allowing the flour to toast lightly and lose its raw taste.
Add the flour directly to the saucepan and stir continuously to combine it with the butter and onion. Cook briefly, allowing the flour to toast lightly and lose its raw taste.

Gradually pour in the milk, stirring constantly with a whisk or wooden spoon to prevent lumps from forming. Continue cooking over medium heat until the mixture comes to a gentle boil and thickens into a dense béchamel.
Gradually pour in the milk, stirring constantly with a whisk or wooden spoon to prevent lumps from forming. Continue cooking over medium heat until the mixture comes to a gentle boil and thickens into a dense béchamel.

Season with salt and freshly ground black pepper, then add the first 2½ oz (70 g) of Gorgonzola.
Stir until the cheese has melted completely and the sauce becomes smooth and creamy. The mixture should be considerably thicker than a traditional pouring béchamel because it needs to hold its shape once cooled.
Season with salt and freshly ground black pepper, then add the first 2½ oz (70 g) of Gorgonzola.
Stir until the cheese has melted completely and the sauce becomes smooth and creamy. The mixture should be considerably thicker than a traditional pouring béchamel because it needs to hold its shape once cooled.
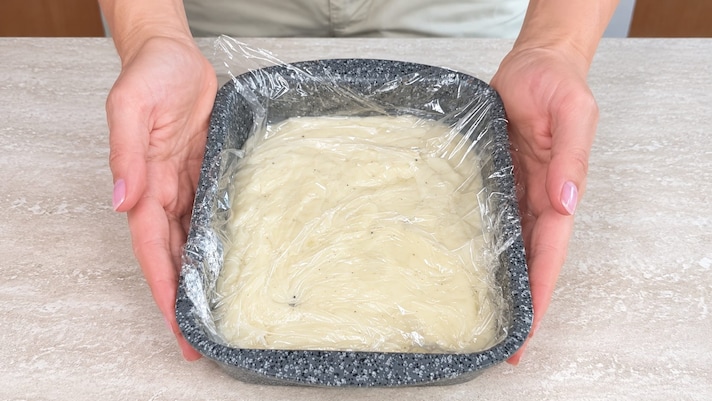
Transfer the hot cheese béchamel to a shallow dish, spreading it into an even layer. Cover the surface directly with plastic wrap to prevent a skin from forming, then allow it to cool. Refrigerate once it has stopped steaming, until completely cold and firm enough to handle.
Transfer the hot cheese béchamel to a shallow dish, spreading it into an even layer. Cover the surface directly with plastic wrap to prevent a skin from forming, then allow it to cool. Refrigerate once it has stopped steaming, until completely cold and firm enough to handle.
Meanwhile, prepare the pear filling. Peel the pears, remove the cores, and cut the flesh into small, evenly sized cubes.
Heat a little oil in a skillet over medium heat, then add the diced pears. Sprinkle with the sugar and pour in the white vinegar. Cook for a few minutes, stirring gently, until the pears begin to soften and the liquid reduces. They should remain in small, distinct pieces rather than turning into a purée.
Remove the skillet from the heat and allow the pears to cool completely.
Meanwhile, prepare the pear filling. Peel the pears, remove the cores, and cut the flesh into small, evenly sized cubes.
Heat a little oil in a skillet over medium heat, then add the diced pears. Sprinkle with the sugar and pour in the white vinegar. Cook for a few minutes, stirring gently, until the pears begin to soften and the liquid reduces. They should remain in small, distinct pieces rather than turning into a purée.
Remove the skillet from the heat and allow the pears to cool completely.
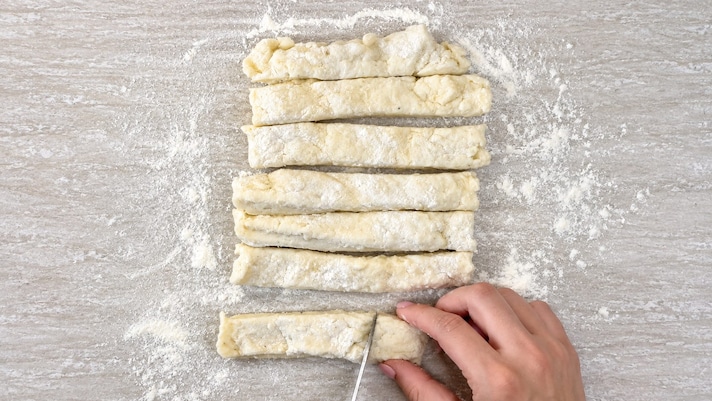
Once the Gorgonzola béchamel has firmed up, transfer it to a work surface lightly dusted with flour. Divide the mixture into manageable portions and gently roll each portion into a thick rope.
Once the Gorgonzola béchamel has firmed up, transfer it to a work surface lightly dusted with flour. Divide the mixture into manageable portions and gently roll each portion into a thick rope.
Cut the ropes into approximately 20 equal pieces, adjusting their size depending on how large you want the finished croquettes to be.
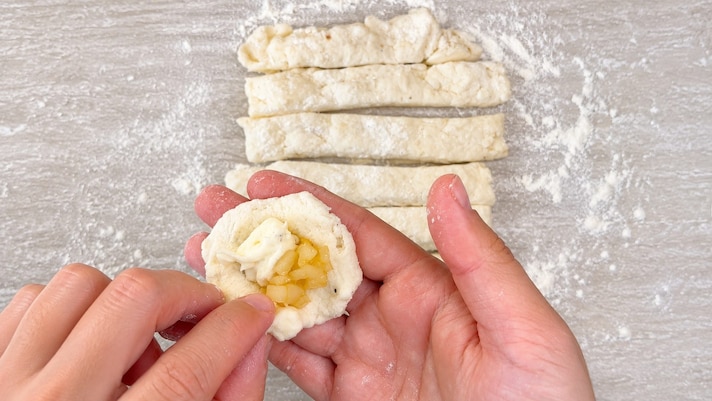
Cut the ropes into approximately 20 equal pieces, adjusting their size depending on how large you want the finished croquettes to be.
Take one piece of the béchamel mixture and flatten it gently in your palm. Place a small piece of the remaining Gorgonzola cheese in the center, followed by a little of the cooked pear mixture.
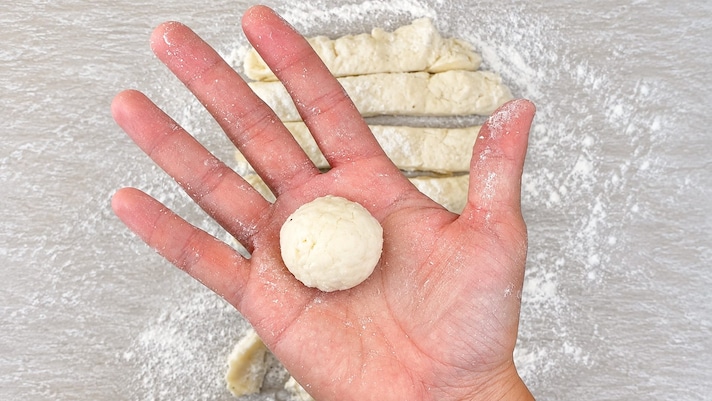
Take one piece of the béchamel mixture and flatten it gently in your palm. Place a small piece of the remaining Gorgonzola cheese in the center, followed by a little of the cooked pear mixture.
Carefully bring the edges of the béchamel around the filling, sealing it completely. Shape the mixture into a compact oval or short cylinder, making sure no cheese or pear pieces are exposed.
Repeat with the remaining béchamel, Gorgonzola, and pears until all the croquettes have been formed.
Carefully bring the edges of the béchamel around the filling, sealing it completely. Shape the mixture into a compact oval or short cylinder, making sure no cheese or pear pieces are exposed.
Repeat with the remaining béchamel, Gorgonzola, and pears until all the croquettes have been formed.
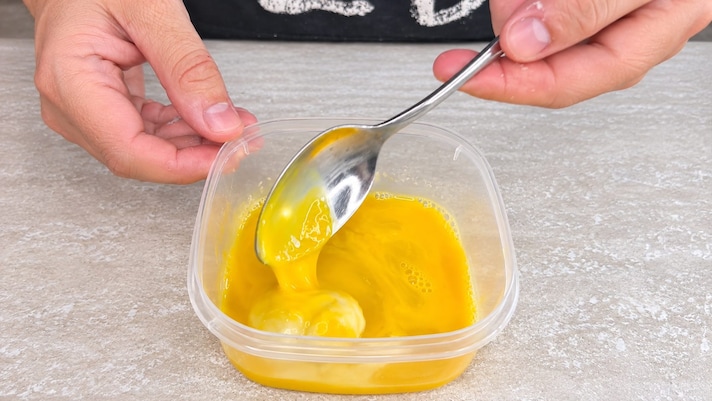
Prepare the breading station by placing the beaten egg in one shallow bowl and the breadcrumbs in another.
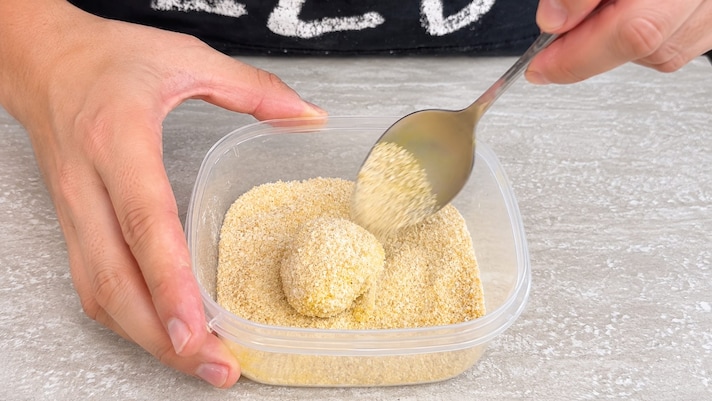
Dip each croquette into the beaten egg, turning it gently to coat all sides. Then transfer it to the breadcrumbs and roll until evenly covered.
Prepare the breading station by placing the beaten egg in one shallow bowl and the breadcrumbs in another.
Dip each croquette into the beaten egg, turning it gently to coat all sides. Then transfer it to the breadcrumbs and roll until evenly covered.
Press the coating lightly against the surface to help it adhere, paying particular attention to the ends of each croquette.
Press the coating lightly against the surface to help it adhere, paying particular attention to the ends of each croquette.
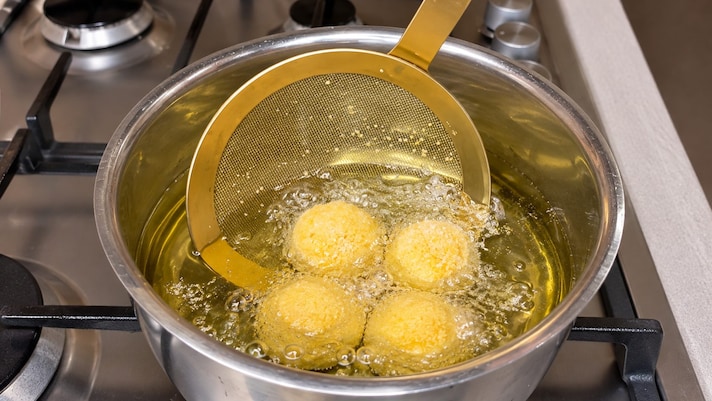
Once all the croquettes are breaded, heat a generous amount of neutral frying oil in a deep, heavy-bottomed saucepan to approximately 340–350°F (170–175°C).
Carefully lower a few croquettes into the hot oil, making sure not to overcrowd the pan.
Fry for approximately 3 minutes, turning gently if necessary, until the exterior becomes evenly golden brown and crisp.
The filling should be hot and creamy, while the breadcrumb coating should remain intact.

Once all the croquettes are breaded, heat a generous amount of neutral frying oil in a deep, heavy-bottomed saucepan to approximately 340–350°F (170–175°C).
Carefully lower a few croquettes into the hot oil, making sure not to overcrowd the pan.
Fry for approximately 3 minutes, turning gently if necessary, until the exterior becomes evenly golden brown and crisp.
The filling should be hot and creamy, while the breadcrumb coating should remain intact.
Use a slotted spoon to remove the golden Gorgonzola and pear croquettes from the oil. Transfer them to a plate lined with paper towels to absorb excess oil.
Continue frying the remaining croquettes in batches, allowing the oil to return to the proper temperature between batches.

Use a slotted spoon to remove the golden Gorgonzola and pear croquettes from the oil. Transfer them to a plate lined with paper towels to absorb excess oil.
Continue frying the remaining croquettes in batches, allowing the oil to return to the proper temperature between batches.
Serve immediately, while the outside is crisp and the inside is beautifully creamy.


