
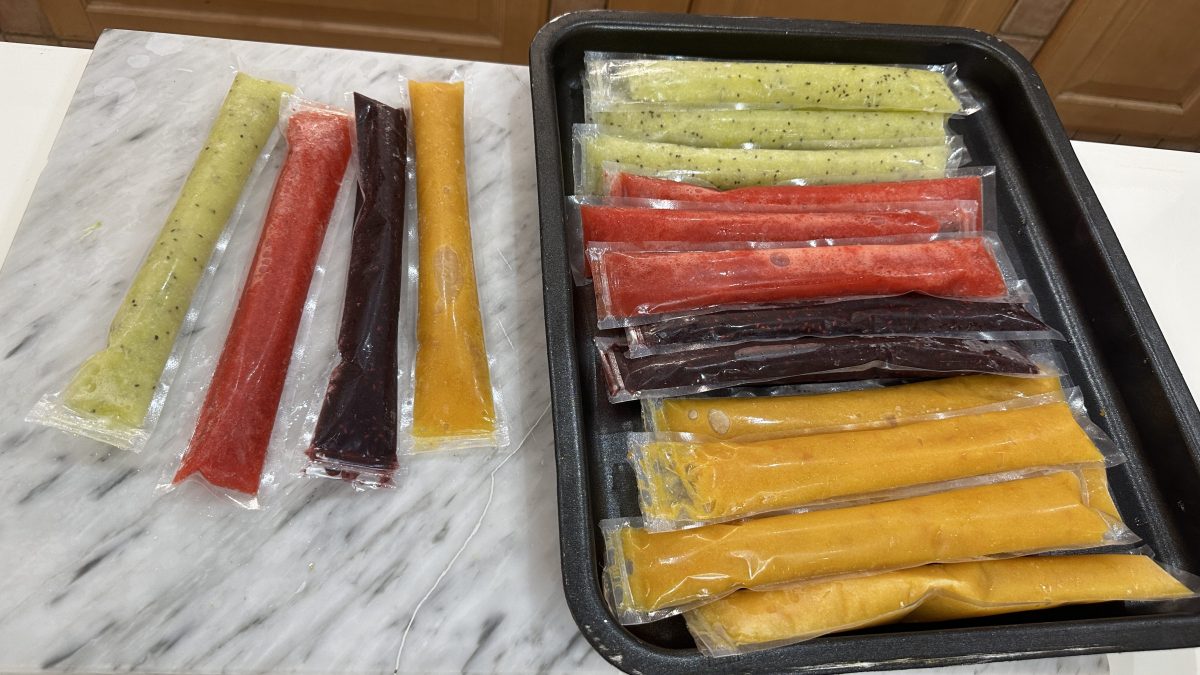
Homemade Fruit Stick Popsicles are the ultimate summer refreshers—bright, juicy, and bursting with real fruit flavor. Made with just two ingredients, they’re a naturally sweet, wholesome snack that both kids and adults will love. Whether you're cooling off by the pool or looking for a healthy dessert, these fruit popsicles are a perfect pick.
What Are Fruit Popsicles?
Fruit popsicles are frozen treats made by blending fruit with water or juice and freezing the mixture into molds or tubes. Inspired by traditional Latin American paletas, these colorful ice pops have gained popularity worldwide as a healthier, homemade alternative to store-bought varieties. They’re often hydrating, packed with antioxidants, and naturally sweet—making them an ideal summer snack or post-dinner treat.
Why Everyone Will Love This Recipe
- Made with Real Fruit: No artificial flavors or colors—just fresh, vibrant ingredients.
- Quick and Easy: Ready in minutes with only two ingredients and a blender.
- Kid-Friendly Fun: Let little hands help with blending and pouring.
- Naturally Vegan and Dairy-Free: Great for most dietary needs.
- Endlessly Customizable: Mix and match your favorite fruits for new flavors every time.
Pro Tips for the Best Homemade Fruit Popsicles
- Choose ripe, in-season fruit for the best natural sweetness.
- Strain the mixture if you want a smoother, seedless finish (especially with berries).
- Add a splash of citrus juice (like lemon or lime) to enhance brightness and preserve color.
- Use popsicle bags or reusable molds—no sticks required!
- Don’t overfill. Leave space at the top to allow for expansion during freezing.
Frequently Asked Questions
Can I Use Frozen Fruit for These Popsicles?
Yes! Just thaw slightly before blending so the texture isn’t too icy or clumpy.
What Are the Best Fruits to Use?
Strawberries, mango, kiwi, pineapple, blueberries, and watermelon work beautifully. For a layered look, blend fruits separately and pour in stages.
Do I Need Special Molds?
Not at all. You can use disposable popsicle bags, small paper cups with wooden sticks, or even silicone ice cube trays for mini pops.
How Long Do They Take to Freeze?
Typically, 4 to 6 hours. For the firmest results, freeze them overnight.
Can I Add Sweeteners?
If your fruit isn’t very sweet, you can add a little honey, agave syrup, or maple syrup—totally optional.
How to Store
Once frozen, store your popsicles in their bags or transfer them to a large zip-top freezer bag for compact storage. Keep them in the freezer for up to 2 weeks. If you're using molds or cups, cover them with plastic wrap or foil to avoid freezer burn.
How to Freeze
Pour your blended fruit mixture into popsicle molds or bags, leaving some space at the top. Freeze upright and undisturbed for at least 4–6 hours, or preferably overnight. Once frozen, remove them from the molds or bags and enjoy right away—or store in an airtight container for later.
Ingredients
How To Make The Best Fruit Popsicles
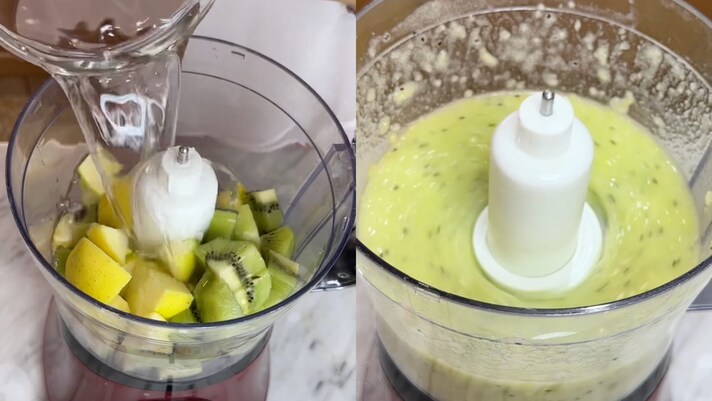
Making these fruit popsicles couldn’t be easier and honestly, it's kind of fun. Start by picking your favorite fruit. You’ll need about two cups in total, so feel free to mix things up: strawberries and mango? Go for it. Blueberries and pineapple? Absolutely. Just make sure your fruit is ripe and juicy for the best flavor. Once your fruit is chopped and ready, toss it into a blender along with one cup of cold water. If you’re after a touch of extra sweetness, this is the moment to add a spoonful of honey or maple syrup. Want to brighten things up even more? A little squeeze of lemon juice works wonders. Now, blend everything until it’s completely smooth. If you’re using seedy fruits like raspberries or blackberries and prefer a smoother texture, you can pour the mixture through a fine mesh sieve. Totally optional—but worth it if texture matters to you.
Making these fruit popsicles couldn’t be easier and honestly, it's kind of fun. Start by picking your favorite fruit. You’ll need about two cups in total, so feel free to mix things up: strawberries and mango? Go for it. Blueberries and pineapple? Absolutely. Just make sure your fruit is ripe and juicy for the best flavor. Once your fruit is chopped and ready, toss it into a blender along with one cup of cold water. If you’re after a touch of extra sweetness, this is the moment to add a spoonful of honey or maple syrup. Want to brighten things up even more? A little squeeze of lemon juice works wonders. Now, blend everything until it’s completely smooth. If you’re using seedy fruits like raspberries or blackberries and prefer a smoother texture, you can pour the mixture through a fine mesh sieve. Totally optional—but worth it if texture matters to you.
Next, pour the liquid into your popsicle molds, disposable popsicle bags, or even small paper cups. Just don’t fill them all the way to the top—leave a little space so the mixture has room to expand as it freezes.
Next, pour the liquid into your popsicle molds, disposable popsicle bags, or even small paper cups. Just don’t fill them all the way to the top—leave a little space so the mixture has room to expand as it freezes.
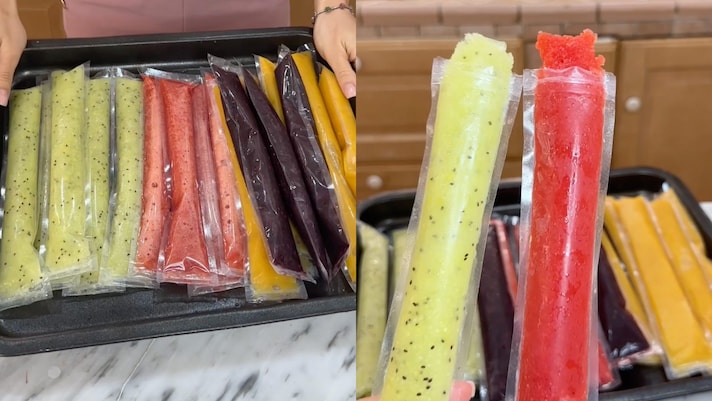
Now for the hard part: waiting. Carefully place your filled molds upright in the freezer and let them sit for at least four to six hours. Overnight is ideal if you’re patient (and if your freezer isn’t constantly being opened and closed).
Once they’re frozen solid, you’re all set. Pop them out of the mold, tear open the bag, or peel away the paper cup. Then sit back, take a bite, and enjoy the pure taste of summer—no artificial anything, just icy, fruity bliss.
;Resize,width=767;)
