Pain au Chocolat (pronounced in English as pan oh shoh-koh-LAH) are soft and fragrant leavened pastries, a typical French pastry. They're made with the same dough and process as croissants and are perfect for breakfast with a cup of cappuccino, along with other Viennese delights, such as pain brioche and pain suisse.
How Are Pain au Chocolat Made?
Bringing them to the table isn't difficult, but it does require a little patience and a bit of skill. In our version, we worked the ingredients by hand, combining the flour with the brewer's yeast, dissolved in a splash of milk and sugar; the remaining milk and salt are then gradually added to the rough mixture; the resulting smooth, homogeneous dough is then left to rise for about 2 hours, then rolled out into a rectangle.
The technique to be used in the subsequent stages is similar to that of puff pastry: in fact, you must respect the resting times, avoiding that the dough with the butter heats up too much and carefully carry out several rounds of folding, necessary for the air to be able to incorporate between the various layers of pastry and butter, allowing the final result to be soft and well-honeycombed.
Finally, cut out squares of dough, fill them with dark chocolate sticks, and roll them up. After another 2 hours of rest, brush the pastries with beaten egg and bake them at 180°C (350°F) for 20 minutes. The result will be golden, fragrant pain au chocolat, which, with the first bite, will transport your imagination to a Parisian bakery.
Pain au Chocolat Vs. Chocolate Croissants
Technically, there’s no real difference between pain au chocolat and what Americans call a chocolate croissant — they’re made from the same laminated, buttery pastry dough and filled with batons of dark chocolate before being baked until golden and flaky. The distinction is mostly linguistic and cultural. In France, the rectangular pastry with chocolate inside is called pain au chocolat, while in the U.S., many bakeries label it a chocolate croissant because “croissant” is more widely recognized by American customers. Purists will point out that a true croissant refers to the crescent-shaped plain pastry, and that pain au chocolat is technically a different shape, not a variation. But in practical terms, if you order either at an American café, you’re getting the same rich, flaky breakfast pastry — just under a different name.
Ingredients
How to Make Pain au Chocolate (Step-By-Step)
To make pain au chocolat, you'll need time and a little skill. Below, you'll find all the steps and tips for making them perfectly at home.
Preparing the Pastel

In a bowl, combine the sugar with the brewer's yeast and a few drops of milk.
In a bowl, combine the sugar with the brewer's yeast and a few drops of milk.

Mix with a teaspoon to dissolve the yeast.
Mix with a teaspoon to dissolve the yeast.

Place the flour in a bowl and pour in the liquid mixture.
Place the flour in a bowl and pour in the liquid mixture.

Start mixing, gradually adding the milk.
Start mixing, gradually adding the milk.

Add salt.
Add salt.

Continue kneading for about 10 minutes, until you obtain a smooth and homogeneous dough. Place the dough in a bowl, cover with cling film, and let it rise in the oven with the light on for 2 hours.
Continue kneading for about 10 minutes, until you obtain a smooth and homogeneous dough. Place the dough in a bowl, cover with cling film, and let it rise in the oven with the light on for 2 hours.

Take the dough and roll it out on a work surface, giving it a rectangular shape; cover with cling film and let it rest in the freezer for another 20 minutes. Meanwhile, prepare the butter square.
Take the dough and roll it out on a work surface, giving it a rectangular shape; cover with cling film and let it rest in the freezer for another 20 minutes. Meanwhile, prepare the butter square.
Preparing the Butter Square
Cut a sheet of parchment paper and place the refrigerated butter in the center. Then cover with a second sheet of parchment paper and begin flattening the butter with a rolling pin. Fold the edges of the parchment paper over each other, folding them toward the center, and continue rolling until the butter forms a rectangle approximately 30 x 20 centimeters; refrigerate until ready to use.
1st Fold

Cut a sheet of parchment paper and place the refrigerated butter in the center. Then cover with a second sheet of parchment paper and begin flattening the butter with a rolling pin. Fold the edges of the parchment paper over each other, folding them toward the center, and continue rolling until the butter forms a rectangle approximately 30 x 20 centimeters; refrigerate until ready to use.
Take the dough out of the fridge, roll it out on a lightly floured surface, trying to obtain a rectangle of approximately 45×25 centimeters and place the solidified butter in the centre.

Take the dough out of the fridge, roll it out on a lightly floured surface, trying to obtain a rectangle of approximately 45x25 centimeters and place the solidified butter in the centre.
Fold the two side flaps towards the centre, pressing on the edges to seal them well. At this point, turn the dough counterclockwise and roll it out again, until you obtain a thin rectangle measuring 40×20 centimetres.

Fold the two side flaps towards the centre, pressing on the edges to seal them well. At this point, turn the dough counterclockwise and roll it out again, until you obtain a thin rectangle measuring 40x20 centimetres.
Close the dough like a book, folding both the bottom flap and the top flap towards the centre of the rectangle, wrap in cling film and place in the freezer for another 20 minutes.
2nd and 3rd Fold

Close the dough like a book, folding both the bottom flap and the top flap towards the centre of the rectangle, wrap in cling film and place in the freezer for another 20 minutes.
Once the resting time has elapsed, roll out the dough again and proceed with another round of folds and put it in the freezer for another 20 minutes.

Once the resting time has elapsed, roll out the dough again and proceed with another round of folds and put it in the freezer for another 20 minutes.
Roll out one last time, make the third and final round of folds, then flatten the dough with a rolling pin and let it rest in the freezer for another 20 minutes.
Making the Pain au Chocolat

Roll out one last time, make the third and final round of folds, then flatten the dough with a rolling pin and let it rest in the freezer for another 20 minutes.
Roll out the dough for the last time, obtaining a rectangle of approximately 40×25 centimeters, then divide it into 8 squares.

Roll out the dough for the last time, obtaining a rectangle of approximately 40x25 centimeters, then divide it into 8 squares.
Slightly flatten one of the squares and place a chocolate stick 1cm from the top edge.

Slightly flatten one of the squares and place a chocolate stick 1cm from the top edge.
Roll up the pastry until it reaches halfway and place a second stick on top and complete the round, creating a small pocket. Repeat the same operation for each piece of dough.
Final Leavening and Baking

Roll up the pastry until it reaches halfway and place a second stick on top and complete the round, creating a small pocket. Repeat the same operation for each piece of dough.
Place all the pastries on a baking tray lined with baking paper, cover with cling film and let it rise for 2 hours at room temperature.

Place all the pastries on a baking tray lined with baking paper, cover with cling film and let it rise for 2 hours at room temperature.
When the pastries are puffed up and soft, brush them with a previously beaten egg.

When the pastries are puffed up and soft, brush them with a previously beaten egg.
Bake in a preheated static oven at 355°F/180°C for 20 minutes, until golden brown.

Bake in a preheated static oven at 355°F/180°C for 20 minutes, until golden brown.
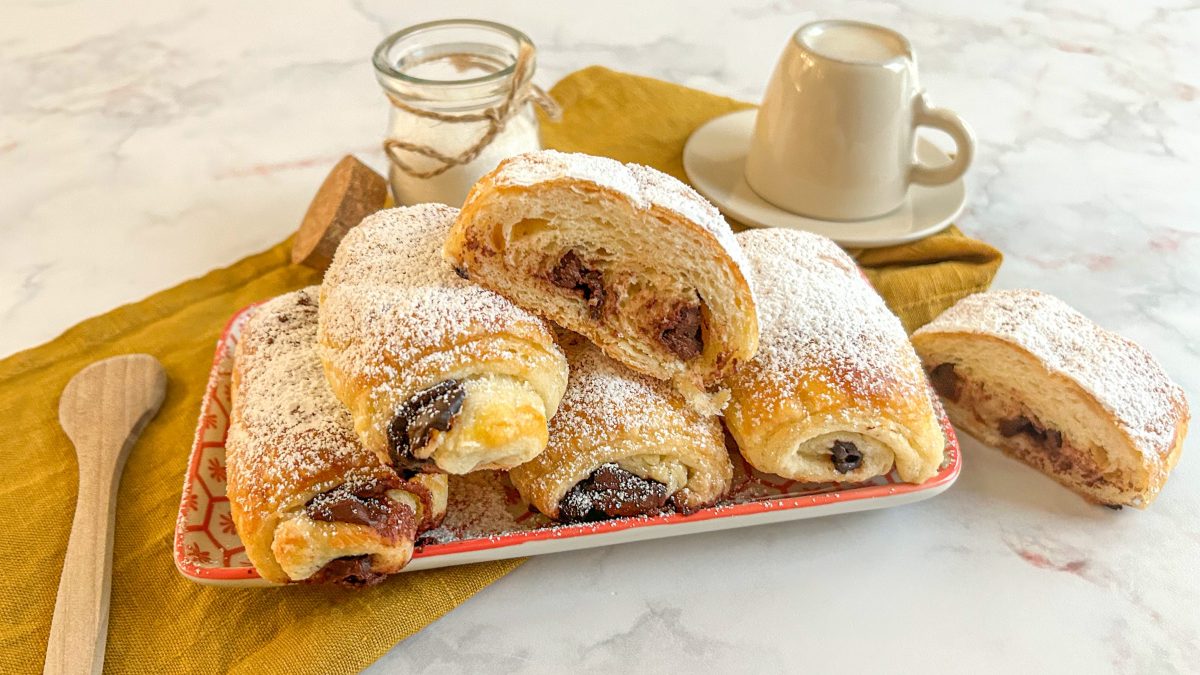
Sprinkle with a little icing sugar and enjoy your hot and fragrant pain au chocolat.
Storage & Freezing Instructions
Any leftovers can be stored at room temperature, tightly sealed in a resealable bag, for up to 3 days.
You can also freeze homemade pain au chocolat. If the pastries are already baked, let them cool completely, then wrap them tightly in plastic wrap and place them in an airtight freezer bag. They’ll keep for about 1 to 2 months without major loss of quality. To reheat, skip the microwave (which makes them soggy) and warm them in a 300°F oven for 8–12 minutes until heated through and crisp again.
If you want the best possible texture, freezing them before baking is even better. After shaping the pain au chocolat, place them on a tray and freeze until solid, then transfer to a freezer bag. When ready to bake, let them thaw and proof in the refrigerator overnight, then bring to room temperature before baking as usual. This preserves the lamination and gives you that fresh-from-the-bakery flakiness.
;Resize,width=767;)
