
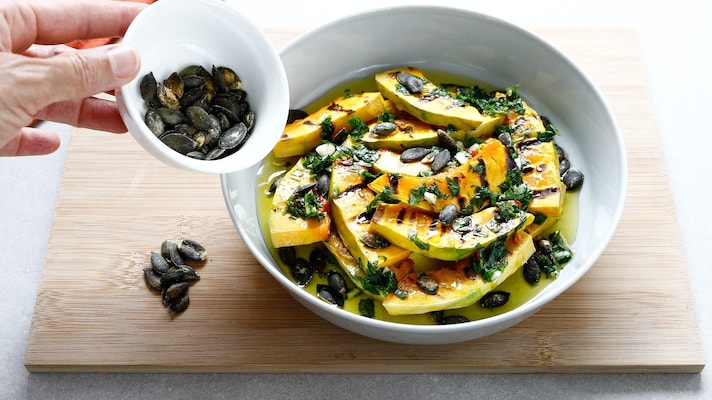
When pumpkin recipes start appearing on the table, there's one rule that should never be forgotten: never throw away the seeds, because they can be easily preserved, whether you want to plant them or use them in cooking. Yes, those with a small plot of land could take advantage of it by sowing them or exchanging them with other enthusiasts, thus promoting biodiversity in their own small way. Those who love following a healthy diet can make the most of all the benefits of these oily seeds, rich in omega-3s, vitamins, minerals and antioxidants – as well as cucurbitin, an amino acid that promotes prostate health – by garnishing main dishes, salads and side dishes, as well as eating them as snacks. And let's not forget that many pumpkin varieties are also eaten with the peel, to create 100% zero-waste dishes.
How to Save Pumpkin Seeds for Planting
If you have a garden, growing your own pumpkin can be incredibly rewarding, just like growing other homegrown fruits and vegetables. Obtaining seeds suitable for planting the following year isn't complicated; storing them is easy, but you do need a lot of patience — drying takes a long time —and the care to follow a few tips. Here are the steps to follow, along with some helpful tips.
- First, you need to extract the seeds from a pumpkin that's fully ripe and ready for cooking (it's best not to use purely ornamental varieties). The ideal time for this is late September or early October, when these vegetables are harvested. Of course, you can also harvest the seeds from pumpkins that are available throughout the winter: in that case, the storage time will be shorter, since sowing usually takes place between April and May.
- Once the pumpkin is cut in half, use a spoon or an ice cream scoop to scoop out the seeds and pulp scraps in a sieve.
- Rinse the seeds thoroughly under running water, removing as much of the pulp and gelatinous surface as possible. Remove any remaining residue with a small knife or your hands: it's important that the seed be free of organic matter, as this can easily be attacked by fungi and mold during air drying.
- Spread the pumpkin seeds on an absorbent cloth and pat them dry, removing any excess water. Then, select them: only the largest and most pot-bellied ones are suitable for sowing, as they contain the nutrient reserves needed for the seedling to grow. If the seeds are broken, very small, or consist only of their shell (they can be recognized by their very flat and hollow appearance), throw them away.
- Transfer the seeds to paper trays or tea towels, which effectively absorb moisture, and let them dry naturally indoors, in a warm, dry place away from direct sunlight, for 2 weeks to a month, depending on environmental conditions. During this time, turn them several times to ensure even drying.
- Once you've verified that the pumpkin seeds are completely dry and free from fungal attack, place them in a paper bag (like a bread bag) and seal them tightly in a glass jar, indicating the date and the type of pumpkin they came from. Stored in a cool, dark place, away from heat and temperature changes, they will keep for up to two years.
A brief side note: pumpkins belong to the Cucurbitaceae family, which in nature are easily subject to hybridization. It can therefore happen that the seed extracted from one pumpkin variety does not produce the same fruit, because it could have potentially been the "victim" of a spontaneous cross: this happens especially when there are several adjacent crops. However, there is no doubt about the outcome when the field is isolated, thus avoiding the possibility of contamination.
How to Store Pumpkin Seeds for Cooking
If the pumpkin seeds you're storing are intended to be eaten, there's no need to take the best steps to encourage germination. This means that, after cleaning and selecting them thoroughly, the drying process can be sped up if done in the open air, but also with other tools, such as an oven or dehydrator. Furthermore, drying the seeds isn't enough: toasting them is recommended, both to make them easier to chew (crunchy) and to enhance their flavor and aroma.
- Air drying: Let the seeds dry in the sun for at least 8 hours. Extend this to 12 hours if you don't have direct sunlight.
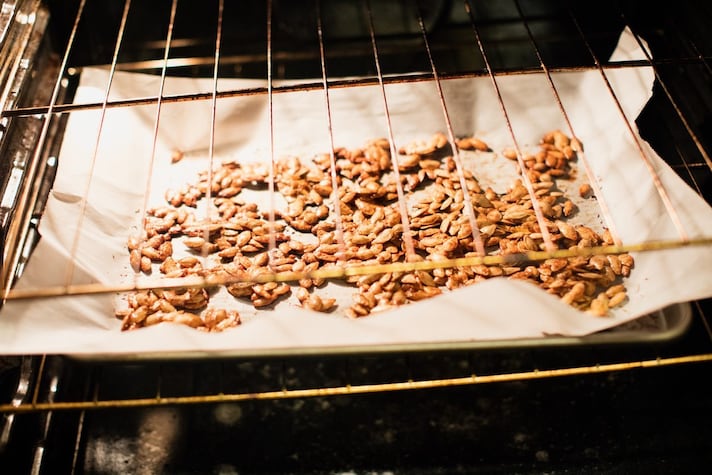
- Oven drying: arrange the seeds well spaced apart on a baking sheet lined with baking paper and set the temperature to low: let them rest inside for 3-4 hours, turning the seeds over every now and then to prevent them from burning.
- Drying in a dehydrator: it depends on the model you have, but usually the pumpkin seeds are arranged without overlapping in the different trays and inserted into the appliance, setting a temperature between 113°F/45°C and 122°F/50°C, for 1 or 2 hours.
At this point, the pumpkin seeds can be toasted in a pan, in the oven, or in the microwave. It's important to remove the pulpy filaments, as they could burn. Since they're completely dehydrated, they can be stored in an airtight container for 2-3 months, always stored in a cool, dry place, away from sudden changes in temperature.
;Resize,width=767;)
