What if one simple cake batter could turn into three completely different layers in the oven? No separate fillings, no complicated assembly, and no special pastry skills required. That's exactly what makes this magic cake recipe so fascinating.
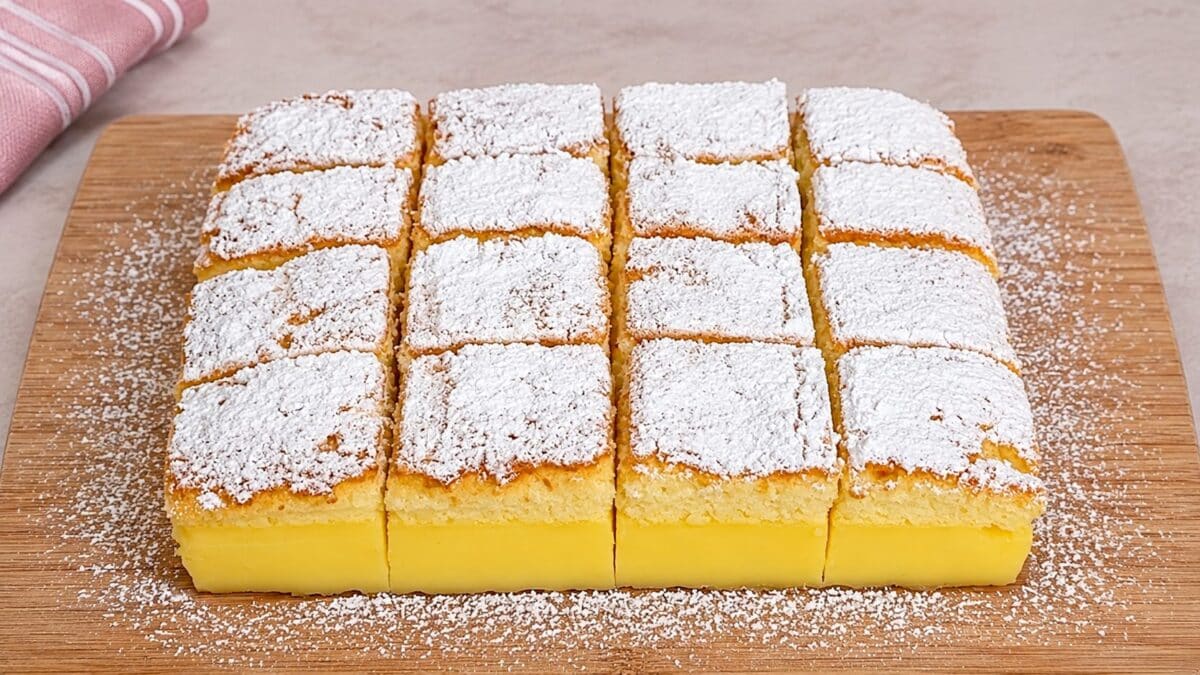
With just a handful of familiar ingredients, the batter transforms as it bakes, creating a delicate sponge cake on top, a soft and creamy custard in the middle, and a denser, almost pudding-like layer at the bottom.
The secret lies in the unusual consistency of the batter and the gentle baking process. Once cooled and sliced, the three distinct textures reveal themselves, making every square of this vanilla magic cake a little surprise.
What Is Magic Cake?
Magic cake, also known as gâteau magique in French, is a custard-style cake famous for developing three distinct layers from a single batter.
Unlike a traditional sponge cake, magic cake starts with a very liquid mixture. The batter contains a relatively high proportion of milk and a small amount of flour, along with whipped egg whites that are gently incorporated before baking.
During slow baking at a relatively low temperature, the mixture separates into different textures. The lightest portion forms a soft sponge-like top, while the middle remains creamy and the bottom becomes denser and more custard-like.
The result is somewhere between a vanilla cake, a baked custard, and a pudding, all in the same slice.
Why Everyone Will Love This Recipe
The most exciting thing about magic cake is that it looks much more elaborate than it actually is. There's no need to prepare separate layers or fillings: everything develops naturally during baking.
Each bite offers a wonderful contrast of textures. The top is light and airy, the middle is silky and custard-like, and the bottom has a richer, more compact consistency.
The flavor is delicate and comforting, with warm vanilla notes and just the right amount of sweetness. It's delicious on its own, but a light dusting of powdered sugar gives it an elegant finish.
And because it's made with milk, eggs, flour, sugar, and butter, this easy vanilla dessert doesn't require hard-to-find ingredients.
Tips for Making the Perfect Three-Layer Magic Cake
- Use room-temperature eggs. They combine more easily with the other ingredients and help create a smoother batter.
- Don't overbeat the egg whites. They should be foamy and hold soft peaks rather than becoming very stiff. This helps them incorporate into the liquid mixture without forming large, dry clumps.
- Expect a very liquid batter. It may look unusually thin compared with regular cake batter, but that's essential for the characteristic layered texture.
- Let the cake cool completely. Cutting it too early can cause the delicate custard layers to collapse. For especially neat slices, refrigerate the cooled cake before cutting.
Frequently Asked Questions
Why Is It Called Magic Cake?
It's called magic cake because a single batter transforms into three different layers during baking. The contrasting textures develop without separately preparing or assembling each layer.
How Does Magic Cake Form Three Layers?
The cake's high liquid content, gently incorporated egg whites, and slow baking process allow the mixture to develop different textures. The airy portion forms the sponge-like top, while the denser mixture creates the creamy middle and bottom layers.
Why Didn't My Magic Cake Separate Into Three Layers?
Several factors can affect the result, including incorrect ingredient measurements, overmixed egg whites, an unsuitable baking pan, or an oven temperature that's too high. The batter should remain quite liquid, and the cake needs gentle, even baking.
Is Magic Cake Supposed to Be Jiggly in the Middle?
Yes, a slight wobble in the center is normal when the cake comes out of the oven. The custard layers continue to firm up as the cake cools. However, the center should not be completely liquid or slosh when the pan is moved.
Can You Use All-Purpose Flour Instead of Italian 00 Flour?
Yes. All-purpose flour works well in this recipe. Italian 00 flour is finely milled, but the cake's characteristic layers depend more on the ingredient proportions and baking method than on using a specific flour type.
Can You Make Magic Cake in a Different Pan?
A square 8-inch (20 × 20 cm) pan with high sides is ideal for this recipe. A larger pan will produce a thinner cake and may affect the definition of the layers, while a smaller pan may require a longer baking time.
How to Store
Magic cake contains a generous amount of milk and eggs, so it should be refrigerated after cooling.
Once the cake has cooled completely, transfer it to an airtight container or cover the baking dish tightly. Store in the refrigerator for up to 3 days.
For the best texture, serve the cake chilled or allow individual portions to stand at room temperature briefly before serving. Avoid leaving it unrefrigerated for more than 2 hours.
How to Freeze
Magic cake is best enjoyed fresh or refrigerated because its custard layers are delicate.
Freezing is possible, but the creamy middle and bottom layers may become watery or slightly grainy after thawing.
If necessary, freeze completely cooled slices individually, wrapped tightly in plastic wrap and placed in a freezer-safe container, for up to 1 month for the best quality.
Thaw overnight in the refrigerator and serve chilled. Avoid reheating, as this can negatively affect the custard texture.
Ingredients
How to make Magic Cake

Begin by preparing the ingredients. Make sure the eggs are at room temperature, then separate the yolks from the whites, placing them in two clean bowls. Take care not to let any yolk fall into the egg whites, as this can make them more difficult to whip.
Begin by preparing the ingredients. Make sure the eggs are at room temperature, then separate the yolks from the whites, placing them in two clean bowls. Take care not to let any yolk fall into the egg whites, as this can make them more difficult to whip.

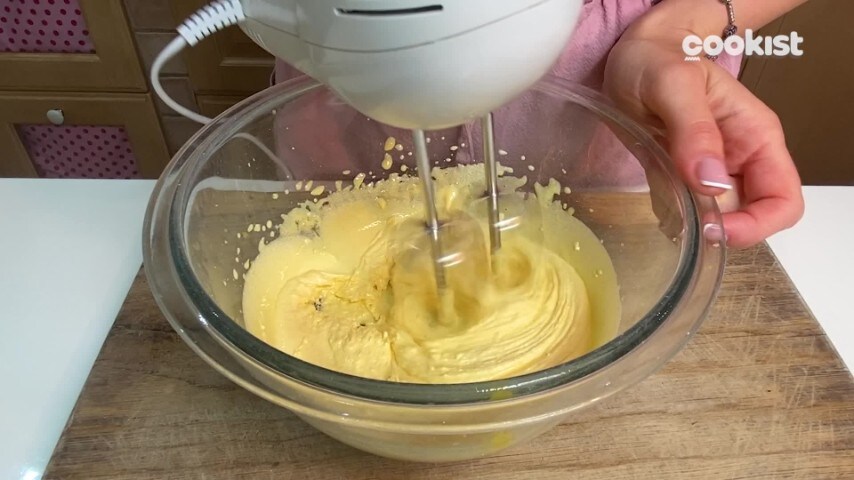
Place the egg yolks and granulated sugar in a large mixing bowl. Beat with an electric mixer for several minutes, until the mixture becomes pale, thick, and fluffy. This step helps create a smooth base for the cake.
Place the egg yolks and granulated sugar in a large mixing bowl. Beat with an electric mixer for several minutes, until the mixture becomes pale, thick, and fluffy. This step helps create a smooth base for the cake.

Add the cold water and the seeds scraped from half a vanilla bean. Continue beating briefly until everything is evenly incorporated.
Add the cold water and the seeds scraped from half a vanilla bean. Continue beating briefly until everything is evenly incorporated.

Gradually pour the melted butter into the bowl while continuing to mix with the electric beaters. Beat until the butter is fully incorporated and the mixture looks smooth and uniform.
Gradually pour the melted butter into the bowl while continuing to mix with the electric beaters. Beat until the butter is fully incorporated and the mixture looks smooth and uniform.

Add a pinch of salt, then sift the flour directly into the bowl in several additions. Mix gently after each addition until no dry flour remains and the batter is free of lumps.
Add a pinch of salt, then sift the flour directly into the bowl in several additions. Mix gently after each addition until no dry flour remains and the batter is free of lumps.

Warm the milk until it feels pleasantly warm to the touch, without allowing it to boil. Slowly pour it into the batter while mixing continuously.
Continue mixing for approximately 1 minute, until the batter becomes smooth, uniform, and noticeably liquid.
Warm the milk until it feels pleasantly warm to the touch, without allowing it to boil. Slowly pour it into the batter while mixing continuously.
Continue mixing for approximately 1 minute, until the batter becomes smooth, uniform, and noticeably liquid.

In a separate clean bowl, begin whipping the egg whites with an electric mixer. Once they become foamy, add the freshly squeezed lemon juice.
In a separate clean bowl, begin whipping the egg whites with an electric mixer. Once they become foamy, add the freshly squeezed lemon juice.

Continue beating until the whites are white, airy, and softly whipped, but not excessively stiff. They should form soft peaks that gently bend over when the beaters are lifted.
Continue beating until the whites are white, airy, and softly whipped, but not excessively stiff. They should form soft peaks that gently bend over when the beaters are lifted.

Add the whipped egg whites to the liquid batter in several additions. Using a spatula or whisk, fold them in gently, lifting the mixture from the bottom of the bowl rather than stirring vigorously.
Add the whipped egg whites to the liquid batter in several additions. Using a spatula or whisk, fold them in gently, lifting the mixture from the bottom of the bowl rather than stirring vigorously.

The final batter should remain quite fluid, with the egg whites distributed throughout. A few small, soft pieces of egg white floating on the surface are normal; avoid overmixing in an attempt to make the batter resemble traditional cake batter.
The final batter should remain quite fluid, with the egg whites distributed throughout. A few small, soft pieces of egg white floating on the surface are normal; avoid overmixing in an attempt to make the batter resemble traditional cake batter.

Line an 8 × 8-inch (20 × 20 cm) square baking pan with high sides with parchment paper, making sure the paper covers the bottom and sides. A solid, leakproof pan is preferable because the batter is very liquid.
Line an 8 × 8-inch (20 × 20 cm) square baking pan with high sides with parchment paper, making sure the paper covers the bottom and sides. A solid, leakproof pan is preferable because the batter is very liquid.

Preheat the oven to 300°F (150°C) using the conventional, non-fan setting. Place the pan on the middle rack and bake for approximately 1 hour and 20 minutes.
Preheat the oven to 300°F (150°C) using the conventional, non-fan setting. Place the pan on the middle rack and bake for approximately 1 hour and 20 minutes.

Remove the cake from the oven and allow it to cool completely at room temperature, keeping it loosely covered once it is no longer steaming. As the cake cools, the custard layers will gradually become firmer. For cleaner, more defined slices, transfer the cooled cake to the refrigerator for an additional 1–2 hours before cutting. This chilling step is especially helpful if the center is very creamy.
Remove the cake from the oven and allow it to cool completely at room temperature, keeping it loosely covered once it is no longer steaming. As the cake cools, the custard layers will gradually become firmer. For cleaner, more defined slices, transfer the cooled cake to the refrigerator for an additional 1–2 hours before cutting. This chilling step is especially helpful if the center is very creamy.

Once the cake is fully set, carefully lift it out of the pan using the parchment paper. Transfer it to a cutting board and dust the surface lightly with powdered sugar, if desired.
Once the cake is fully set, carefully lift it out of the pan using the parchment paper. Transfer it to a cutting board and dust the surface lightly with powdered sugar, if desired.

Using a sharp knife, cut the cake into generous squares, wiping the blade between cuts for neat edges.
Using a sharp knife, cut the cake into generous squares, wiping the blade between cuts for neat edges.
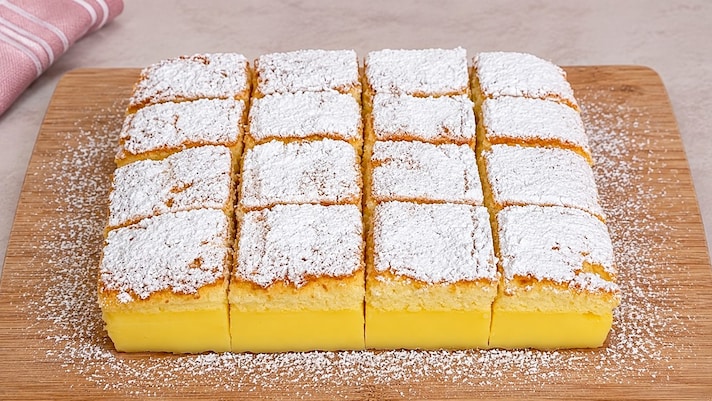
Serve the vanilla magic cake chilled or slightly cool, allowing the three layers to take center stage: a delicate sponge top, a creamy custard middle, and a rich, dense base.
Serve the vanilla magic cake chilled or slightly cool, allowing the three layers to take center stage: a delicate sponge top, a creamy custard middle, and a rich, dense base.


