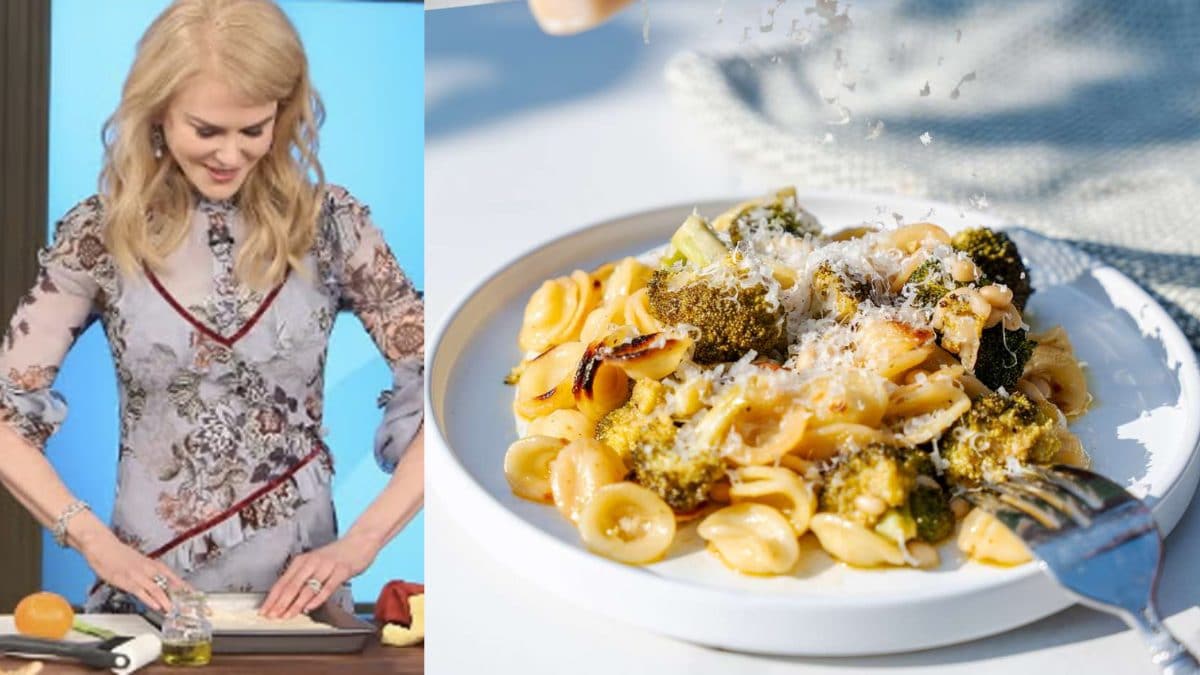
Nicole Kidman’s Crispy Orecchiette with Broccoli, Pine Nuts, and Garlic is a flavorful and unique pasta dish that combines crispy pasta, sautéed broccoli, and toasted pine nuts in a rich and savory sauce. The key to this recipe’s deliciousness is the orecchiette pasta, which is cooked until crispy and golden in a hot skillet. Paired with the earthy flavors of garlic, tangy balsamic vinegar, and a squeeze of fresh lemon juice, this dish is sure to stand out on any dinner table. It’s easy to make, yet bursting with flavor, making it a perfect choice for a weeknight meal or a special occasion.
Why Everyone Will Love This Recipe
What makes this dish so special is the texture contrast between the crispy orecchiette and the tender broccoli. The pasta is fried to perfection, creating a golden, crispy crust while maintaining a soft and chewy interior. The addition of toasted pine nuts gives the dish a nutty crunch, while the tangy balsamic vinegar and fresh lemon juice add layers of complexity to the flavors. With simple ingredients like garlic, Parmesan cheese, and butter, this recipe brings out the best of each element, creating a balanced and satisfying meal.
What Is Nicole Kidman’s Crispy Orecchiette with Broccoli, Pine Nuts, and Garlic?
Nicole Kidman’s Crispy Orecchiette with Broccoli, Pine Nuts, and Garlic is a one-of-a-kind pasta dish where the orecchiette is cooked until golden and crispy in oil, then combined with sautéed broccoli, garlic, and toasted pine nuts. The pasta is then tossed in a flavorful mixture of balsamic vinegar, butter, lemon juice, and seasonings to create a rich and satisfying sauce. It’s a simple yet elevated dish that’s perfect for anyone who loves pasta with a crunchy twist.
Cooking Tips
- Crisp the pasta: The key to this dish is getting the orecchiette crispy. Make sure to cook it in plenty of hot oil, spreading it in an even layer to ensure the pasta gets golden brown on both sides.
- Toast the pine nuts: Toasting the pine nuts brings out their natural flavor and adds a nice crunch to the dish. Be sure to watch them carefully so they don’t burn.
- Adjust seasoning: Taste and adjust the seasoning with salt, pepper, and additional lemon juice if needed. The acidity of the lemon juice balances the richness of the butter and balsamic vinegar.
- Use fresh ingredients: Fresh garlic, lemon, and Parmesan cheese make a big difference in the overall flavor of the dish, so use the best-quality ingredients you can find.
Frequently Asked Questions
Can I use a different type of pasta?
Yes! While orecchiette is traditional in this recipe, you can substitute it with other pasta shapes like fusilli, penne, or rigatoni. Just be sure to adjust the cooking time based on the pasta you choose.
Can I make this dish ahead of time?
This dish is best served fresh, as the crispy texture of the pasta may soften when stored. However, you can prepare the broccoli, garlic, and sauce ahead of time and just cook the pasta and assemble the dish when you’re ready to serve.
Can I make this vegan?
To make this recipe vegan, substitute the butter with olive oil and skip the Parmesan cheese, or use a vegan cheese alternative.
How do I store leftovers?
Store any leftover pasta in an airtight container in the refrigerator for up to 2 days. To reheat, sauté it in a pan with a little olive oil to revive some of the crispiness.
How do I toast pine nuts?
To toast pine nuts, place them in a dry skillet over medium heat and cook, stirring frequently, until they are golden brown. Be sure to keep an eye on them, as they can burn quickly.
How to Store
Leftover pasta can be stored in an airtight container in the refrigerator for up to 2 days. For the best texture, reheat it in a pan with a little olive oil to crisp it up again.
How to Freeze
While pasta dishes like this one are best enjoyed fresh, you can freeze leftovers. Let the pasta cool completely, then place it in a freezer-safe container. Freeze for up to 2 months. To reheat, thaw overnight in the refrigerator and sauté in a pan with olive oil to bring back some of the crispy texture.
Ingredients
- 1 ½ boxes (16 ounces each) orecchiette (little ears)
- ¾ cup vegetable oil
- 2 tablespoons slivered garlic
- 5 cups small broccoli florets
- ⅓ cup dry white wine
- ¼ cup fresh lemon juice
- Salt and freshly ground black pepper, to taste
- 3 tablespoons balsamic vinegar
- 6 tablespoons unsalted butter, cut in chunks and softened
- ½ cup toasted pine nuts
- 1 cup freshly grated Parmesan cheese
Step-by-Step Instructions
- Step 1: Cook the Orecchiette: In a large stockpot, cook the orecchiette in plenty of salted boiling water until tender but firm. Drain and run under cold water, then set aside to drain completely.
- Step 2: Prepare the Pasta in Oil: Heat ¾ cup of vegetable oil in two medium sauté pans until smoking. Add the cooked orecchiette carefully, dividing it evenly between the pans. Spread the pasta in an even layer and cook for about 3 minutes until medium brown on the underside. Turn the pasta over and cook for another 2 minutes until browned on the other side. Transfer the pasta to a large bowl and keep warm.
- Step 3: Cook the Broccoli and Garlic: In one of the pans, heat the remaining ¼ cup of oil over medium heat. Add the garlic and broccoli, and sauté for about 5 minutes. Add the wine, lemon juice, salt, and pepper. Taste and adjust seasoning, then cook for another 3 minutes. Transfer to a large (13×9-inch) flameproof baking dish.
- Step 4: Assemble the Dish: Add the browned orecchiette, balsamic vinegar, butter, and pine nuts to the baking dish. Toss everything over medium-high heat until the butter is melted and the mixture is well combined. Sprinkle with ½ cup of Parmesan cheese.
- Step 5: Serve: Serve the pasta in 6 heated bowls or plates, with a generous grinding of fresh black pepper on top and the remaining cheese on the side.
;Resize,width=767;)
