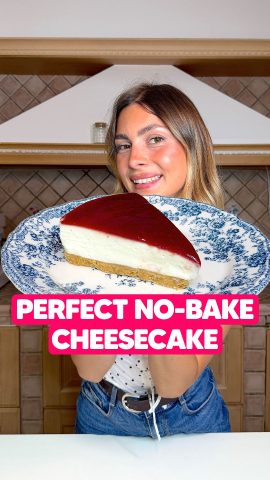
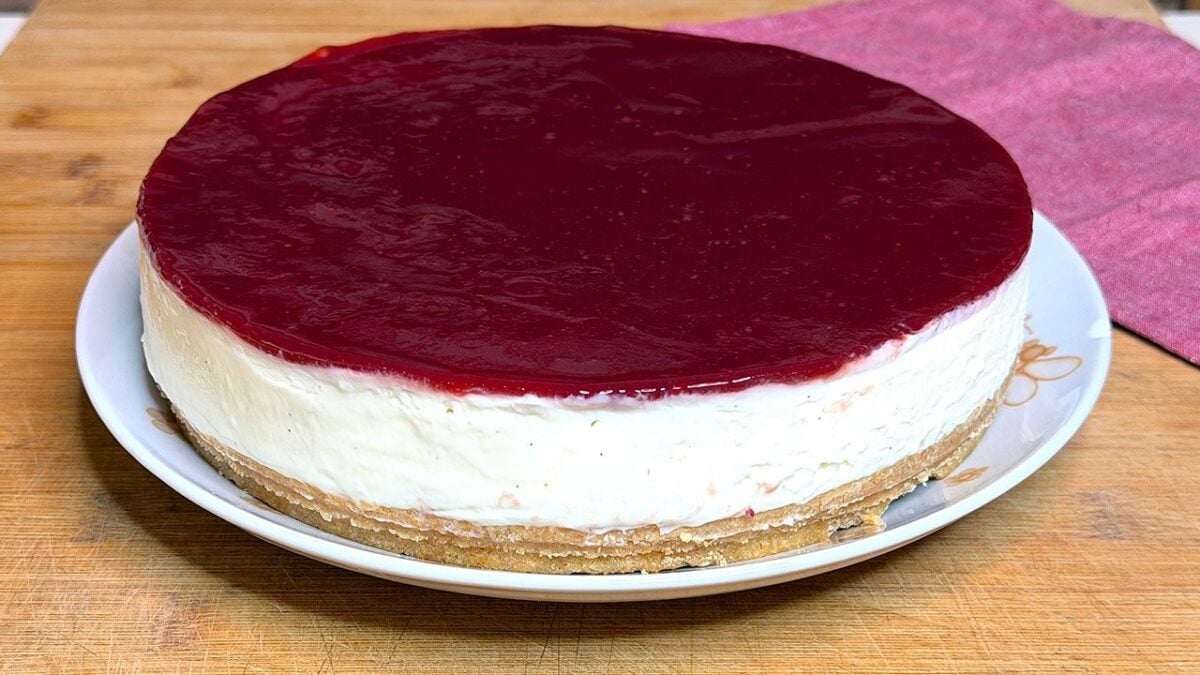
This no-bake raspberry cheesecake is everything a homemade cheesecake should be: rich, creamy, smooth, and topped with a delicious layer of sweet-tart raspberry sauce.
The buttery digestive biscuit crust provides the perfect contrast to the silky cream cheese filling, while vanilla adds a delicate sweetness. A glossy raspberry topping gives the dessert a beautiful finish without requiring fresh fruit or complicated preparation.
And the best part? There's no baking involved.
A small amount of gelatin helps the filling hold its shape, creating a cheesecake that's firm enough to slice but still wonderfully creamy.
Perfect for birthdays, dinner parties, summer gatherings, or whenever a make-ahead dessert is needed, this easy no-bake cheesecake is guaranteed to impress.
What Is No-Bake Cheesecake?
No-bake cheesecake is a chilled dessert made with a cookie or biscuit crust and a creamy filling that sets in the refrigerator rather than the oven.
Traditional baked cheesecake often contains eggs, which help the filling set during baking. No-bake versions rely on ingredients such as whipped cream or gelatin to create structure.
This recipe uses cream cheese, heavy cream, sugar, vanilla, and gelatin sheets for a smooth, stable filling.
The base is made from crushed digestive biscuits mixed with melted butter, similar to a graham cracker crust.
Once the cheesecake has chilled and set, it's topped with raspberry jam loosened with water and lemon juice.
The result is a rich, refreshing dessert with a creamy center, buttery base, and fruity topping.
Why Everyone Will Love This Recipe
The texture is the real highlight. The cream cheese filling is smooth and velvety, while the digestive biscuit base adds a buttery crunch.
Unlike baked cheesecakes, this version doesn't require an oven, a water bath, or careful monitoring to prevent cracks.
The raspberry topping also makes the recipe particularly convenient. Using jam instead of fresh raspberries creates a fruity, glossy finish with very little effort.
Another advantage is that the cheesecake can be prepared ahead of time. After chilling, it holds its shape beautifully and can be served straight from the refrigerator.
It's an elegant dessert made with simple ingredients and straightforward techniques.
Tips for the Perfect No-Bake Cheesecake
- Press the biscuit base firmly. Compacting the crumbs helps prevent the crust from falling apart when the cheesecake is sliced.
- Soak and dissolve the gelatin properly. The gelatin must soften in cold water before being dissolved completely in warm cream.
- Use softened cream cheese. Allowing the cream cheese to lose its refrigerator chill makes it easier to achieve a smooth, lump-free filling.
- Respect the chilling time. The cheesecake needs at least 4 hours to set before the topping is added, followed by another hour in the refrigerator.
Frequently Asked Questions
How Do You Make a No-Bake Cheesecake Set Firmly?
This recipe uses gelatin sheets to stabilize the cream cheese filling.
The gelatin is first soaked in cold water, then squeezed and dissolved in warm cream before being mixed into the filling.
Proper refrigeration is essential for the cheesecake to develop a firm but creamy consistency.
Why Is My No-Bake Cheesecake Too Soft?
A cheesecake may remain soft if the gelatin wasn't fully dissolved, the filling was too warm when refrigerated, or it hasn't chilled long enough.
For the best results, follow the gelatin preparation carefully and allow the cheesecake to set completely before removing it from the pan.
Can Graham Crackers Replace Digestive Biscuits?
Yes. Graham crackers are an excellent substitute for digestive biscuits and create a similarly buttery, slightly sweet crust.
Use the same weight of finely crushed graham crackers as the digestive biscuits in the recipe.
Can Powdered Gelatin Be Used Instead of Gelatin Sheets?
Yes, but the conversion depends on the strength of the gelatin.
For this recipe, use a powdered gelatin product with equivalent setting strength to 9g of gelatin sheets, following the manufacturer's blooming and dissolving instructions.
Can Fresh Raspberries Be Used for the Topping?
Yes. Fresh raspberries can be cooked briefly with sugar and a little lemon juice to create a homemade raspberry sauce.
However, the jam topping in this recipe is quicker and produces a smooth, glossy finish without needing to cook fresh fruit.
How Do You Remove a No-Bake Cheesecake From a Springform Pan?
Make sure the cheesecake is completely set before opening the pan.
Run a thin knife carefully around the inside edge, release the springform ring, and lift it away slowly.
For especially neat slices, use a sharp knife wiped clean between cuts.
How to Store
Keep the no-bake raspberry cheesecake in the refrigerator until ready to serve.
Cover it carefully or transfer individual slices to an airtight container. It will keep refrigerated for approximately 3 to 4 days.
Because the filling contains cream cheese and fresh cream, avoid leaving the cheesecake at room temperature for more than 2 hours.
For the best texture and appearance, serve it chilled.
How to Freeze
This no-bake cheesecake can be frozen, although the texture may change slightly after thawing.
For the best results, freeze the cheesecake after it has set, preferably before adding the raspberry topping.
Wrap it tightly in plastic wrap and place it in a freezer-safe container. Freeze for up to 1 month for the best quality.
Thaw overnight in the refrigerator, then add the raspberry topping before serving.
Individual slices can also be frozen, making it easy to thaw only the portions needed.
Ingredients
How to make No-Bake Raspberry Cheesecake

Begin by preparing the biscuit crust. Place the digestive biscuits in a food processor and blend until they become fine, even crumbs.
Alternatively, transfer the biscuits to a sturdy food-safe bag and crush them with a rolling pin or meat mallet until finely ground.
Begin by preparing the biscuit crust. Place the digestive biscuits in a food processor and blend until they become fine, even crumbs.
Alternatively, transfer the biscuits to a sturdy food-safe bag and crush them with a rolling pin or meat mallet until finely ground.

Melt the butter in a small saucepan or microwave-safe bowl, then pour it over the crushed biscuits.
Mix thoroughly until all the crumbs are evenly coated and resemble wet sand.
Melt the butter in a small saucepan or microwave-safe bowl, then pour it over the crushed biscuits.
Mix thoroughly until all the crumbs are evenly coated and resemble wet sand.

Transfer the biscuit mixture to a 9½-inch (24cm) springform pan. Spread it evenly across the bottom and press it down firmly using the back of a spoon or the bottom of a glass.
Place the prepared crust in the refrigerator while making the filling.
Transfer the biscuit mixture to a 9½-inch (24cm) springform pan. Spread it evenly across the bottom and press it down firmly using the back of a spoon or the bottom of a glass.
Place the prepared crust in the refrigerator while making the filling.

Next, place the gelatin sheets in a bowl of cold water and leave them to soak for approximately 10 minutes, or according to the package instructions, until softened.
Next, place the gelatin sheets in a bowl of cold water and leave them to soak for approximately 10 minutes, or according to the package instructions, until softened.

Meanwhile, transfer the cream cheese to a large mixing bowl.
Add the granulated sugar, 150ml of the heavy cream, and the seeds scraped from half a vanilla bean. Mix with a whisk or electric mixer on low speed until the ingredients are thoroughly combined and the filling becomes smooth, creamy, and free of lumps.

Pour the remaining 30ml of heavy cream into a small saucepan and warm it gently over low heat without allowing it to boil.
Pour the remaining 30ml of heavy cream into a small saucepan and warm it gently over low heat without allowing it to boil.

Remove the softened gelatin from the cold water and squeeze out the excess liquid.
Add the gelatin to the warm cream and stir until completely dissolved, with no visible pieces remaining.
Let the gelatin mixture cool slightly, making sure it remains fluid.
Remove the softened gelatin from the cold water and squeeze out the excess liquid.
Add the gelatin to the warm cream and stir until completely dissolved, with no visible pieces remaining.
Let the gelatin mixture cool slightly, making sure it remains fluid.

To help prevent lumps, mix a few spoonfuls of the cream cheese filling into the dissolved gelatin mixture first. Then gradually pour this mixture back into the remaining filling, stirring continuously until everything is evenly incorporated.
To help prevent lumps, mix a few spoonfuls of the cream cheese filling into the dissolved gelatin mixture first. Then gradually pour this mixture back into the remaining filling, stirring continuously until everything is evenly incorporated.

Pour the cream cheese filling over the crust and spread it evenly with a spatula, smoothing the top.Transfer the cheesecake to the refrigerator and let it set for at least 4 hours, or until the filling is firm enough to support the topping.
Pour the cream cheese filling over the crust and spread it evenly with a spatula, smoothing the top.Transfer the cheesecake to the refrigerator and let it set for at least 4 hours, or until the filling is firm enough to support the topping.

Once the cheesecake has set, prepare the raspberry topping.
Place the raspberry jam in a small saucepan with the water and a few drops of fresh lemon juice.
Once the cheesecake has set, prepare the raspberry topping.
Place the raspberry jam in a small saucepan with the water and a few drops of fresh lemon juice.

Warm gently over low heat, stirring until the jam becomes smooth and fluid enough to spread easily.
Remove the saucepan from the heat and allow the raspberry mixture to cool until no longer hot.
Warm gently over low heat, stirring until the jam becomes smooth and fluid enough to spread easily.
Remove the saucepan from the heat and allow the raspberry mixture to cool until no longer hot.

Carefully pour the topping over the chilled cheesecake and spread it into an even layer with the back of a spoon or an offset spatula.
Return the cheesecake to the refrigerator for approximately 1 hour, allowing the topping to cool and settle.
Carefully pour the topping over the chilled cheesecake and spread it into an even layer with the back of a spoon or an offset spatula.
Return the cheesecake to the refrigerator for approximately 1 hour, allowing the topping to cool and settle.

Slice the no-bake raspberry cheesecake with a sharp knife, wiping the blade clean between cuts for neat, even portions.
Slice the no-bake raspberry cheesecake with a sharp knife, wiping the blade clean between cuts for neat, even portions.

Serve well chilled for a rich, creamy dessert with a deliciously fruity finish.
Serve well chilled for a rich, creamy dessert with a deliciously fruity finish.


