
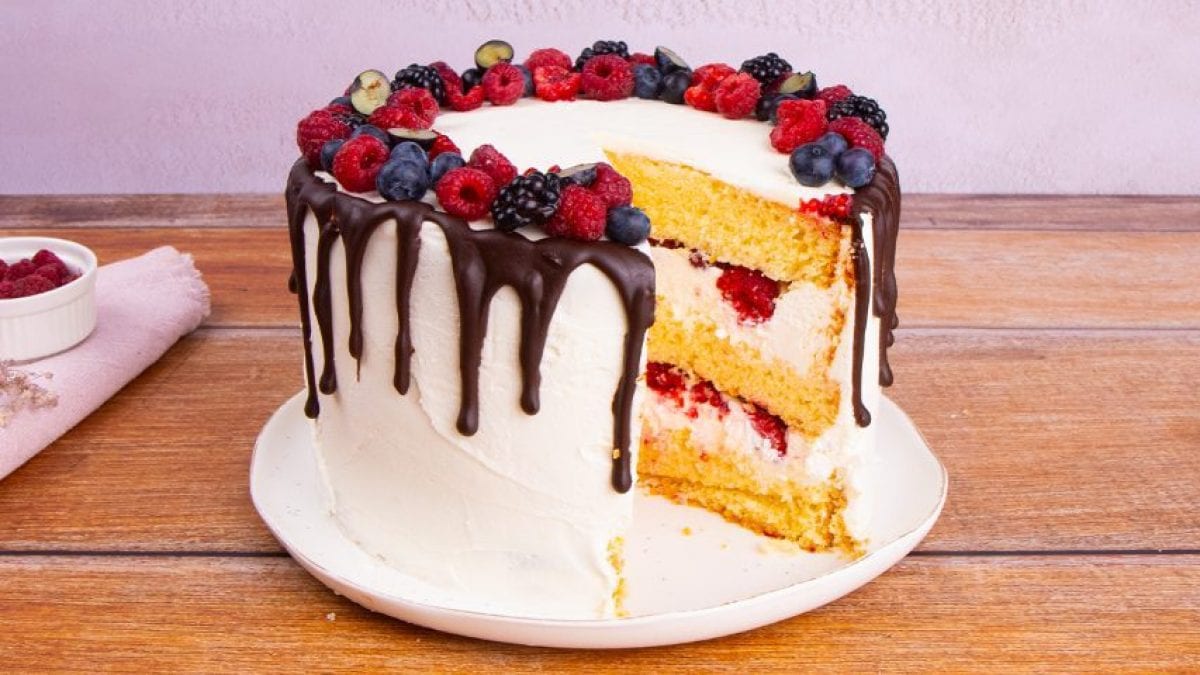
A drip cake instantly turns any table into a celebration, with chocolate cascading down soft and tall layers. This recipe pairs light lemon-scented sponge layers with a rich cream filling and a smooth dark chocolate drip. Finished with fresh berries, it makes birthdays, anniversaries, and milestones feel properly celebrated from the very first slice.
What Is a Drip Cake?
A drip cake is intentionally decorated with a flowing glaze, usually chocolate or ganache, that drips artfully down the sides. The style became popular through modern cake design, where imperfections are part of the beauty rather than something to hide. Traditionally, drip cakes feature tall sponge layers, smooth frosting, and a dramatic topping or decoration. Today, they’re a staple for celebrations because they look bakery-level impressive while still being achievable at home.
Pro Tips for the Perfect Drip Cake
- Make sure your cake layers are completely cool before assembling, or the frosting will slide instead of staying fluffy and neat.
- Chill the assembled cake before adding the chocolate drip, and cold frosting helps control the flow and creates clean, defined drips.
- Test the chocolate glaze consistency by dripping a little down the side of a glass before pouring it over the cake.
- Use a turntable if possible; it makes frosting smoother and helps you distribute the drip evenly around the cake.
Frequently Asked Questions
Why did my chocolate drip run all the way down the cake?
This usually means the glaze was too warm or too thin when applied. Let the chocolate cool slightly so it thickens but is still pourable. A chilled cake also helps slow the drip and gives you more control.
Can I make this drip cake in advance?
Yes, this cake is perfect for making ahead. You can bake the layers a day before and store them wrapped at room temperature. Assemble and frost the cake the next day, then add the drip and decorations closer to serving time for the freshest look.
What can I use instead of mascarpone?
If mascarpone isn’t available, you can replace it with more cream cheese. The texture will still be smooth, though a bit denser. Make sure everything is well chilled before whipping to maintain structure and adjust powdered sugar slightly to taste.
How do I get smooth, clean sides on my cake?
Start with a crumb coat and chill the cake before applying the final layer of frosting. Use a bench scraper or flat spatula and rotate the cake slowly for even smoothing.
How to Store Drip Cake
You can preserve the assembled cake in the fridge, covered or in a cake box, for up to 3 days. Let it sit at room temperature for about 20 minutes before serving to soften the frosting. Keep it away from strong-smelling foods to preserve its fresh, delicate taste. You can also freeze the unfrosted cake layers for up to one month. Thaw at room temperature before assembling and decorating. Freezing a fully decorated drip cake isn’t recommended, as the glaze and cream can lose their texture.
Ingredients
How to Make Drip Cake
;Resize,width=712;)
In a large bowl, whisk together the yogurt, milk, and lemon juice until smooth, and set the mixture aside for 30 minutes.
In a large bowl, whisk together the yogurt, milk, and lemon juice until smooth, and set the mixture aside for 30 minutes.
;Resize,width=712;)
After resting, mix in the corn oil, lemon zest, white vinegar, and eggs to the bowl.
After resting, mix in the corn oil, lemon zest, white vinegar, and eggs to the bowl.
;Resize,width=712;)
In a separate bowl, mix the flour, baking soda, salt, and sugar.
In a separate bowl, mix the flour, baking soda, salt, and sugar.
;Resize,width=712;)
Combine wet and dry ingredients using an electric mixer until smooth.
Combine wet and dry ingredients using an electric mixer until smooth.
;Resize,width=712;)
Divide the batter evenly into three parts. Pour one portion into a greased 20cm cake pan and bake at 180°C (360°F) for about 35 minutes, and repeat with the remaining batter.
Divide the batter evenly into three parts. Pour one portion into a greased 20cm cake pan and bake at 180°C (360°F) for about 35 minutes, and repeat with the remaining batter.
;Resize,width=712;)
In a large bowl, add fresh cream, cream cheese, mascarpone, powdered sugar, and beat with an electric mixer until thick and fluffy.
In a large bowl, add fresh cream, cream cheese, mascarpone, powdered sugar, and beat with an electric mixer until thick and fluffy.
;Resize,width=712;)
Trim the tops of the cooled cake layers to make them flat.
Trim the tops of the cooled cake layers to make them flat.
;Resize,width=712;)
Place the first layer on a serving plate, pipe or spread an even layer of cream, and scatter raspberries over the top.
Place the first layer on a serving plate, pipe or spread an even layer of cream, and scatter raspberries over the top.
;Resize,width=712;)
Repeat with the second layer, then finish with the final cake layer on top.
Repeat with the second layer, then finish with the final cake layer on top.
;Resize,width=712;)
Cover the sides and top with the cream cheese mixture and refrigerate for 4 hours.
Cover the sides and top with the cream cheese mixture and refrigerate for 4 hours.
;Resize,width=712;)
After the 4 hours have elapsed, remove from the fridge and cover the cake with more cream cheese mixture.
After the 4 hours have elapsed, remove from the fridge and cover the cake with more cream cheese mixture.
;Resize,width=712;)
In a saucepan over low heat, combine water, fresh cream, sugar, dark chocolate, and a pinch of salt. Stir gently until melted, and let it cool slightly.
In a saucepan over low heat, combine water, fresh cream, sugar, dark chocolate, and a pinch of salt. Stir gently until melted, and let it cool slightly.
;Resize,width=712;)
Pour the chocolate glaze over the chilled cake, letting it drip naturally down the sides. Decorate the top with raspberries, blackberries, and blueberries for a vibrant finish.
Pour the chocolate glaze over the chilled cake, letting it drip naturally down the sides. Decorate the top with raspberries, blackberries, and blueberries for a vibrant finish.
;Resize,width=712;)
Slice, serve, and enjoy the moment.
Slice, serve, and enjoy the moment.
;Resize,width=767;)
