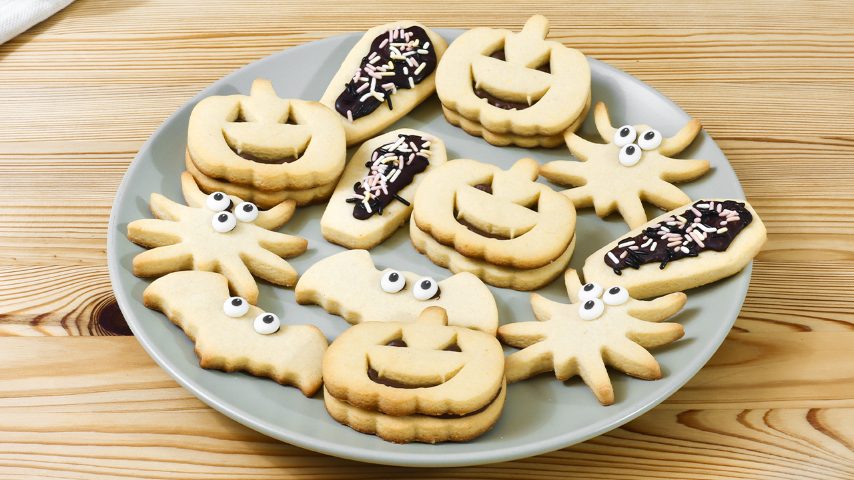
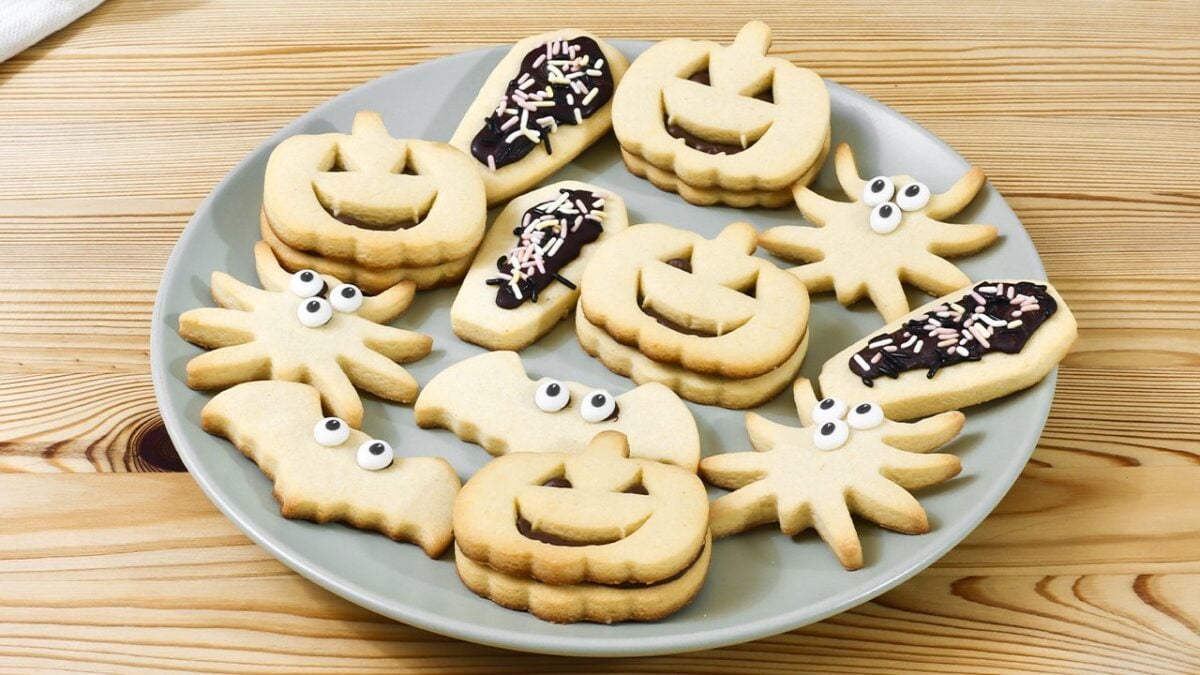
Halloween Sandwich Cookies are fun, buttery cut-out treats shaped like pumpkins, bats, spiders, coffins, and other spooky characters, then decorated with chocolate, hazelnut cream, colorful sprinkles, and candy eyes.
The dough is easy to prepare and needs only a short rest in the refrigerator before rolling and cutting. Once baked, the cookies become the perfect blank canvas for all kinds of Halloween decorations.
They are ideal for October parties, trick-or-treat tables, school celebrations, or an afternoon baking project with the family. Some can be filled like sandwich cookies, while others can be dipped, piped, or decorated individually for a mixed Halloween platter.
Why Everyone Will Love This Recipe
These Halloween Cookies are as much fun to decorate as they are to eat. The basic dough has a delicate vanilla flavor and a buttery texture that works well with richer toppings such as melted dark chocolate and hazelnut cream. Because the decorations vary from cookie to cookie, a single batch can look like a whole collection of different treats.
They are also easy to personalize. Use whichever Halloween cutters you have available and change the sprinkles, chocolate, or candy decorations to create ghosts, monsters, pumpkins, bats, spiders, or coffins. Best of all, the dough is sturdy enough for shaped cookies but still tender once baked.
What Are Halloween Cookies?
Halloween Cookies are decorative cookies shaped and finished to match the symbols traditionally associated with Halloween, which is celebrated on October 31.
Halloween itself developed from a combination of older seasonal customs and later Christian traditions surrounding All Hallows' Eve. Over time, particularly in Britain, Ireland, and eventually North America, the holiday became associated with costumes, lanterns, sweets, parties, and playful spooky imagery.
Decorated cut-out cookies are a much more modern addition to Halloween celebrations. Pumpkin faces, bats, spiders, ghosts, and coffins are especially popular because they can be easily recreated with cookie cutters, icing, chocolate, sprinkles, and candy decorations. This recipe uses one simple vanilla cookie dough to create several different designs, making it particularly practical for a festive dessert table.
Cooking Tips
- Let the melted butter cool until it is warm rather than hot before mixing it with the eggs because excessive heat could begin cooking them and affect the texture of the dough.
- Add the flour gradually if needed because the exact amount absorbed can vary slightly depending on the size of the eggs and the flour itself.
- Knead the dough only until it becomes smooth and workable because excessive kneading can make cut-out cookies tougher after baking.
- Chill the dough for the full 30 minutes because resting firms the butter and makes the pastry much easier to roll and cut into clean Halloween shapes.
- Roll the dough to an even thickness of about 1/2 cm because cookies of very different thicknesses will brown at different speeds in the oven.
- Dip the cookie cutters lightly in flour if the dough begins sticking because this helps release detailed shapes such as bats, spiders, or pumpkin faces without distorting them.
- For sandwich-style pumpkin cookies, make matching pairs and cut the eyes and mouth only from the top cookie so the hazelnut cream remains visible through the openings.
- Arrange cookies of similar size on the same baking tray whenever possible because tiny shapes may bake faster than larger coffins or pumpkins.
- Let the cookies cool completely before adding chocolate or hazelnut cream because warm cookies can melt the decorations and make them difficult to handle.
- Allow melted chocolate decorations to set before stacking or transferring the cookies because the surface can easily smudge while still soft.
Frequently Asked Questions
Can I Prepare the Cookie Dough Ahead of Time?
Yes. The dough can be prepared in advance and kept well wrapped in the refrigerator until you are ready to roll and cut it. If it becomes very firm, let it sit at room temperature for a few minutes before rolling so it does not crack.
Can I Use Different Halloween Cookie Cutters?
Absolutely. Ghosts, witches' hats, skulls, cats, moons, tombstones, or monster shapes all work with the same dough. Choose cutters of relatively similar thickness and size when baking them together so they finish at roughly the same time.
Can I Decorate the Cookies With White or Milk Chocolate?
Yes. White chocolate is particularly useful for ghosts, skeleton details, or contrasting drizzles, while milk chocolate creates a sweeter coating than dark chocolate. You can even use two or three different chocolates on the same tray for more variety.
What Can I Use Instead of Hazelnut Cream?
Chocolate spread, pistachio cream, cookie butter, thick jam, or dulce de leche can all work as sandwich-cookie fillings. Choose a spread that is thick enough to stay between the cookies rather than running out through the pumpkin cutouts.
Why Did My Halloween Cookies Lose Their Shape?
This usually happens when the dough becomes too warm before baking. After cutting the shapes, you can refrigerate the tray briefly to firm the butter again, especially if the room is warm or the cutters have intricate details.
Can Children Help Make These Cookies?
Yes, particularly with cutting and decorating once the baking stages are supervised by an adult. Candy eyes, sprinkles, and sandwich-cookie assembly make the recipe especially suitable for a Halloween baking activity because every cookie can be decorated differently.
How to Store
Store undecorated Halloween Cookies in an airtight container at room temperature for up to 5 days. Cookies filled with hazelnut cream or coated with chocolate should also be kept well covered in a cool, dry place. If your kitchen is warm enough to soften the chocolate or filling, refrigerate them and let them return closer to room temperature before serving. Place parchment paper between decorated layers to protect the chocolate, sprinkles, and candy eyes.
How to Freeze
The unbaked cookie dough freezes very well. Wrap it tightly in plastic wrap, place it in a freezer-safe bag or container, and freeze for up to 1 month. Thaw it overnight in the refrigerator before rolling and cutting.
You can also freeze plain baked cookies before decorating them. Once completely cool, place them in a freezer-safe container with parchment paper between the layers and freeze for up to 1 month. Thaw completely before adding hazelnut cream, melted chocolate, sprinkles, or candy eyes.
Ingredients
How to Make Decorated Halloween Cookies
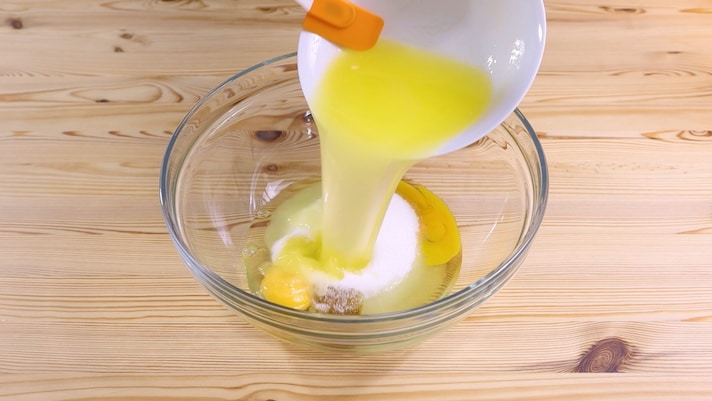
To prepare the Halloween cookies, collect the eggs, sugar, vanilla extract, and melted butter (not too hot) in a large bowl and salt.
To prepare the Halloween cookies, collect the eggs, sugar, vanilla extract, and melted butter (not too hot) in a large bowl and salt.
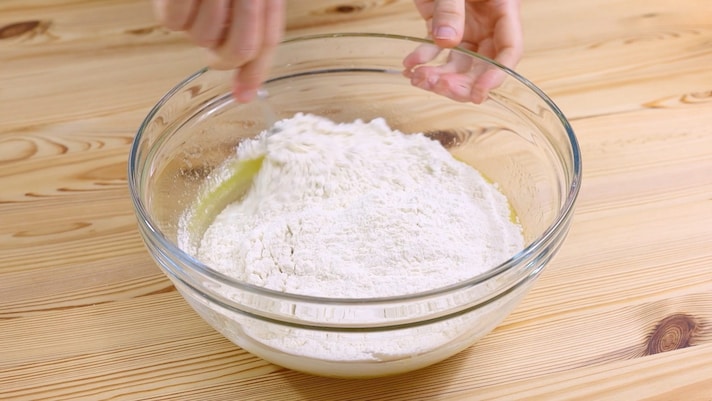
Mix with a spoon until you get a smooth mixture, then add the flour.
Mix with a spoon until you get a smooth mixture, then add the flour.
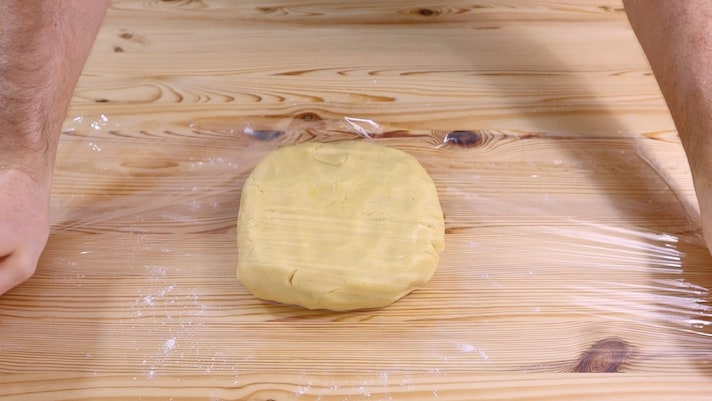
Mix again with a spoon, then continue kneading the dough on the pastry board, adding a handful of flour. Shape it into a ball and wrap it in plastic wrap and place it in the refrigerator for at least 30 minutes.
Mix again with a spoon, then continue kneading the dough on the pastry board, adding a handful of flour. Shape it into a ball and wrap it in plastic wrap and place it in the refrigerator for at least 30 minutes.
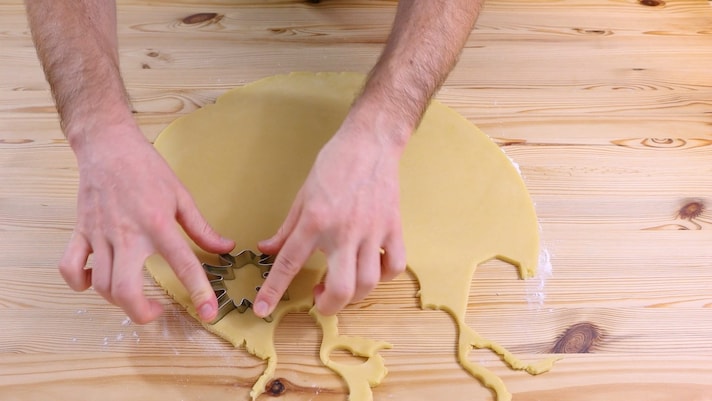
Roll out the dough until it is about half a centimetre thick, then cut out the biscuits using the Halloween cookie cutters.
Roll out the dough until it is about half a centimetre thick, then cut out the biscuits using the Halloween cookie cutters.
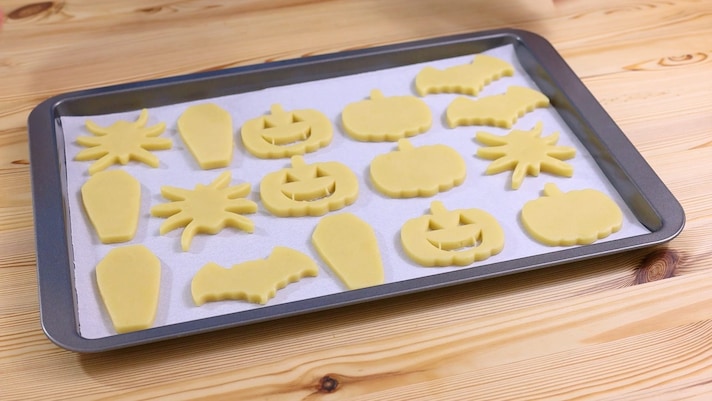
Arrange the biscuits on a baking tray lined with baking paper.
Arrange the biscuits on a baking tray lined with baking paper.
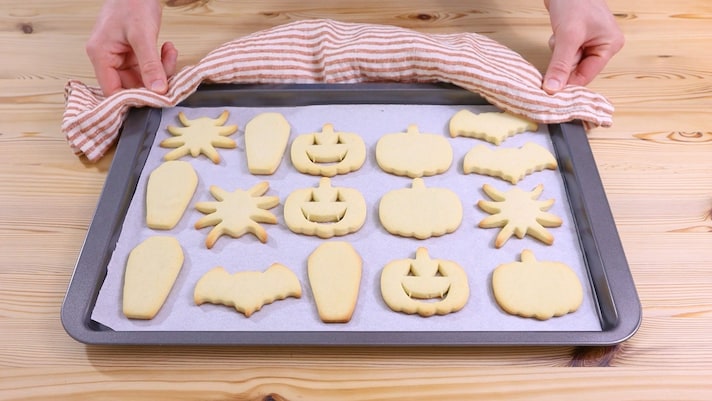
Cook in a preheated oven at 355°F/180°C for about 12 minutes, then take them out let them cool.
Cook in a preheated oven at 355°F/180°C for about 12 minutes, then take them out let them cool.
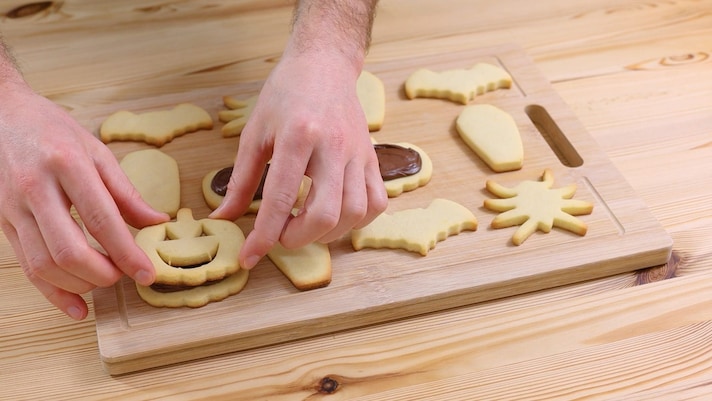
Fill the whole pumpkin-shaped biscuits with a teaspoon of hazelnut cream, then cover them with the Halloween pumpkins.
Fill the whole pumpkin-shaped biscuits with a teaspoon of hazelnut cream, then cover them with the Halloween pumpkins.
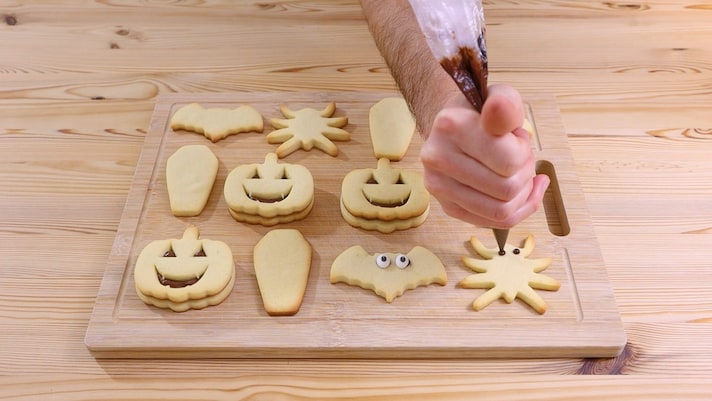
Using a piping bag, pipe some dark chocolate chips onto the bat and spider-shaped cookies so you can easily attach the sugar eyes.
Using a piping bag, pipe some dark chocolate chips onto the bat and spider-shaped cookies so you can easily attach the sugar eyes.
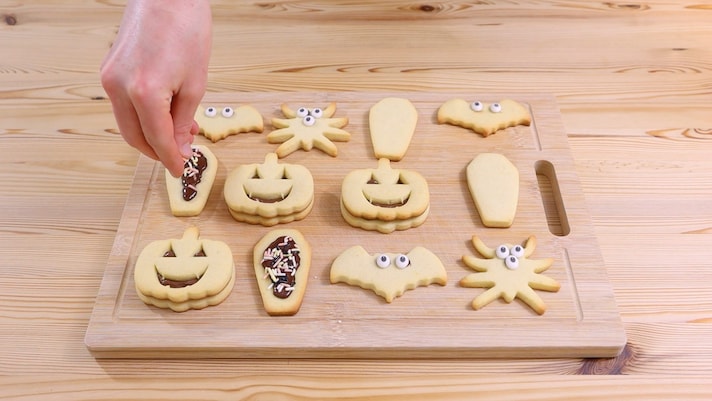
Finally, spread a generous amount of melted dark chocolate over the coffin-shaped cookies and add the colored sprinkles.
Finally, spread a generous amount of melted dark chocolate over the coffin-shaped cookies and add the colored sprinkles.
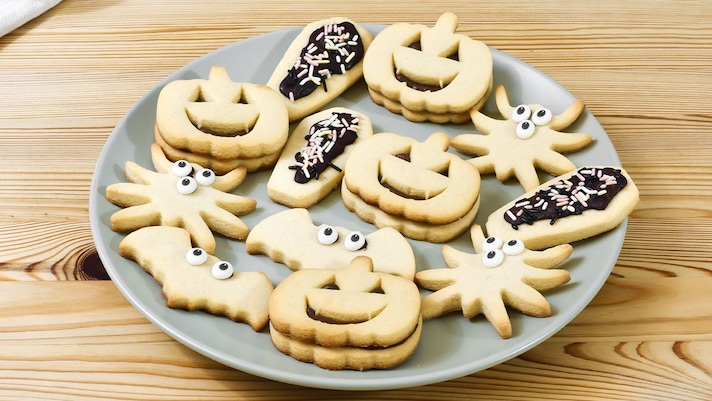
Your decorated Halloween cookies are ready to be enjoyed!
Your decorated Halloween cookies are ready to be enjoyed!


