
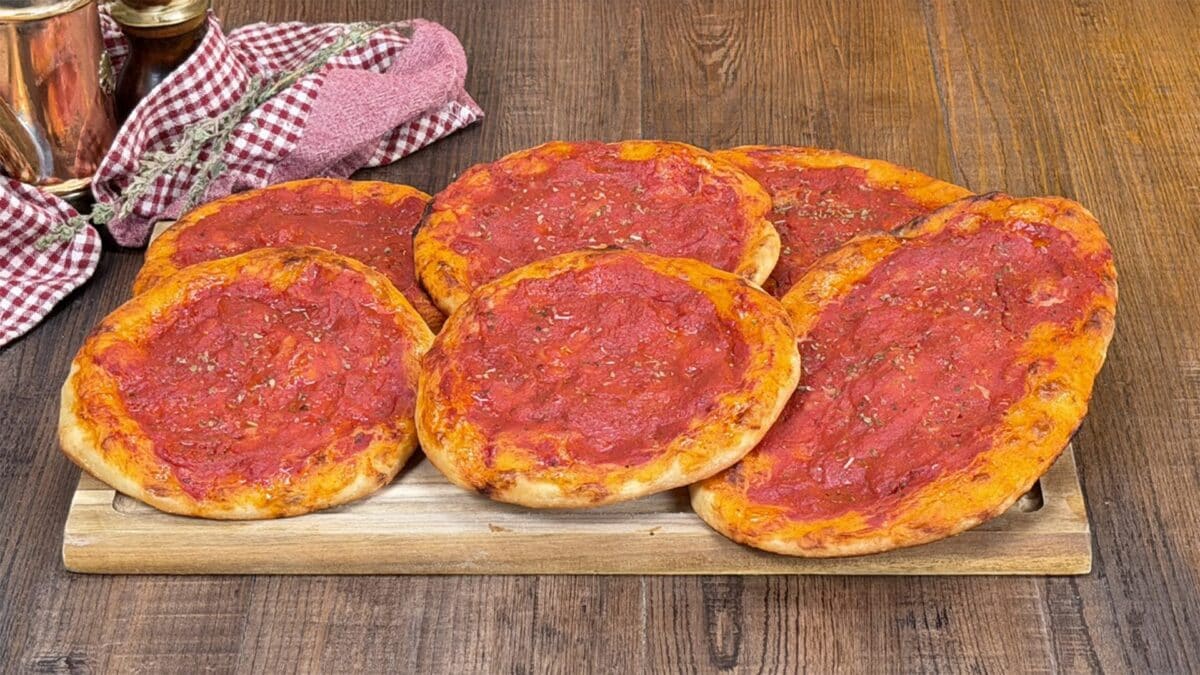
There's something irresistible about a freshly baked tomato mini pizza. The edges are golden and lightly crisp, the middle stays soft, and the tomato topping is rich, fragrant, and full of flavor.
These homemade Italian pizzette are inspired by the simple tomato-topped pizzas found in Italian bakeries. They don't need mozzarella, complicated toppings, or a long ingredient list. Just good dough, tomato passata, olive oil, and oregano.
The dough rises until airy, then gets divided into small portions and gently flattened by hand. A generous layer of seasoned tomato sauce goes all the way to the edges, giving every bite that delicious tomato flavor.
Baked at a high temperature, these tomato mini pizzas develop a crisp base while keeping their centers tender. They're delicious warm from the oven, but they're also convenient for parties and afternoon snacks.
What Are Italian Tomato Mini Pizzas?
In Italy, small individual pizzas are often called pizzette. They come in different shapes and styles, from soft party-sized rounds to slightly larger bakery-style pizzas with crisp edges.
One popular variation is the pizzetta rossa, or red mini pizza, which is topped with tomato sauce rather than mozzarella.
Tomato pizzette are especially common as snacks, quick lunches, and savory treats from bakeries and cafés.
Unlike a classic Margherita pizza, which includes mozzarella and basil, these mini pizzas focus on the flavor of tomato, olive oil, and oregano.
This version uses a homemade yeast dough and a generous tomato topping, then bakes at high heat to create a contrast between the crisp exterior and the soft interior.
Why Everyone Will Love This Recipe
These mini pizzas are proof that simple ingredients can make something incredibly satisfying.
The dough contains just flour, water, yeast, salt, and extra virgin olive oil. After rising, it becomes easy to shape into individual pizzas with soft centers and slightly thicker edges.
The tomato topping is equally straightforward. Passata creates a smooth, rich layer, while oregano adds the familiar aroma of an Italian pizzeria.
Another advantage is that these are mini pizzas without cheese. They're naturally dairy-free when made with suitable ingredients, and the tomato flavor gets to take center stage.
They're also wonderfully versatile. Serve them as a snack, arrange them on a party platter, or pair them with a salad for a casual lunch.
Tips for Making the Best Tomato Mini Pizzas
- Don't rush the rising time. The dough needs enough time to become airy and elastic. Proper fermentation helps create a lighter texture.
- Flatten the dough gently. Press from the center toward the edges without crushing the dough completely. This helps preserve some of the air developed during rising.
- Use thick tomato passata. A very watery sauce can make the centers soggy. If necessary, let the passata drain briefly before seasoning it.
- Preheat the oven thoroughly. High heat is essential for a crisp base. Use a preheated pizza stone, baking steel, or suitable baking tray rather than placing food directly on the oven floor.
Frequently Asked Questions
What Is the Difference Between Mini Pizzas and Pizzette?
Pizzette is the Italian word for small pizzas. The term can describe different regional and bakery-style preparations, including soft party pizzas and crisp tomato-topped rounds.
Can You Make Tomato Mini Pizzas Without Cheese?
Absolutely. In fact, cheese-free tomato pizzette are a familiar Italian bakery snack. Tomato sauce, olive oil, and oregano provide plenty of flavor on their own.
What Is the Best Flour for Homemade Mini Pizzas?
This recipe uses Italian type 1 flour, which is less refined than standard white flour and retains some of the grain's outer components. In the United States, a suitable high-protein flour or a bread flour with some whole-wheat flour can be used as an alternative, although the texture may differ.
Can You Use Pizza Sauce Instead of Tomato Passata?
Yes, but choose a relatively smooth sauce that isn't too watery. Tomato passata works particularly well because it has a fine texture and allows you to control the seasoning.
Why Are My Mini Pizzas Soggy in the Middle?
The tomato topping may be too watery, the dough may be too thick in the center, or the baking surface may not have been hot enough. A well-preheated oven and a suitable hot baking surface help the base cook more evenly.
Can You Make the Dough Ahead of Time?
Yes. The dough can be prepared in advance and refrigerated in a covered container. Allow it to warm slightly and become relaxed enough to shape before baking. A refrigerated rise will require different timing from the room-temperature method used here.
How to Store
Allow leftover tomato mini pizzas to cool, then place them in an airtight container in the refrigerator within 2 hours.
Store for up to 3–4 days.
To reheat, arrange the mini pizzas on a baking sheet and warm them in a preheated 375°F (190°C) oven until thoroughly heated and the bases become crisp again.
An air fryer can also work well for reheating individual portions.
Avoid using the microwave if you want to preserve the crisp texture, as it tends to soften the crust.
How to Freeze
These tomato mini pizzas can be frozen after baking.
Allow them to cool completely, then arrange them in a single layer on a parchment-lined tray. Freeze until firm before transferring them to a freezer-safe container or bag.
Place parchment paper between layers to prevent the pizzas from sticking together.
Freeze for up to 2 months for the best quality.
To reheat, place the frozen mini pizzas on a baking sheet and warm them in a preheated 375°F (190°C) oven until hot throughout and crisp around the edges.
You can also freeze the portioned dough before the final rise. Thaw it overnight in the refrigerator, then allow it to relax and rise before shaping and baking.
Ingredients
How to make Tomato Mini Pizzas
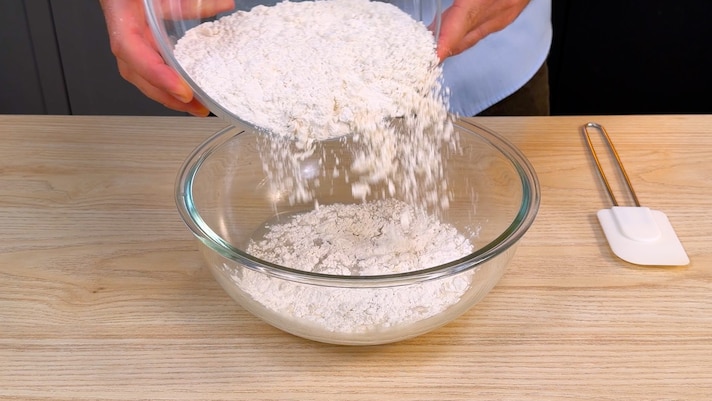
Begin by pouring the room-temperature water into a large mixing bowl. Add the yeast and stir until dissolved.
Gradually add the type 1 flour, mixing as you go. Continue until the ingredients come together into a rough dough with no visible dry flour.
Begin by pouring the room-temperature water into a large mixing bowl. Add the yeast and stir until dissolved.
Gradually add the type 1 flour, mixing as you go. Continue until the ingredients come together into a rough dough with no visible dry flour.
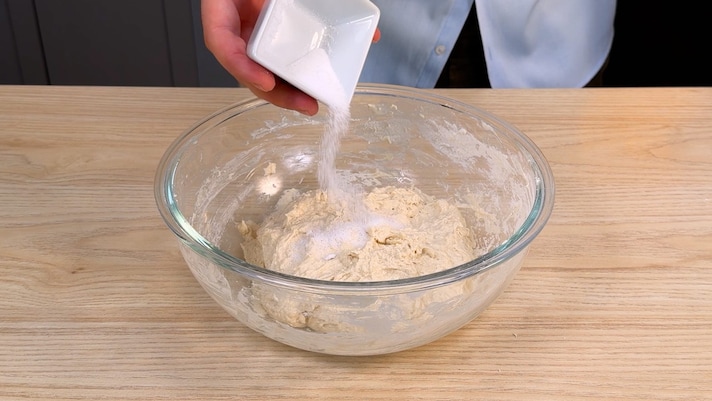
Knead until the mixture becomes smoother and more cohesive and add the fine salt.
Knead until the mixture becomes smoother and more cohesive and add the fine salt.
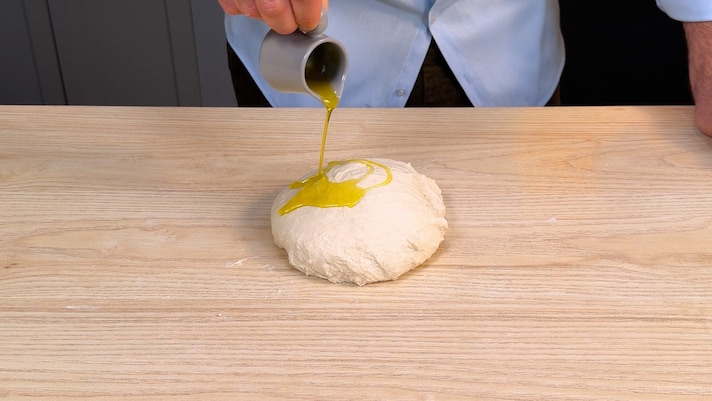
Add the extra virgin olive oil, and continue working the dough until both ingredients are fully incorporated.
The finished dough should feel smooth, elastic, and slightly tacky rather than dry.
Add the extra virgin olive oil, and continue working the dough until both ingredients are fully incorporated.
The finished dough should feel smooth, elastic, and slightly tacky rather than dry.
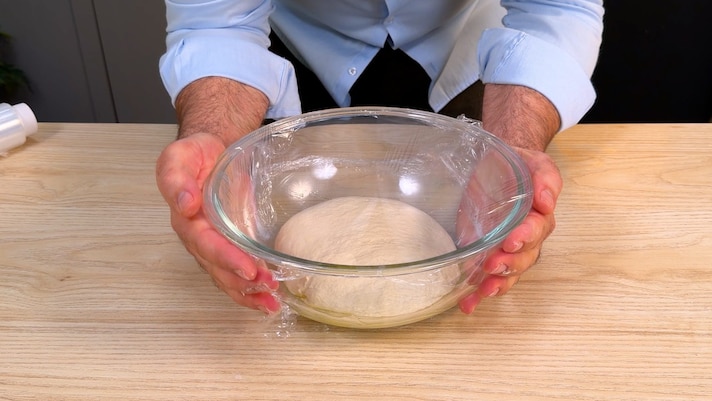
Shape it into a ball and place it in a lightly oiled bowl. Cover the bowl and leave the dough to rise at room temperature for approximately 2 hours, or until noticeably expanded.
Shape it into a ball and place it in a lightly oiled bowl. Cover the bowl and leave the dough to rise at room temperature for approximately 2 hours, or until noticeably expanded.
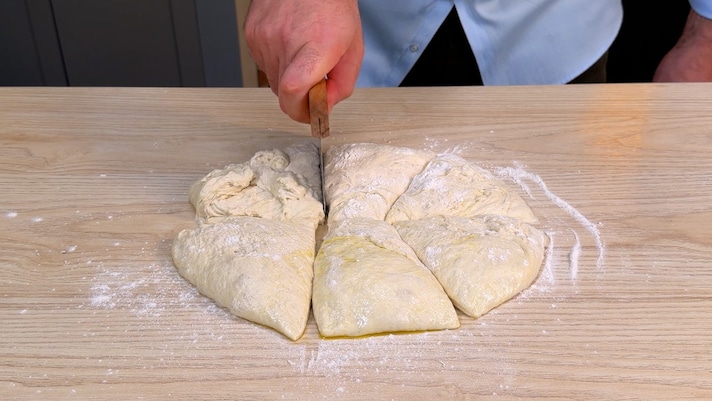
Once the dough has risen, transfer it to a clean work surface and divide it into 8 equal portions.
The original recipe calls for 100 g balls, but the total dough weight is approximately 865 g. Dividing it into eight equal pieces gives portions of roughly 108 g each.
Once the dough has risen, transfer it to a clean work surface and divide it into 8 equal portions.
The original recipe calls for 100 g balls, but the total dough weight is approximately 865 g. Dividing it into eight equal pieces gives portions of roughly 108 g each.
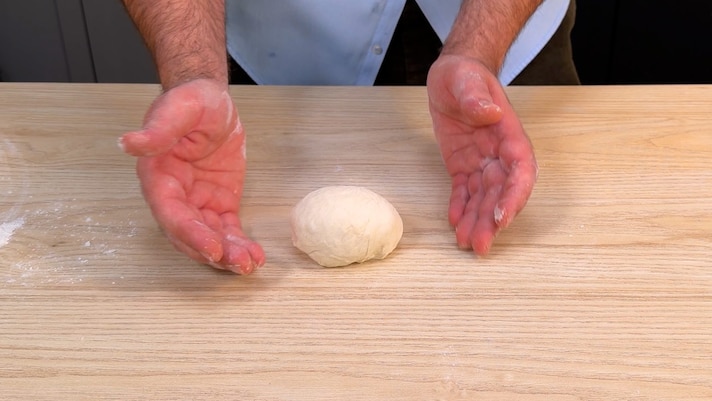
Shape each portion into a tight, smooth ball by gently stretching the surface and tucking the edges underneath.
Shape each portion into a tight, smooth ball by gently stretching the surface and tucking the edges underneath.
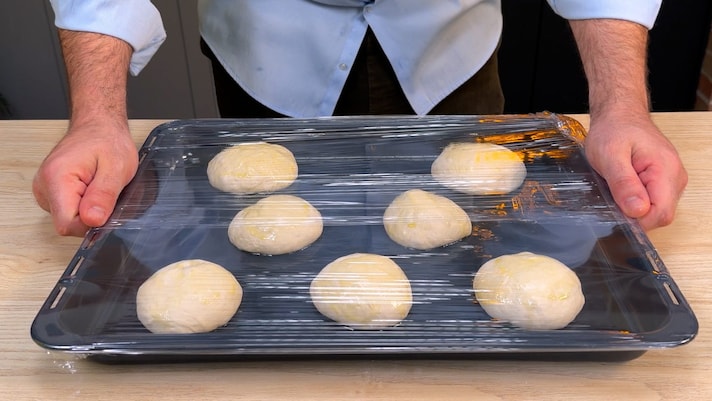
Arrange the dough balls on a lightly floured tray, leaving some space between them. Cover and let them rest for approximately 30 minutes.
Meanwhile, prepare the tomato topping.
Arrange the dough balls on a lightly floured tray, leaving some space between them. Cover and let them rest for approximately 30 minutes.
Meanwhile, prepare the tomato topping.

Pour the tomato passata into a bowl and season with salt, freshly ground black pepper, dried oregano, and a drizzle of extra virgin olive oil.
Stir until the seasoning is evenly distributed. The sauce should be smooth and flavorful, with a noticeable oregano aroma.
Pour the tomato passata into a bowl and season with salt, freshly ground black pepper, dried oregano, and a drizzle of extra virgin olive oil.
Stir until the seasoning is evenly distributed. The sauce should be smooth and flavorful, with a noticeable oregano aroma.
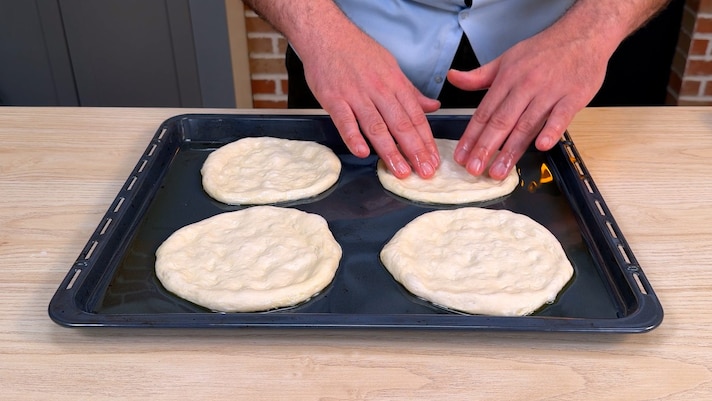
Once the dough balls have rested, place one on a lightly floured work surface.
Using your fingertips, gently press from the center toward the edges to form a small round pizza. Keep the center relatively thin and leave the outer edge slightly thicker.
Repeat with the remaining dough balls.
Once the dough balls have rested, place one on a lightly floured work surface.
Using your fingertips, gently press from the center toward the edges to form a small round pizza. Keep the center relatively thin and leave the outer edge slightly thicker.
Repeat with the remaining dough balls.
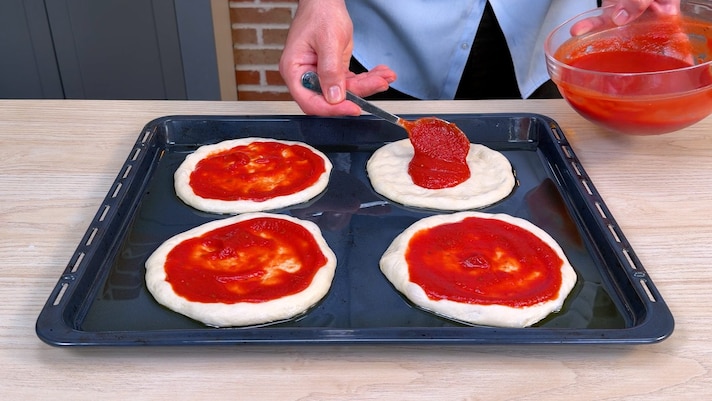
Spoon the seasoned tomato passata onto each pizza and spread it generously over the surface, reaching close to the edges.
Spoon the seasoned tomato passata onto each pizza and spread it generously over the surface, reaching close to the edges.

Carefully transfer the mini pizzas to the hot baking surface.
Bake at 480°F (250°C) for approximately 12 minutes, or until the dough is cooked through and the bottoms are beginning to crisp.
For the final 3 minutes, switch to the oven's broiler or grill setting, if appropriate for your equipment, to finish cooking the tops and lightly concentrate the tomato sauce.
Carefully transfer the mini pizzas to the hot baking surface.
Bake at 480°F (250°C) for approximately 12 minutes, or until the dough is cooked through and the bottoms are beginning to crisp.
For the final 3 minutes, switch to the oven's broiler or grill setting, if appropriate for your equipment, to finish cooking the tops and lightly concentrate the tomato sauce.
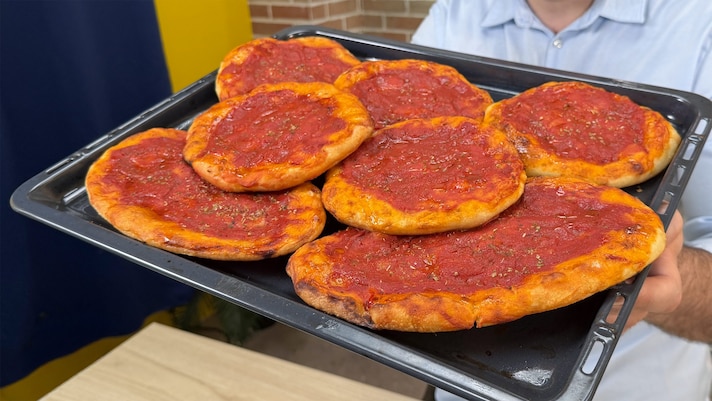
Remove the tomato mini pizzas from the oven once the crusts are golden, the bottoms are crisp, and the tomato topping looks slightly reduced.
Let them rest for a minute or two before serving.
Remove the tomato mini pizzas from the oven once the crusts are golden, the bottoms are crisp, and the tomato topping looks slightly reduced.
Let them rest for a minute or two before serving.
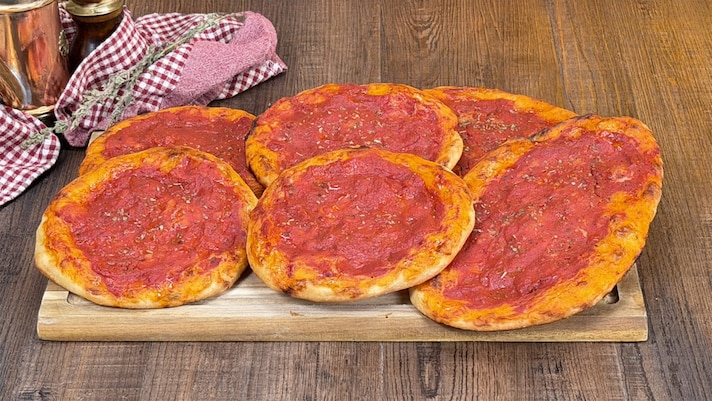
Enjoy them warm, when the edges are at their crispiest and the centers are still soft and tender.
Enjoy them warm, when the edges are at their crispiest and the centers are still soft and tender.


