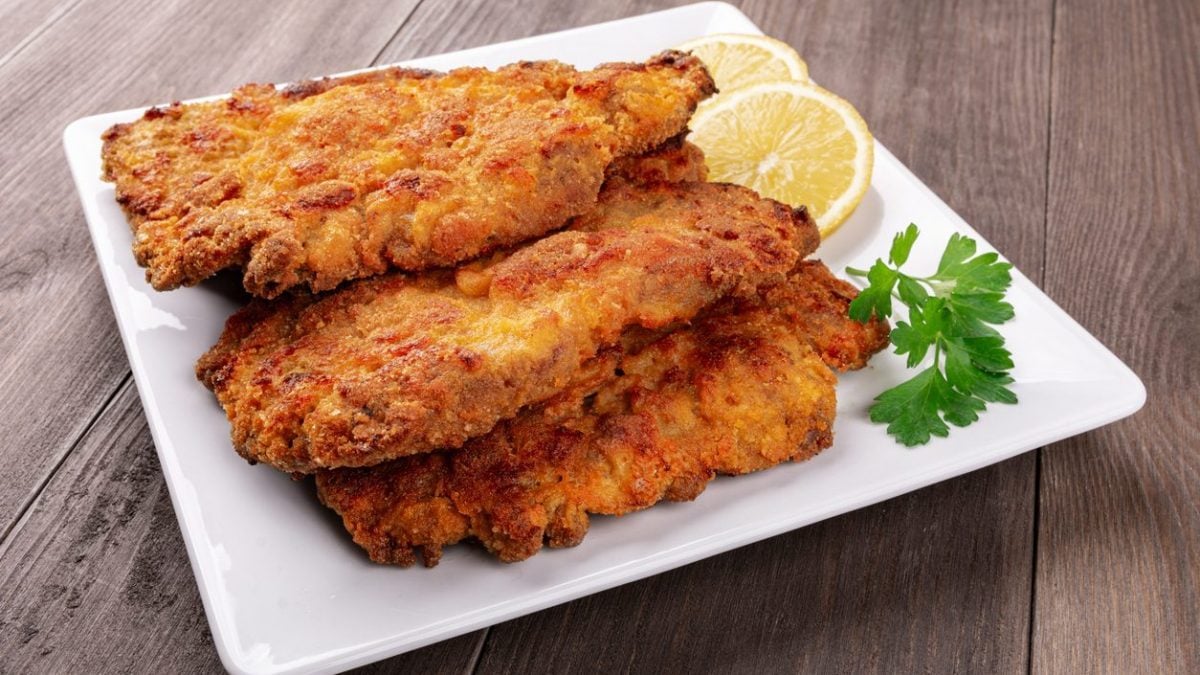
The cotoletta is one of those dishes that evokes both European culinary tradition — there are various versions of it throughout the country —and that family comfort food made for children, but which adults also enjoy. It can be made from veal, pork, or chicken, thick or thin, lightly or heavily breaded, fried in butter and oil, or baked in the lighter versions. Regardless of the recipe, it's a delicious dish that's always satisfying, served with roasted or fried potatoes, grilled vegetables, or sautéed vegetables. Sometimes, however, the result isn't quite what you'd hoped for: the meat is dry and flavorless, the breading comes off, or it's greasy. Below, we'll look at the most common mistakes and how to avoid them, so you can have juicy slices on the inside and delightfully crispy on the outside.
1. Getting The Wrong Cut of Meat
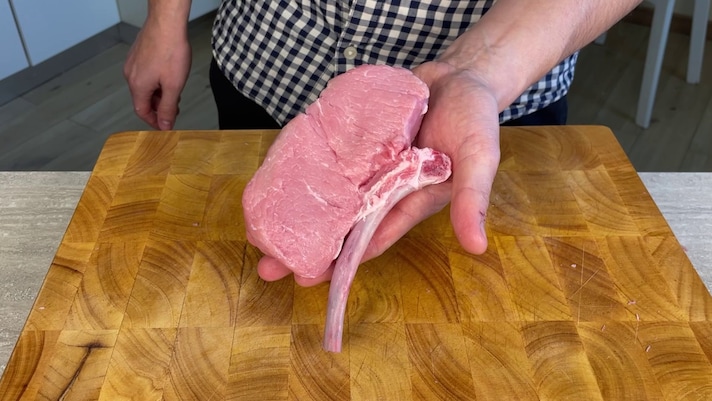
When it comes to a meat-based dish, choosing the cut is always the first potential mistake. In fact, the cutlet can be made from various sources that best enhance the quick cooking of the dish, which must remain tender on the inside. The classic Milanese version calls for veal rack, from which the noble and tasty bone-in "chops" are obtained, but for a more affordable homemade version, you can opt for flank and rump, even beef. Pork is the most common alternative, because it is tasty and cheaper: make room for lean cuts such as pork loin, loin, fillet, or capocollo, with good fat infiltrations that keep the meat tender (try it for Japanese katsu sando). The "light" version of the cutlet is the chicken cutlet, where the breast takes center stage, the leanest and most valuable part of the bird that lends itself well to being sliced.
2. Not Beating The Meat Evenly
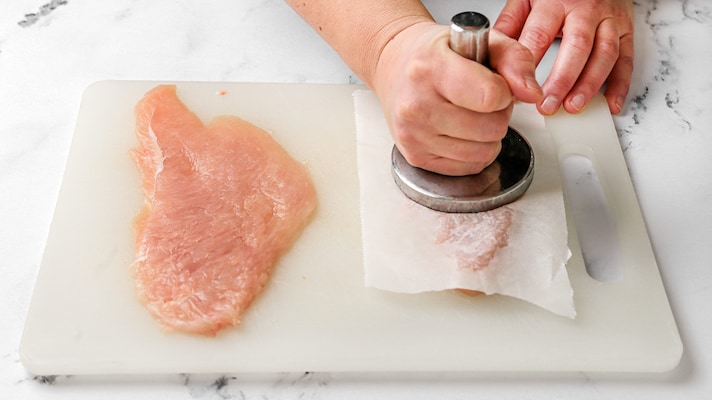
How thick is a cutlet? There's no universal measurement, since the Milanese cutlet, for example, is known for not being too thin, around 1.5-2 cm. Adjust the thickness of the bone, otherwise cooking will be uneven. Since we're talking about the most common preparations here, they generally have a thinner thickness, between 4 and 8 mm. The meat must always be pounded to make the slice uniform, so that it cooks evenly from the edges to the center, without any parts remaining raw. How? Take a meat tenderizer and cover with parchment paper to protect the surface of the meat, which must not tear or suffer any other damage: a few firm, evenly distributed blows over the entire surface are enough.
3. Underestimating the Breading
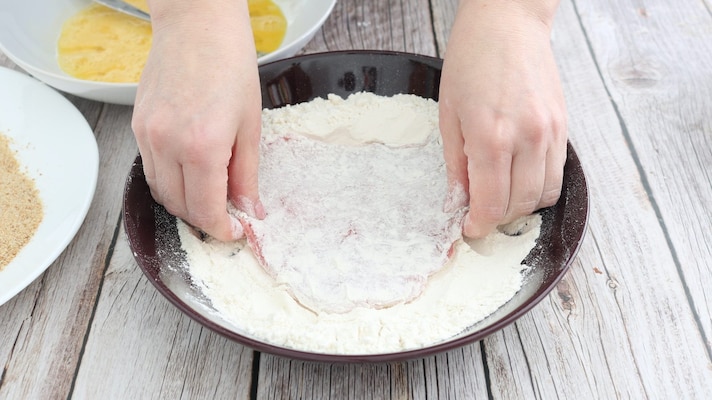
The breading step is one of the most important, and there's no single way to do it. You can follow the classic order of flour, eggs, and breadcrumbs, opt for a double coating (so twice in eggs and breadcrumbs), or, to invoke the Milanese recipe, omit the flour. Our suggestion is to avoid adding aromatic herbs or spices, as they can burn and become bitter. In any case, a great enemy of breading is moisture, and this is one of the reasons why it comes off during cooking. Before proceeding with the operation, therefore, pat dry with kitchen paper and don't put salt directly on the meat, as it tends to draw out the liquids from the tissues: salt last, with coarse salt or salt flakes. If you use flour, remember to gently shake the slices to remove any excess (or there may be lumps) and use your hands to apply light pressure to completely adhere the breading, which should be a compact coating that evenly covers the entire surface.
4. Not Considering The Temperature
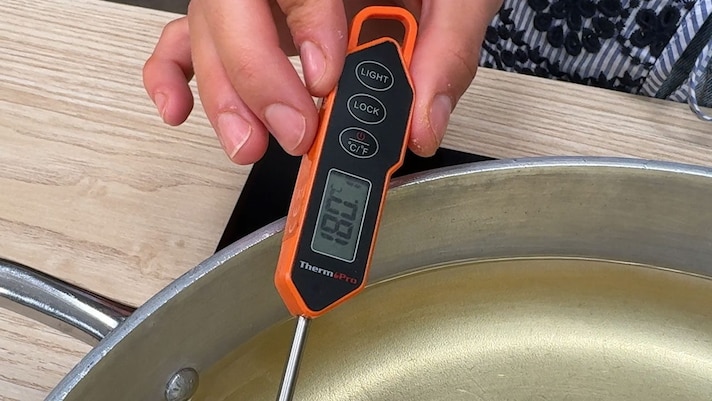
The cutlet in its most delicious sense is the fried one. This means that the slice is immersed in a fat: which one should you choose? The general instructions apply when you want to achieve golden, crispy and dry frying. Peanut oil and clarified butter are particularly suitable, as both reach a high smoke point, avoiding burning the breading: the former has a neutral flavor and gives a "light" result, the latter, however, adds flavor and is richer. What is important for both is to immerse the cutlets only when the correct temperature is reached, between 340°F/170°C and 375°F/190°C: if "dipped" too early the breading will get wet, absorbing the fat and will be greasy and heavy, too late, however, the outside will cook quickly, while the center is left behind. Our advice? Use a thermometer, or rely on a few old wives' tricks, to determine when the oil is hot enough. Cook a few cutlets at a time, depending on the size of your pan, or the temperature may drop.
5. Turning It Continuously and Cooking It More Than Necessary
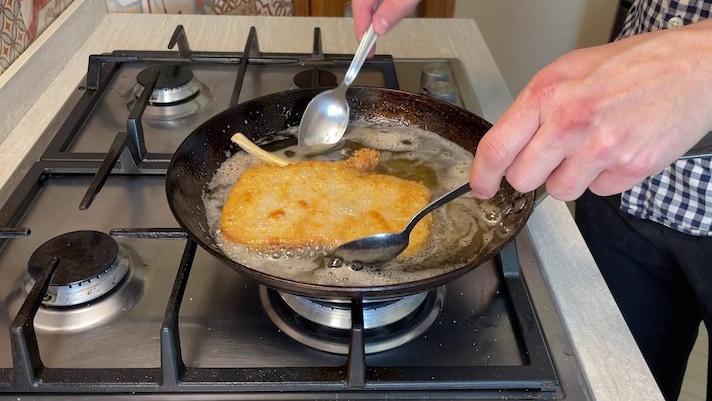
When cooking in oil or butter, the cutlet should be touched as little as possible: turning it too often could compromise the breading, causing it to come loose. There's only one moment to turn it: first brown one side thoroughly, then the other, leaving both sides immersed for the same amount of time. This is usually very short, for a total of no more than 8-10 minutes. Want to make the baked version? Go for chicken: to prevent the meat from becoming stringy, you can soften the slices in a bowl with milk, let them rest for about half an hour, then bread them (even without eggs) and bake for 20-30 minutes at 355°F/180°C to 390°F/200°C.
6. Not Removing Excess Fat
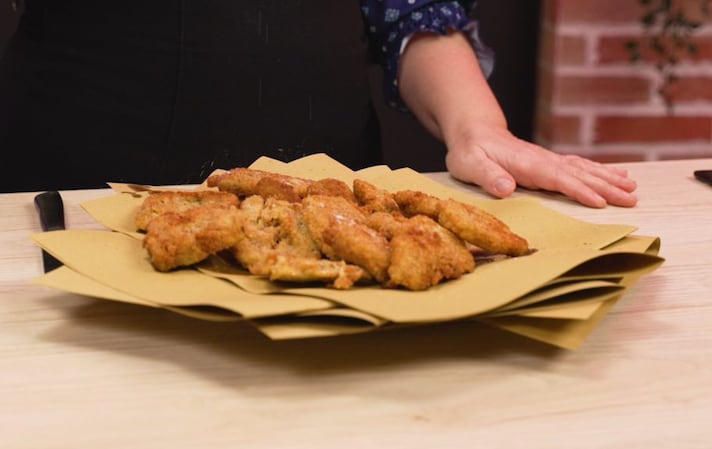
The cutlet is served as soon as it's ready, piping hot, although it's also excellent cold, for example in a salad. It doesn't need a settling period like steak or roast: what you need to do, however, is make sure it's free of excess grease, so it should be drained and placed on special frying paper (or absorbent paper) to allow it to lose the excess oil or butter, drying it out and maintaining its crispiness. If you've fried a lot of cutlets, never stack them on top of each other and change the paper, or they'll get soggy, ruining all the hard work you've done up until the end.
;Resize,width=767;)
