
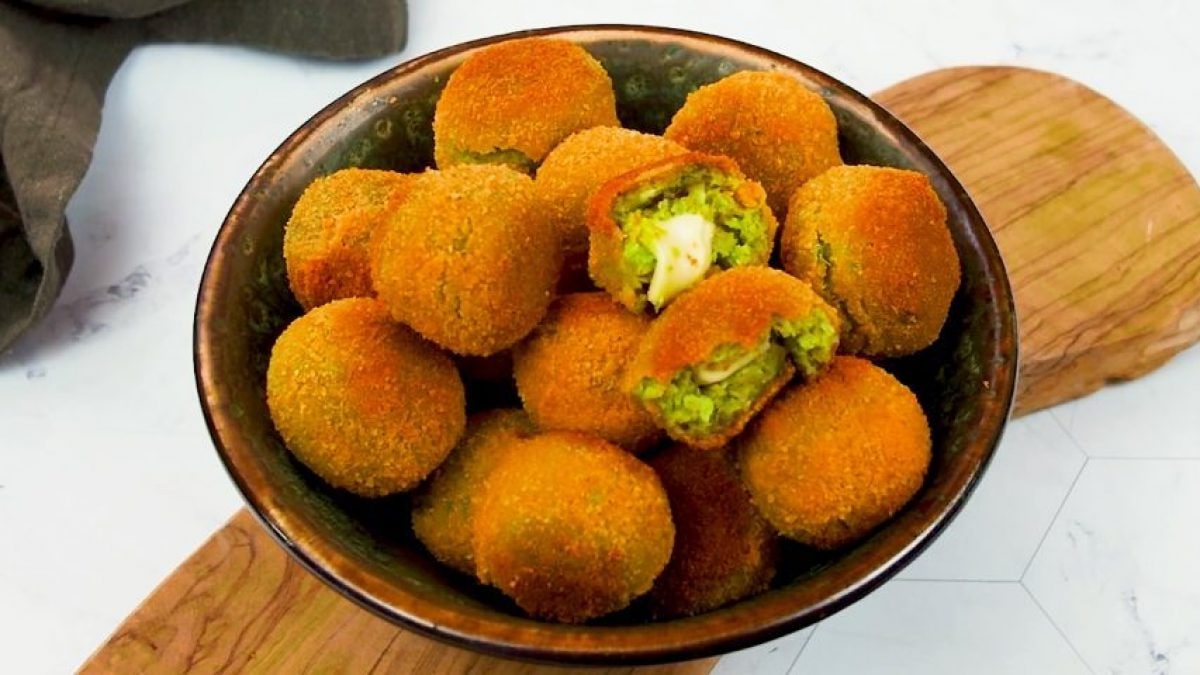
These cheesy pea balls are crisp on the outside, hiding a melty cheese center that makes each bite far more exciting than their humble ingredient list suggests. They come together with simple ingredients, a quick blend, and a short fry, and are ideal for appetizers, party platters, or lunchbox surprises.
What Are Cheesy Pea Balls?
While peas have been used in cooking for centuries, dating back to ancient Mediterranean and Middle Eastern cuisines, this recipe leans more into contemporary home cooking creativity than strict tradition.
Pea-based snacks appear in many cultures, from Indian matar tikki to British mushy pea croquettes. What makes this recipe stand out is the use of oats for structure and the cheese center.
Pro Tips for the Best Cheesy Pea Balls
- Don’t overcook the peas, and five minutes is enough. Overcooking can dull the flavor and make the mixture too wet.
- Blend to a thick paste, not a puree, you want texture. A completely smooth mix can make the balls dense.
- Use sharp cheese for contrast. A stronger cheese balances the mild sweetness of peas and keeps things interesting.
- Make sure the cheese cube is fully covered to prevent leaks during frying.
Frequently Asked Questions
Can I use fresh peas instead of frozen?
Fresh peas work well and may even bring a brighter flavor. Just ensure they’re cooked until tender before blending, as raw peas won’t break down properly.
What type of cheese works best?
Sharp cheeses like cheddar or aged varieties are ideal because they hold their flavor inside the pea mixture. Softer cheeses can melt too quickly and may leak during frying.
Why are my pea balls falling apart?
This usually means the mixture is too wet or not compacted enough. Add more oat flour or breadcrumbs and press firmly when shaping to improve structure.
How do I keep them crispy after frying?
Place them on a wire rack instead of paper towels after frying. This prevents steam from softening the outer layer.
Can I air-fry these?
Yes, they work well in an air fryer. Lightly coat with oil and cook at around 180°C (350°F), turning once for even browning.
How to Store Leftovers
If you somehow end up with extras, let the pea balls cool completely before storing. Keep them in an airtight container in the fridge for up to 3 days. You can also freeze them after shaping but before frying. When ready to cook, fry straight from frozen, adding a couple of extra minutes to the cooking time.
Ingredients
How to Make Cheesy Pea Balls
;Resize,width=712;)
Heat olive oil in a pan over medium heat. Add the peas and chopped onion, cooking for about 5 minutes until softened and fragrant.
Heat olive oil in a pan over medium heat. Add the peas and chopped onion, cooking for about 5 minutes until softened and fragrant.
;Resize,width=712;)
Transfer to a blender and pulse into a thick paste. In a bowl, combine the pea mixture with oat flour, breadcrumbs, olive oil, milk, salt, and pepper.
Transfer to a blender and pulse into a thick paste. In a bowl, combine the pea mixture with oat flour, breadcrumbs, olive oil, milk, salt, and pepper.
;Resize,width=712;)
Scoop out portions, about 25g each, flatten slightly, and place a cube of cheese in the center. Wrap the mixture around the cheese and roll into a neat ball.
Scoop out portions, about 25g each, flatten slightly, and place a cube of cheese in the center. Wrap the mixture around the cheese and roll into a neat ball.
;Resize,width=712;)
Roll each ball in breadcrumbs, pressing gently to ensure an even coating.
Roll each ball in breadcrumbs, pressing gently to ensure an even coating.
;Resize,width=712;)
Heat vegetable oil and fry the balls until golden and crisp on the outside.
Heat vegetable oil and fry the balls until golden and crisp on the outside.
;Resize,width=712;)
Remove from heat and enjoy.
Remove from heat and enjoy.
;Resize,width=767;)
