
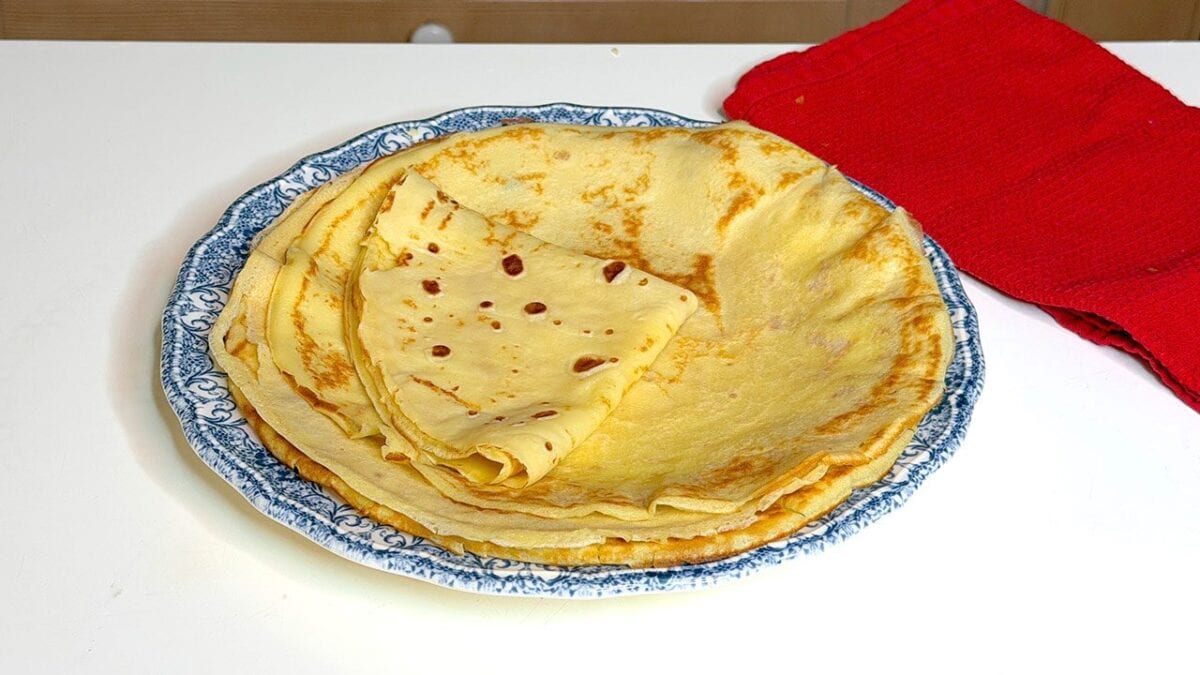
These easy crepes in a bottle might be the smartest way to make homemade crepes with almost no mess. Instead of whisking the batter in a bowl, you simply add milk, eggs, melted butter, and flour directly to a bottle, close it, and shake.
That's it. The bottle becomes both your mixing container and an easy way to pour the batter straight into the pan.
After a short rest, the batter cooks into thin, soft, flexible crepes that can be filled with anything you like, from chocolate spread and fresh fruit to cheese and other savory fillings.
What Are Bottle Crepes?
Bottle crepes are classic thin crepes made with a clever preparation method. Rather than combining the ingredients in a bowl, the batter is mixed by shaking everything together inside a clean bottle.
The narrow opening also makes it easy to control how much batter goes into the pan.
The basic batter contains milk, eggs, flour, butter, and a pinch of salt. Resting it for about 30 minutes before cooking helps the flour hydrate and gives the finished crepes a soft, flexible texture that's easy to fold or roll.
Why Everyone Will Love This Recipe
The biggest advantage is obvious: fewer dishes to wash. There’s no mixing bowl and no complicated equipment, and leftover batter can stay right inside the bottle until you're ready to use it.
The crepes themselves are wonderfully versatile, too. Since the batter contains no sugar, you can turn them into either a sweet breakfast or a savory meal simply by changing the filling.
Tips for Perfect Crepes
- Use a bottle with enough empty space to shake the batter vigorously.
- If you notice flour lumps after shaking, simply strain the batter through a fine-mesh sieve.
- Let the batter rest for about 30 minutes for softer, more flexible crepes.
- Keep the crepes thin by pouring in only enough batter to lightly cover the surface of the pan.
Frequently Asked Questions
What Kind of Bottle Should I Use for Crepe Batter?
Use a clean, food-safe bottle with a secure lid and an opening wide enough to add the ingredients. A funnel can make adding the flour much easier and cleaner.
Why Should Crepe Batter Rest?
Resting gives the flour time to hydrate and allows the batter to settle. For this recipe, about 30 minutes in the refrigerator is enough.
Why Does My Crepe Batter Have Lumps?
Flour can sometimes clump when it's added directly to liquid. Shake the bottle thoroughly, and if lumps remain, pour the batter through a fine-mesh sieve before cooking.
How Do You Make Thin Crepes?
Use only a small amount of batter and immediately tilt and rotate the pan so it spreads into a thin, even layer before it begins to set.
Can I Make Sweet and Savory Crepes With the Same Batter?
Yes. Since the basic batter isn't sweetened, it works with both. Try chocolate-hazelnut spread, jam, or fruit for sweet crepes, or cheese and vegetables for a savory version.
Can I Make the Batter Ahead of Time?
Yes. One advantage of this method is that the batter can remain directly in the closed bottle in the refrigerator. Shake it again before cooking the remaining crepes.
How to Store
Keep cooked crepes in an airtight container or tightly covered in the refrigerator for up to 3 days. Place parchment paper between them if necessary to prevent sticking.
The uncooked batter can also be kept directly in the sealed bottle in the refrigerator until the following day, as indicated in the recipe. Shake it well before using it again.
How to Freeze
Let the crepes cool completely before freezing. Stack them with small sheets of parchment paper between each crepe, then wrap well or place in a freezer-safe container.
Freeze for up to 2 months. Thaw them in the refrigerator and briefly warm them in a skillet before filling and serving.
Ingredients
How to Make Easy Crepes in a Bottle

Pour the lukewarm milk into a clean bottle, followed by the melted butter and beaten eggs. Add the all-purpose flour and a pinch of salt.
Pour the lukewarm milk into a clean bottle, followed by the melted butter and beaten eggs. Add the all-purpose flour and a pinch of salt.

Close the bottle securely and shake vigorously until the ingredients form a smooth, homogeneous crepe batter. If you notice any persistent lumps, pour the mixture through a fine-mesh sieve and return it to the bottle. Transfer the bottle to the refrigerator and let the batter rest for about 30 minutes. This step is optional when you're short on time, but it helps produce softer and more flexible crepes.
Close the bottle securely and shake vigorously until the ingredients form a smooth, homogeneous crepe batter. If you notice any persistent lumps, pour the mixture through a fine-mesh sieve and return it to the bottle. Transfer the bottle to the refrigerator and let the batter rest for about 30 minutes. This step is optional when you're short on time, but it helps produce softer and more flexible crepes.

Heat a nonstick crepe pan or skillet over medium heat. Lightly grease it if necessary. Shake the bottle again, then pour enough batter into the hot pan to create a thin layer. Immediately tilt and rotate the pan so the batter spreads evenly across the entire surface.
Heat a nonstick crepe pan or skillet over medium heat. Lightly grease it if necessary. Shake the bottle again, then pour enough batter into the hot pan to create a thin layer. Immediately tilt and rotate the pan so the batter spreads evenly across the entire surface.

Cook until the underside is lightly golden and the top has set, then carefully flip the crepe and cook briefly on the second side.
Cook until the underside is lightly golden and the top has set, then carefully flip the crepe and cook briefly on the second side.

Serve the bottle crepes warm and fill them however you like. Go sweet with chocolate spread, jam, or fresh fruit, or use cheese, vegetables, and other savory ingredients for an easy lunch or dinner.
Serve the bottle crepes warm and fill them however you like. Go sweet with chocolate spread, jam, or fresh fruit, or use cheese, vegetables, and other savory ingredients for an easy lunch or dinner.
;Resize,width=767;)
