

The Ice Cream Sandwich is an irresistible dessert that combines creamy filling with layers of tender, milk-brushed biscuits. This no-bake recipe is quick and simple to prepare, requiring just a few basic ingredients. Whether you are hosting a summer gathering or craving a cool treat, this Ice Cream Sandwich delivers pure indulgence in every bite.
Why Everyone Will Love This Recipe
Everyone loves an Ice Cream Sandwich because it is both nostalgic and satisfying. With creamy chocolate-infused filling layered between soft biscuits, this dessert offers the perfect balance of texture and flavor. It is an ideal make-ahead option for parties and a fun project to prepare with kids. Plus, the no-bake method means you can enjoy a cool and refreshing dessert without turning on the oven.
Pro Tips for the Best Ice Cream Sandwich
- Use full-fat fresh cream for a richer, more stable whipped filling.
- Choose high-quality dark chocolate for the best flavor.
- Brushing the biscuits with milk keeps them soft and easy to bite.
- Freeze the Ice Cream Sandwich for at least three hours to achieve clean, sharp layers.
- For extra flair, decorate the sides with sprinkles, chopped nuts, or mini chocolate chips.
Frequently Asked Questions
Can I use milk chocolate instead of dark chocolate?
Yes, milk chocolate works well if you prefer a sweeter flavor. Just keep in mind that the filling will be less intense compared to dark chocolate.
How long does Ice Cream Sandwich need to freeze?
For the best texture, freeze the assembled Ice Cream Sandwich for a minimum of three hours. Overnight freezing is even better if you want firmer layers.
What type of biscuits should I use?
Dry biscuits such as graham crackers, digestive biscuits, or tea biscuits work perfectly. Choose a variety that holds its shape but softens slightly when brushed with milk.
Can I add extra flavors to the cream?
Absolutely. You can fold in a splash of vanilla extract, a pinch of sea salt, or even some finely grated orange zest to enhance the flavor of the filling.
How should I serve Ice Cream Sandwich?
Serve the Ice Cream Sandwich directly from the freezer, sliced into squares. Let it sit at room temperature for just a few minutes to soften slightly before enjoying.
How to Store
Store Ice Cream Sandwich squares in an airtight container in the freezer. They will remain fresh and delicious for up to two weeks. Separate layers with parchment paper to prevent sticking.
How to Freeze
Ice Cream Sandwich is designed to be frozen. After assembling the dessert, cover it tightly and freeze for at least three hours. Once fully set, slice the Ice Cream Sandwich into portions and store them in an airtight container for longer storage.
Ingredients
How to Make Ice Cream Sandwich
;Resize,width=712;)
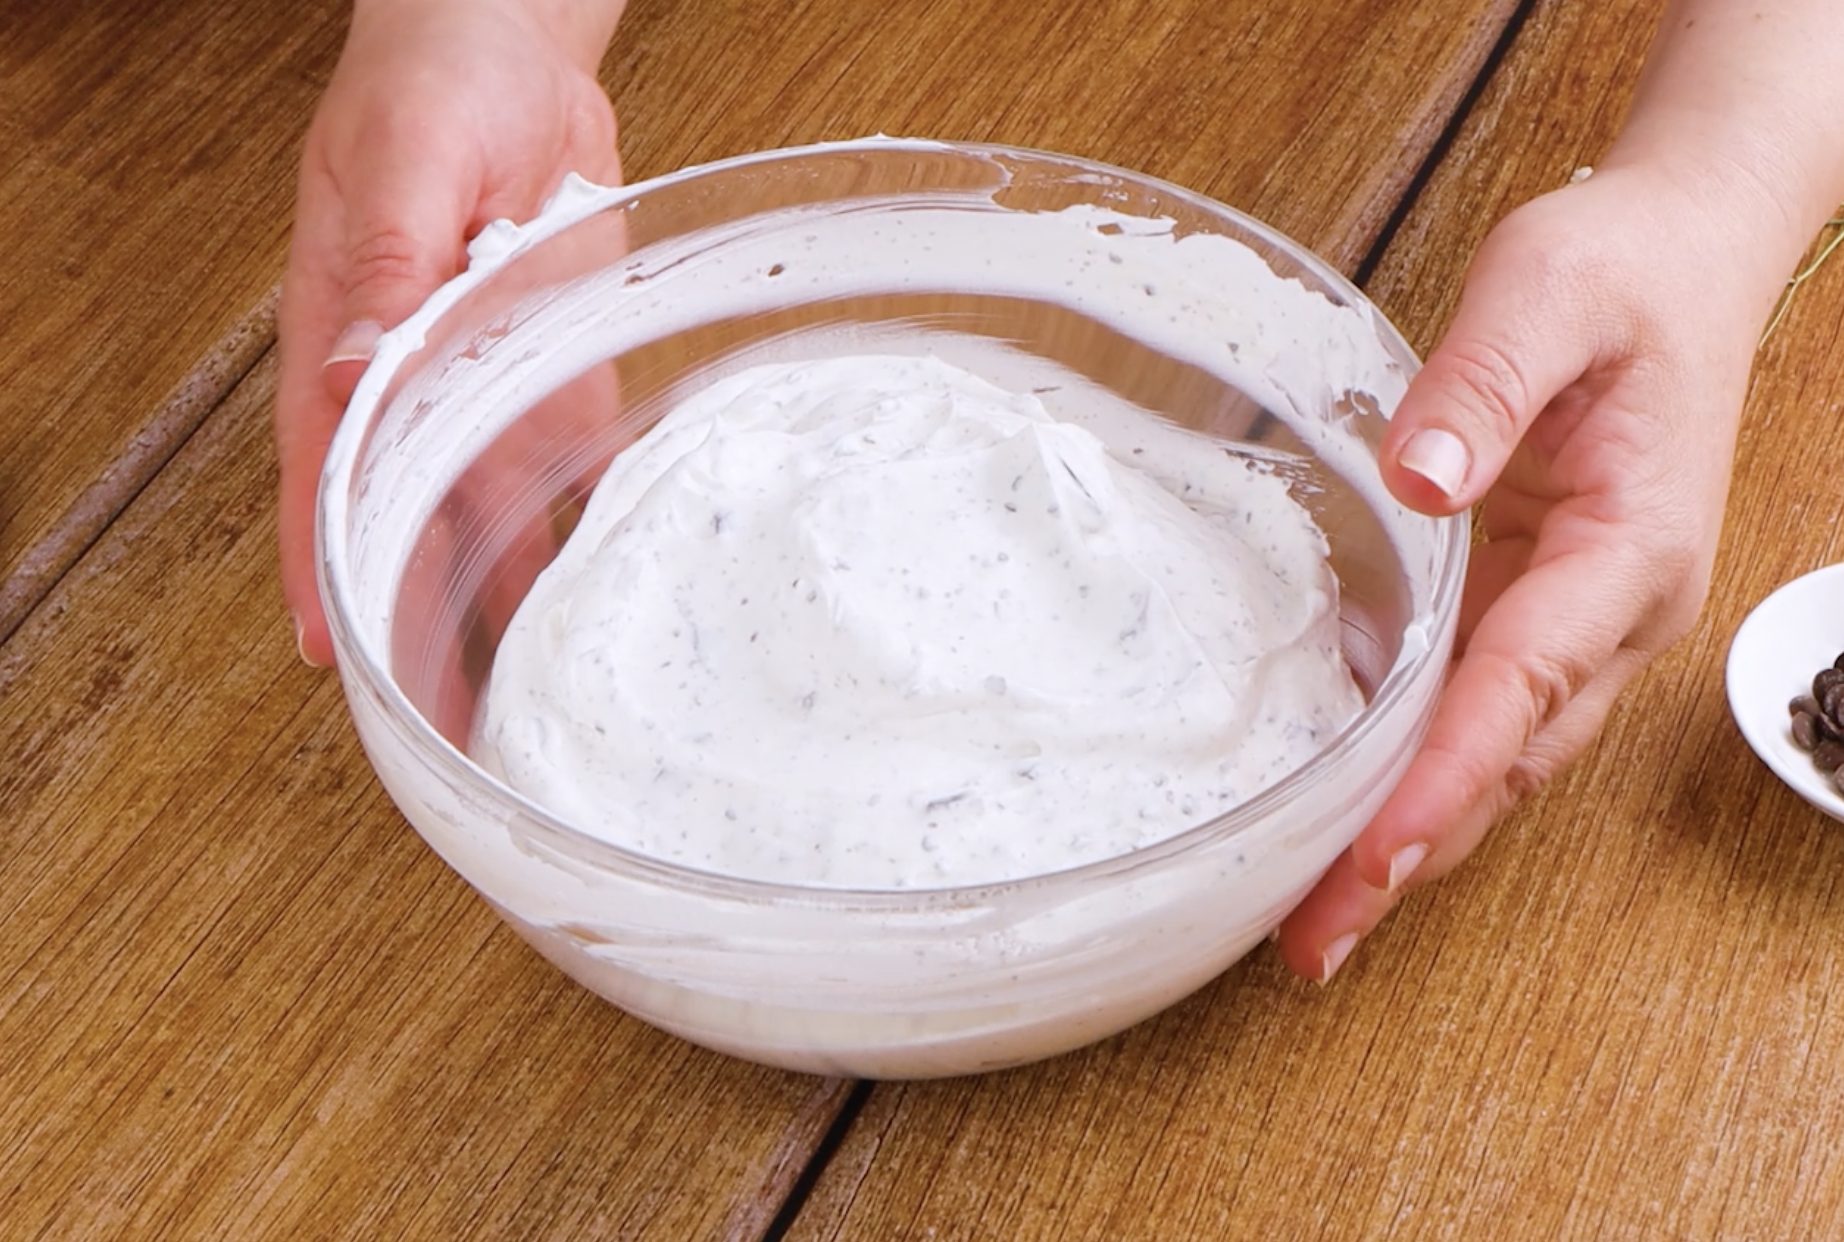
Start by preparing the filling. Place the fresh cream in a large bowl and whip it with an electric mixer until stiff peaks form. In a separate bowl, melt the dark chocolate gently and let it cool slightly. Add the sweetened condensed milk and melted chocolate to the whipped cream. Using a spatula, fold the mixture carefully until well combined and smooth.
Start by preparing the filling. Place the fresh cream in a large bowl and whip it with an electric mixer until stiff peaks form. In a separate bowl, melt the dark chocolate gently and let it cool slightly. Add the sweetened condensed milk and melted chocolate to the whipped cream. Using a spatula, fold the mixture carefully until well combined and smooth.
;Resize,width=712;)
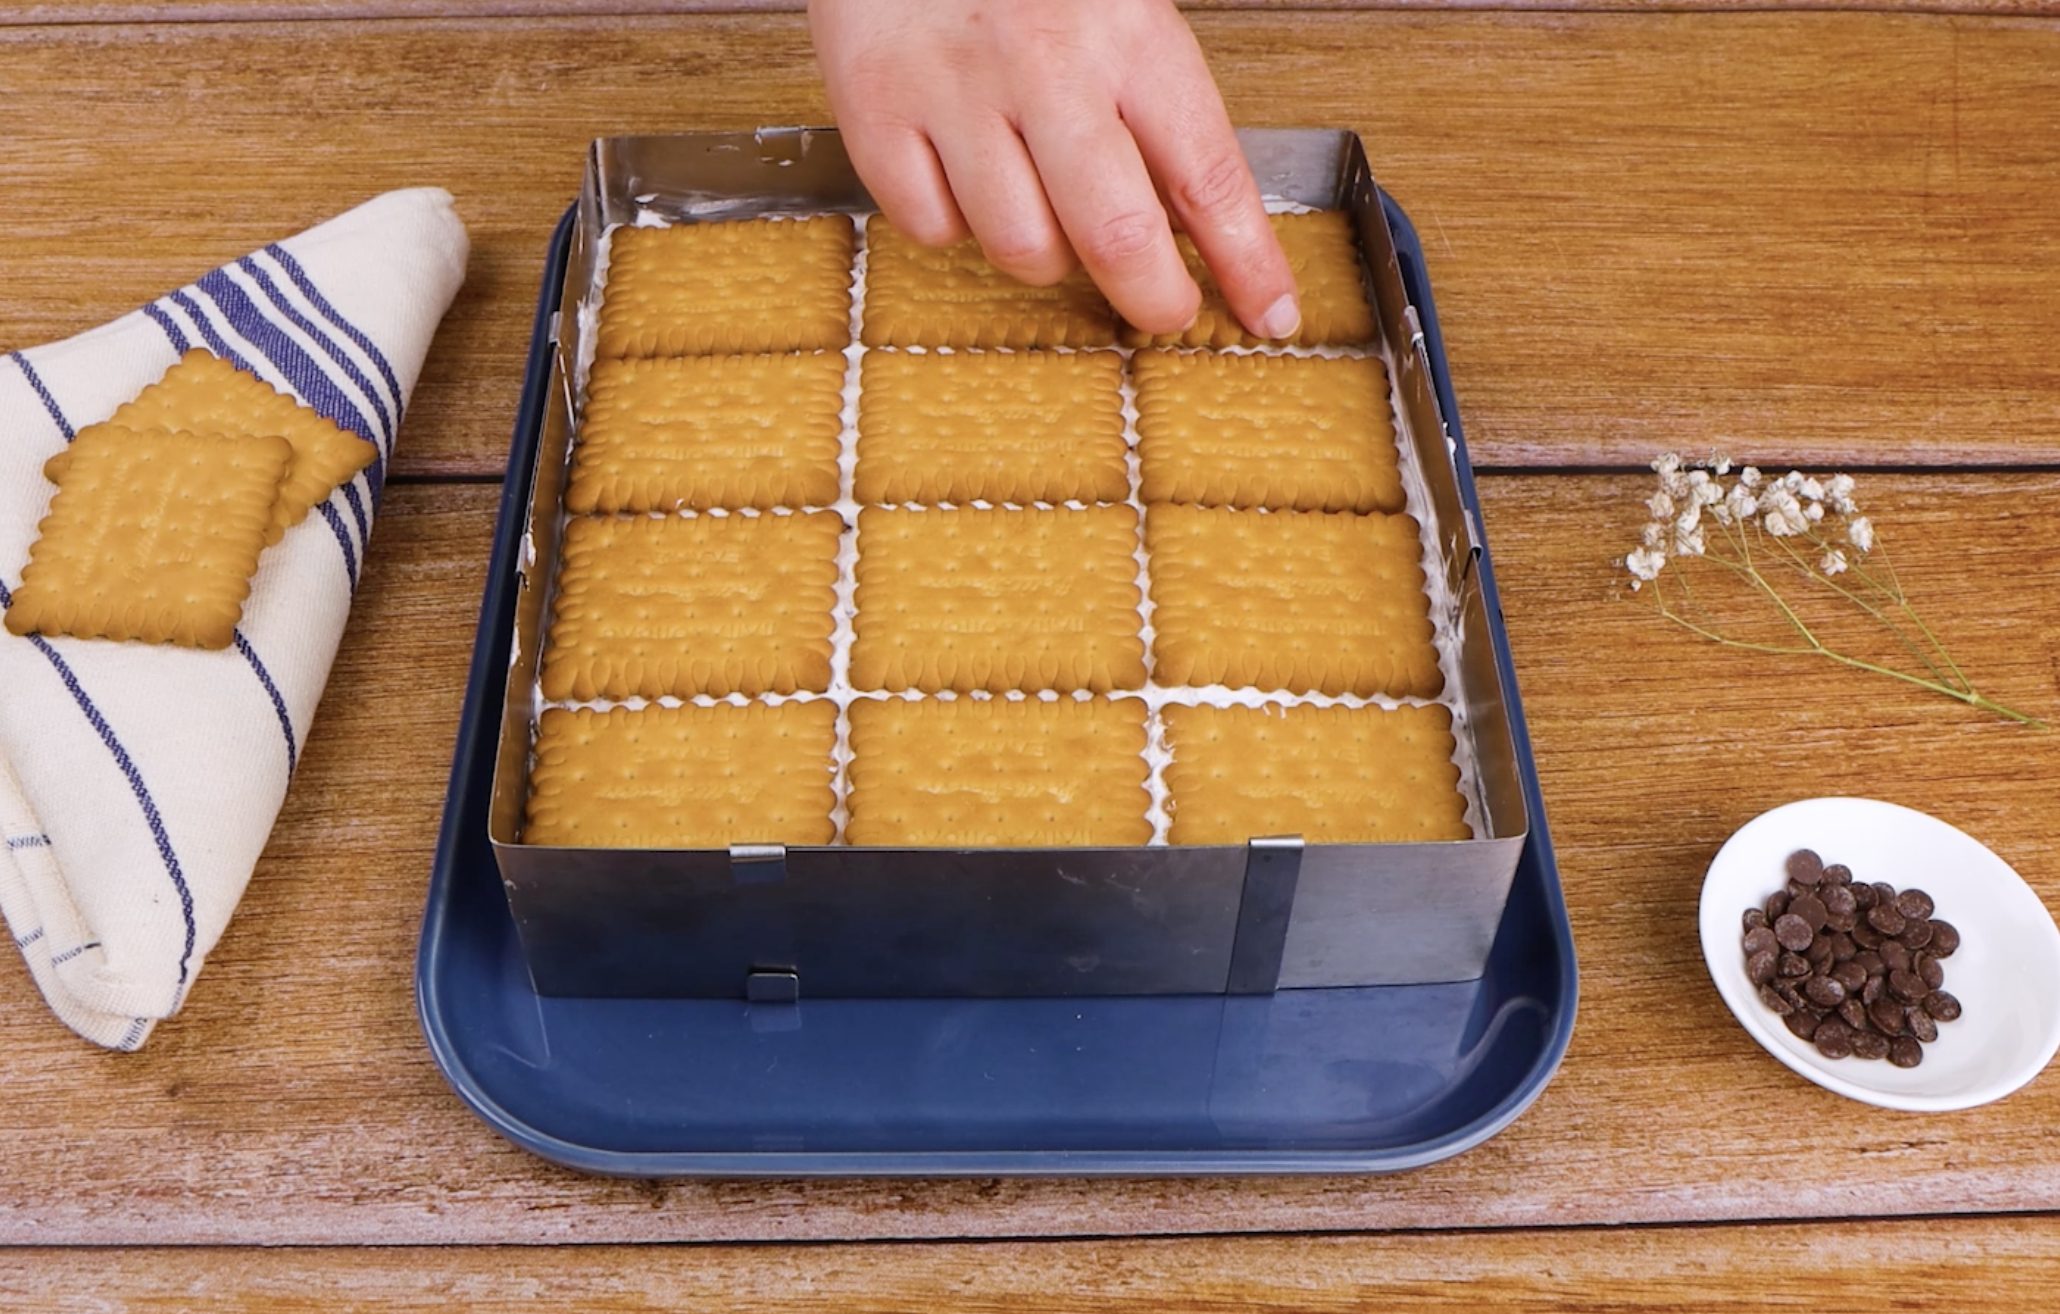
Next, prepare the mold. Arrange a layer of dry biscuits side by side on the bottom of your chosen mold. Lightly brush the biscuits with milk to soften them, which will make the Ice Cream Sandwich easier to cut and eat. Spread half of the prepared cream mixture over the biscuit layer, smoothing it evenly with a spatula.
Next, prepare the mold. Arrange a layer of dry biscuits side by side on the bottom of your chosen mold. Lightly brush the biscuits with milk to soften them, which will make the Ice Cream Sandwich easier to cut and eat. Spread half of the prepared cream mixture over the biscuit layer, smoothing it evenly with a spatula.
Repeat the process by adding another layer of milk-brushed biscuits over the cream. Cover this layer with the remaining cream mixture, again smoothing it out. Finally, arrange a last layer of biscuits brushed with milk to complete the dessert.
;Resize,width=712;)
Repeat the process by adding another layer of milk-brushed biscuits over the cream. Cover this layer with the remaining cream mixture, again smoothing it out. Finally, arrange a last layer of biscuits brushed with milk to complete the dessert.
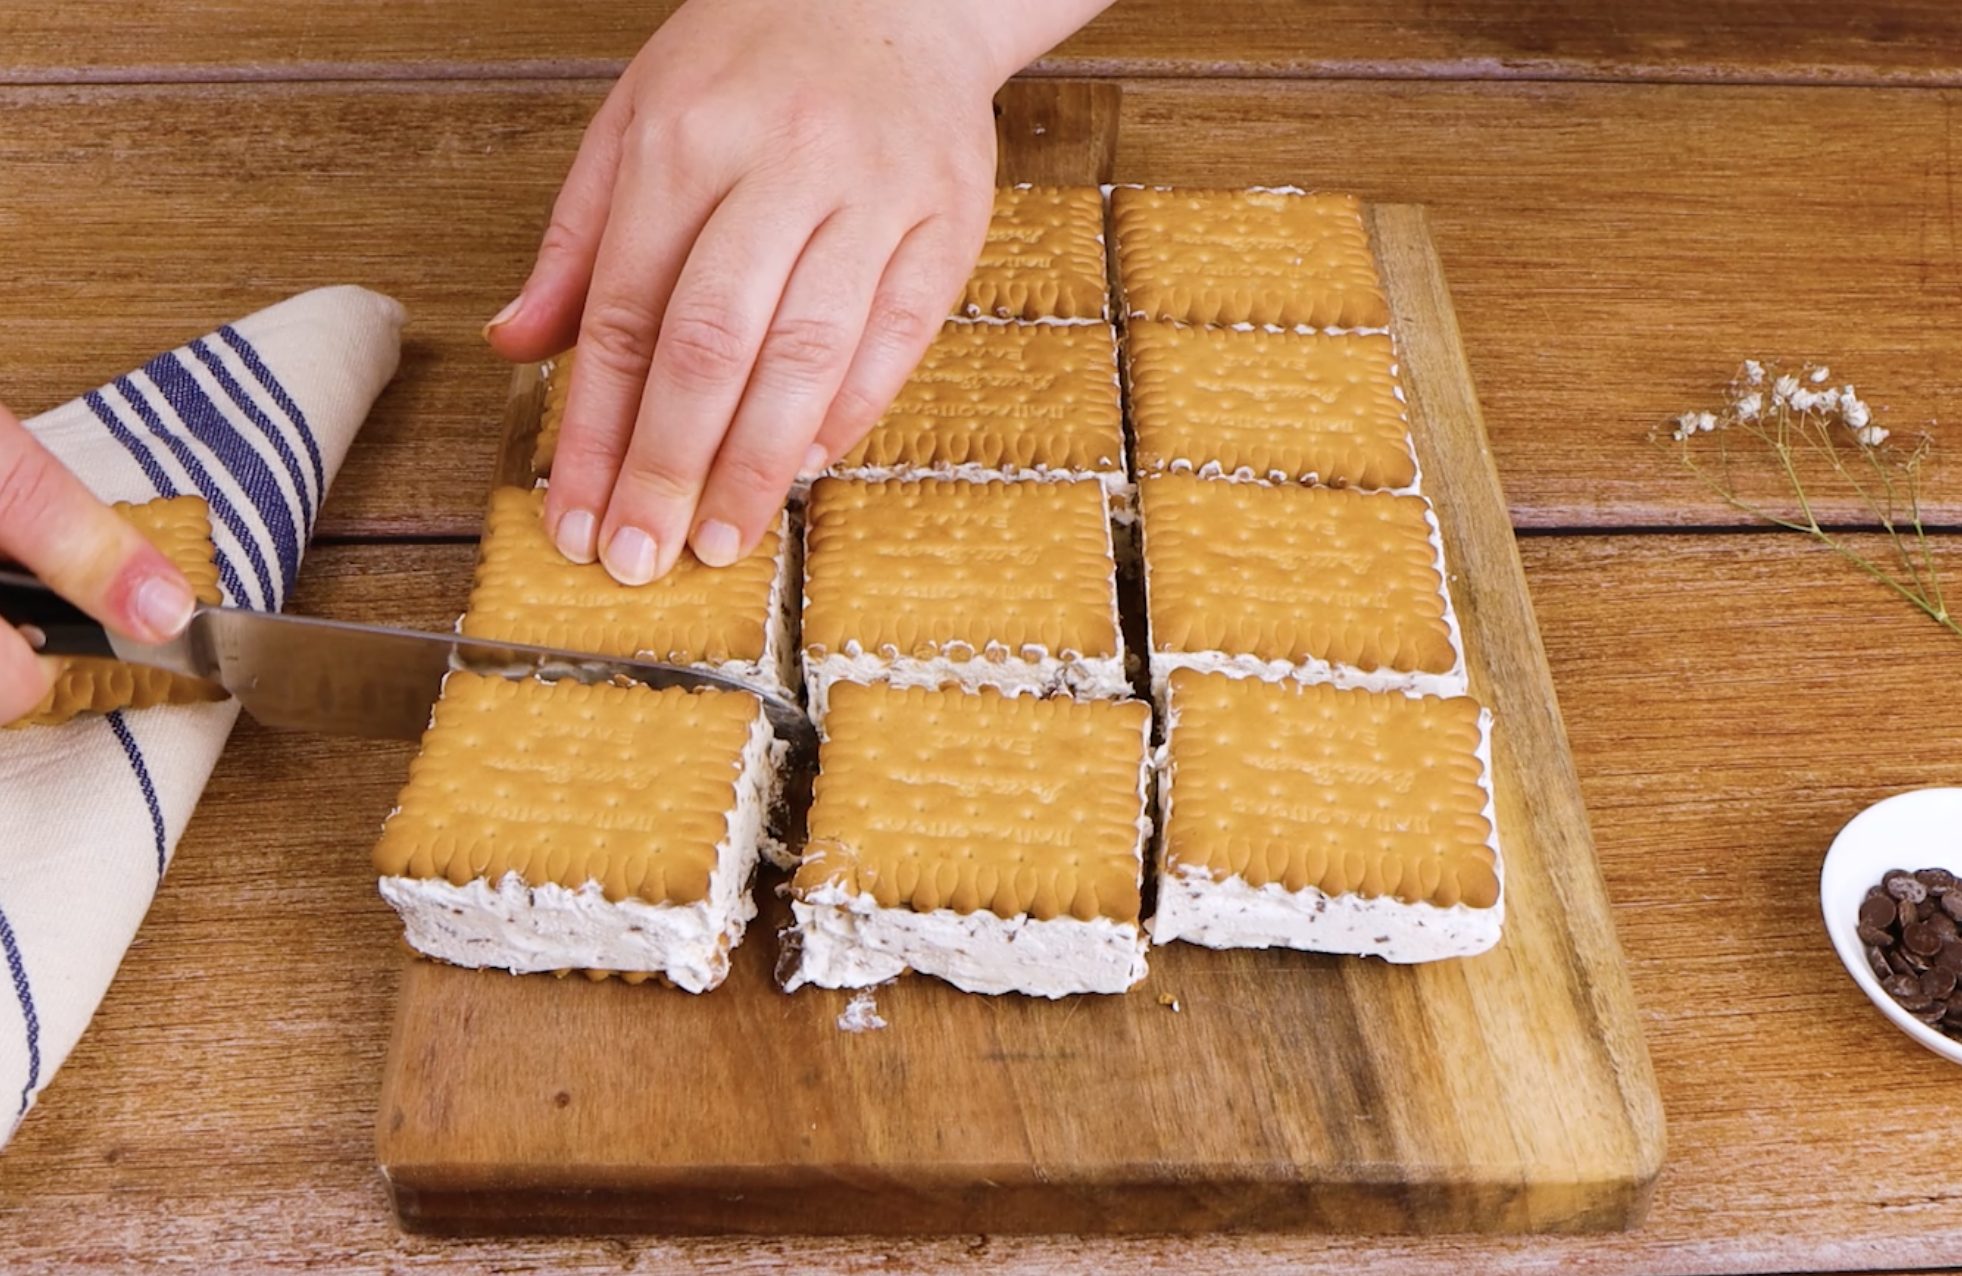
Cover the mold and place the Ice Cream Sandwich in the freezer. Let it set for at least three hours, or preferably overnight for firmer layers. When ready to serve, remove the dessert from the mold, slice it into neat squares, and enjoy this cool, creamy treat.
;Resize,width=767;)
