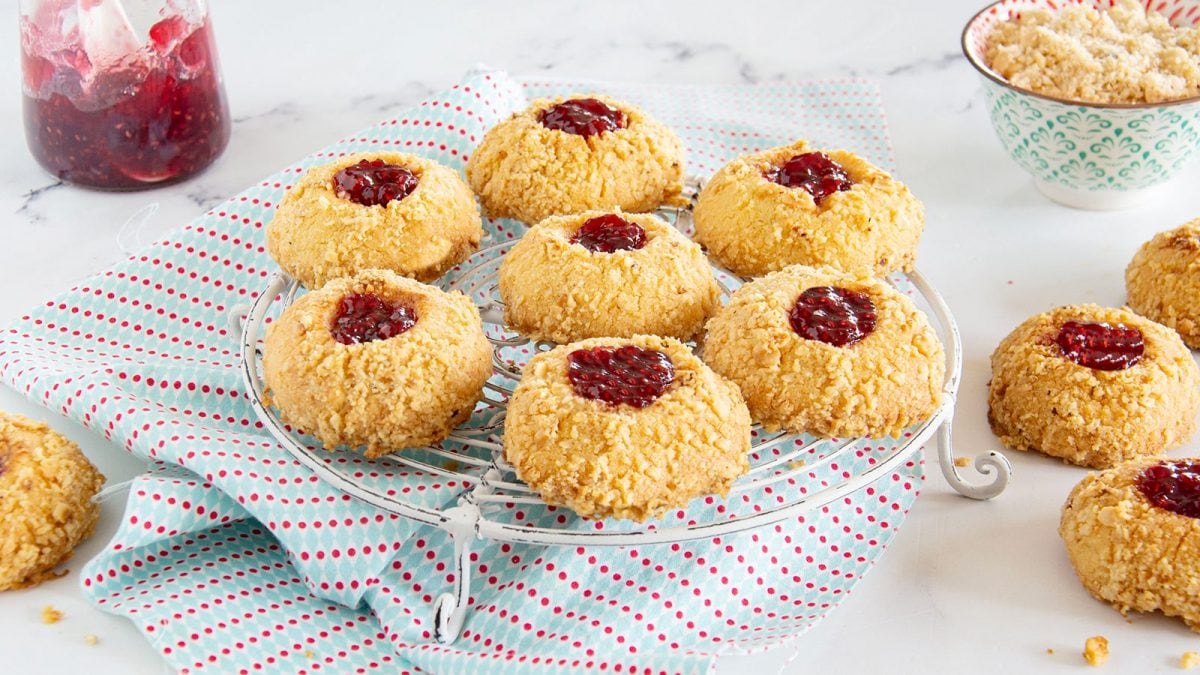
Thumbprint Cookies are crumbly and delicious treats, perfect for serving after a meal with a cup of espresso or as a snack with a delicious fruit tea. Featuring a central indentation made with the fingertip—hence the name "thumbprint "—the center holds a fragrant, melt-in-the-mouth heart of fruit jam.
Light and crumbly, to serve them, simply prepare a shortcrust pastry by mixing together cold cubed butter, granulated sugar, egg yolk, flour, and vanilla extract. Once you've formed a smooth dough into balls weighing about 20 grams each, all you have to do is roll them in chopped hazelnuts, make a dimple in the center, and pour in a teaspoon of jam of your choice. Baking in a preheated oven at 350°F/180°C for just 15 minutes will do the rest, creating fragrant and delicious pastries, perfect for a holiday buffet or a family Sunday brunch.
The Origin on Thumbprint Cookies
Most food historians trace their origins to Central and Eastern Europe, particularly Sweden, where they’re known as hallongrotta (“raspberry cave”), a name that perfectly captures their little jam-filled centers. Variations also appeared in Poland and Jewish Eastern European baking, where bakers used butter-rich doughs and filled the indent with preserves made from whatever fruit was in season. By the early 20th century, these cookies made their way into American cookbooks, becoming a holiday staple thanks to their simplicity, versatility, and the fact that they looked far more impressive than the effort required. Today, thumbprint cookies are a beloved classic—from Christmas cookie trays to year-round baking—proof that sometimes the most charming treats are the ones shaped with your own hands.
Thumbprint Cookies Types and Fillings
Thumbprint cookies come in far more varieties than the classic raspberry-filled version you see on holiday trays. Because the “thumbprint” is really just a technique, bakers have turned it into a whole category of cookies. Here are some popular types:
- Classic Jam Thumbprints: Usually made with raspberry, strawberry, apricot, or blackberry jam. These are the traditional hallongrotta-style cookies.
- Chocolate Thumbprints: A cocoa-rich dough filled with melted chocolate, chocolate ganache, or even a Hershey’s Kiss-style center.
- Nut-Coated Thumbprints: The dough balls are rolled in finely chopped walnuts, pecans, or almonds before baking, adding crunch and depth.
- Lemon Curd Thumbprints: Bright, tangy, and buttery — a favorite for springtime or tea-style cookie assortments.
- Caramel or Dulce de Leche Thumbprints: Often sprinkled with sea salt, these are a richer, candy-like take on the classic.
- Almond Thumbprints: Made with almond flour or extract, filled with cherry or raspberry jam — a nod to European cookie traditions.
- Shortbread Thumbprints: A more crumbly, buttery base that holds its shape beautifully and pairs well with any filling.
- Nutella or Chocolate-Hazelnut Thumbprints: Soft, indulgent, and beloved by kids and adults alike.
- Peppermint or Holiday Thumbprints: Rolled in crushed peppermint or filled with white chocolate ganache, often decorated for Christmas.
- Savory Thumbprint Cookies (yes, really!): Think: Parmesan shortbread filled with caramelized onion jam or tomato chutney — a modern twist served as cocktail appetizers.
Ingredients
How to Make Jam Walnuts Thumbprint Cookies

Collect the cold butter cubes in a bowl with the granulated sugar and vanilla extract.
Collect the cold butter cubes in a bowl with the granulated sugar and vanilla extract.
;Resize,width=712;)
Work everything well with the prongs of a fork.
Work everything well with the prongs of a fork.
;Resize,width=712;)
Add the egg yolk and a pinch of salt to the butter cream.
Add the egg yolk and a pinch of salt to the butter cream.
;Resize,width=712;)
Incorporate the ingredients.
Incorporate the ingredients.
;Resize,width=712;)
Finish with the sifted flour and mix again.
Finish with the sifted flour and mix again.
;Resize,width=712;)
Then transfer the mixture onto a floured work surface and quickly knead everything until you obtain a soft and homogeneous dough.
Then transfer the mixture onto a floured work surface and quickly knead everything until you obtain a soft and homogeneous dough.
;Resize,width=712;)
Then take small portions of dough of about 20 g each and form regular spheres.
Then take small portions of dough of about 20 g each and form regular spheres.
;Resize,width=712;)
Cover the balls obtained with chopped hazelnuts.
Cover the balls obtained with chopped hazelnuts.
;Resize,width=712;)
As they are ready, arrange the sweets on a baking tray with baking paper and make a dimple in the center with your fingertip or the handle of a wooden spoon; then put it in the fridge and let it set for about half an hour.
As they are ready, arrange the sweets on a baking tray with baking paper and make a dimple in the center with your fingertip or the handle of a wooden spoon; then put it in the fridge and let it set for about half an hour.
;Resize,width=712;)
Once the time has passed, fill the central cavity with a jam of your choice, then bake the biscuits in a hot oven at 350°F/180°C for about 15 minutes or until golden.
Once the time has passed, fill the central cavity with a jam of your choice, then bake the biscuits in a hot oven at 350°F/180°C for about 15 minutes or until golden.

Once the resting time has passed, take the cookies out of the oven.
Once the resting time has passed, take the cookies out of the oven.

Let them cool on a rack.
Let them cool on a rack.

Arrange the thumbprint cookies on a cake stand, bring to the table and serve. Enjoy!
Arrange the thumbprint cookies on a cake stand, bring to the table and serve. Enjoy!
Do You Fill Thumbprint Cookies Before or After Baking?
You’ll want to fill thumbprint cookies before baking them, because the heat helps the jam or curd set beautifully while also keeping the indentation from puffing up or losing its shape. As the cookies bake, the filling thickens slightly and melts into the dough, giving you that glossy, cohesive center thumbprints are known for.
The only real exception is when you’re using delicate fillings like melted chocolate, ganache, Nutella, or certain caramels, which can burn or turn grainy in the oven. Those are better added after the cookies come out and cool. In general, though, the classic technique is simple: thumbprint first, fill second, bake third.
Storage Instructions
Thumbprint biscuits can be stored at room temperature, tightly closed in a tin, for up to 3-4 days.
;Resize,width=767;)
