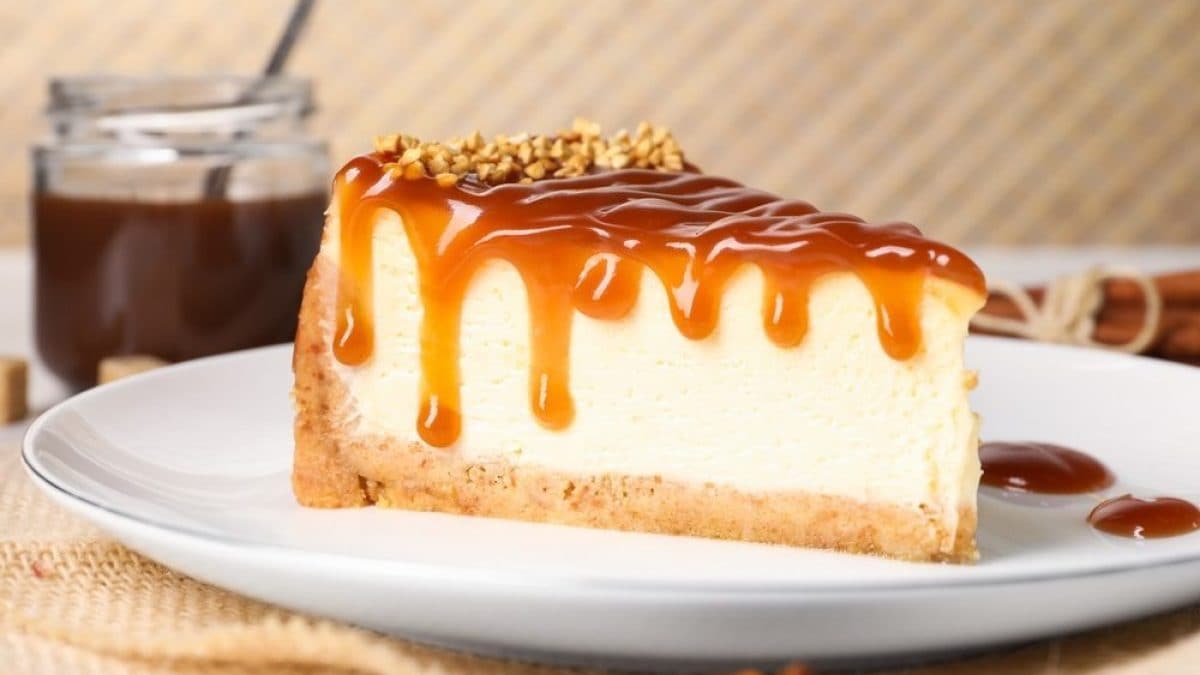
Cheesecake is one of the most iconic desserts in the United States, particularly on the East Coast, but there's no corner of the world that doesn't know or serve it. Over the years, this iconic cheesecake has gained fame and notoriety everywhere in both its versions: the original recipe, known as New York Cheesecake, calls for it to be baked, but an unbaked version (semifreddo-style) has developed that's now equally popular and beloved, especially in Anglo-Saxon countries. Besides being delicious, cheesecake is also quite easy to make at home, as long as you learn to avoid the most common mistakes along the way, which can lead to a less-than-ideal outcome. What are the mistakes you make most often, why do they happen, and how can you avoid them? Here are all the secrets to making the perfect cheesecake, whether baked or unbaked.
The Most Common Problems When Making Baked or No-Bake Cheesecake
Whether you're baking cheesecake or refrigerating it, some mistakes are common to both, while others are specific to one or the other. Here are the most common ones and how to avoid or fix them.
1. Crumbling Base: Bad Biscuits, Too Little Butter, and No Refrigeration
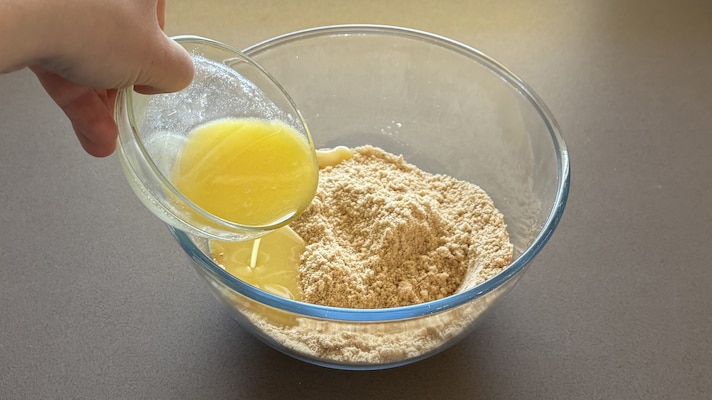
The crust is the fundamental component of cheesecake, a compact layer made of crushed biscuits and melted butter, onto which the cream cheese filling is then poured. One of the most common mistakes you can make is a crust that crumbles and doesn't stay together. What causes this? There are three mistakes that lead to a cracked crust.
- The biscuits you used are the wrong ones. The type of biscuit is crucial: the recipe uses Digestive biscuits, which are rustic and very crumbly, but any dry, crunchy biscuit will do. The important thing is that they aren't soft like ladyfingers or old, already-open biscuits: the result would be a base that's too loose, not to mention soggy.
- You use only a small amount of butter. What binds the crushed biscuits together is the melted butter, an ingredient you shouldn't skimp on: it should, on average, be about half the weight of the biscuits; if the dough seems tough after mixing, add more melted butter; if it seems too loose, add a few more crushed biscuits.
- You're not letting the crust rest in the refrigerator. This is an underestimated step, but it's actually where the perfect crust is made: the crust should be refrigerated for at least half an hour, so that the melted butter can solidify again, compacting the dough so that it doesn't crack or allow bits of crust to come loose and rise to the surface when you pour in the filling.
2. Rubbery Filling: Less Gelatine
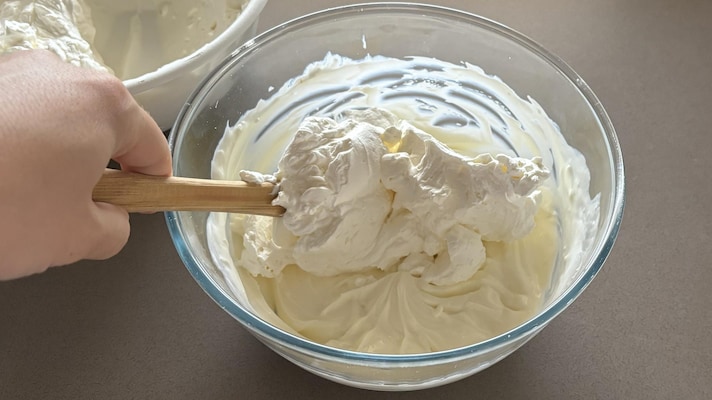
The filling is the heart of the cheesecake, whether baked or unbaked, and its most substantial layer. It's made from a cream cheese or a blend of several soft, spreadable cheeses, such as mascarpone, robiola, or Philadelphia, to which various ingredients are added depending on whether the cake is baked or refrigerated. This advice specifically concerns unbaked cheesecake, as it requires the addition of a binding agent, which in this case is gelatine (in the baked version, it's eggs). Incorrect use of gelatin sheets can cause the cream cheese to fail. You might be tempted to use more than recommended for fear the cake won't set, but in reality, using too much can make the cream cheese so rubbery it's inedible. It's also important to make the gelatine elastic enough to work properly on the cream: to do this, soak it in cold water until soft, then melt it over a heat along with a spoonful of a liquid ingredient (cream, for example); add it to the mixture only when it's lukewarm, otherwise you'll ruin the entire cream.
3. Filling Too Liquid or Not Setting

Your cheesecake filling should have a soft, slightly spongy consistency: ending up with a filling that's too runny becomes a problem. This usually stems from the wrong proportions of ingredients (too much liquid, too little cheese or cream), but it can also be linked to the lack of use or incorrect dosage of gelling agents (such as gelatin or agar-agar, depending on the recipe). Naturally, in this case, the best thing to do is follow the recipe carefully, measuring the ingredients precisely. If you use a gelling agent, be sure to hydrate and dissolve it properly and use the appropriate amount.
But, if even following the recipe doesn't give you the ideal filling consistency, you can try this:
- For a no-bake cheesecake, you can add a little more gelling agent (if you didn't use any or only a little), or chill it longer: sometimes, no-bake cheesecake simply needs more time in the refrigerator to fully set. Be patient and leave it in the refrigerator for at least 6-8 hours, or ideally overnight. Alternatively, you can add cream cheese or mascarpone: if the flavor allows, you can try adding more cold cream cheese or mascarpone to the filling and stirring gently to thicken it.
- For baked cheesecake, if the center is still very jiggly and runny, it may simply need more time in the oven. Lower the temperature slightly if the surface is already browning too much. Baked cheesecake firms up significantly during refrigeration: even if it still seems a little soft when you remove it from the oven, let it cool completely to room temperature and then refrigerate for at least 4-6 hours, or ideally overnight. If it remains runny after cooling, you can try baking it a little longer; if it's still too runny after prolonged cooling, you can put it back in the oven at a low temperature for a bit longer. Keep an eye on the surface to prevent it from drying out or cracking.
4. Cracks on a Baked Cheesecake
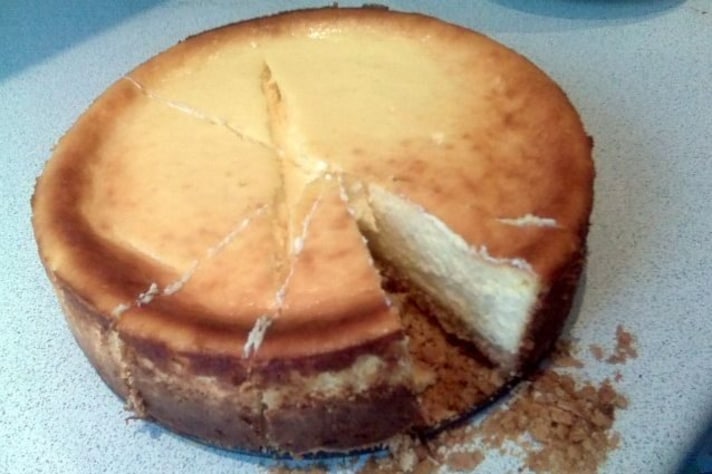
Let's move on to a case that only concerns baked cheesecake: have you ever had the surface of the cake separate, creating annoying cracks, either during baking or fresh out of the oven ? These are unsightly because, if there's no topping, they ruin the cake's appearance, and they're inconvenient if there's a topping because it would drip through the cracks and not solidify on the surface. This error is caused by a series of bad habits during cheesecake baking: they form if you open the oven before it's finished baking, and they form if the baking time is excessively long. They could also appear after baking due to temperature changes: to avoid this, wait to remove the cake from the oven but let it rest inside for at least an hour, so that the outside temperature doesn't cause unpleasant surprises.
5. Cheesecake That Breaks: Using the Wrong Mold (and Not Putting Kitchen Paper)
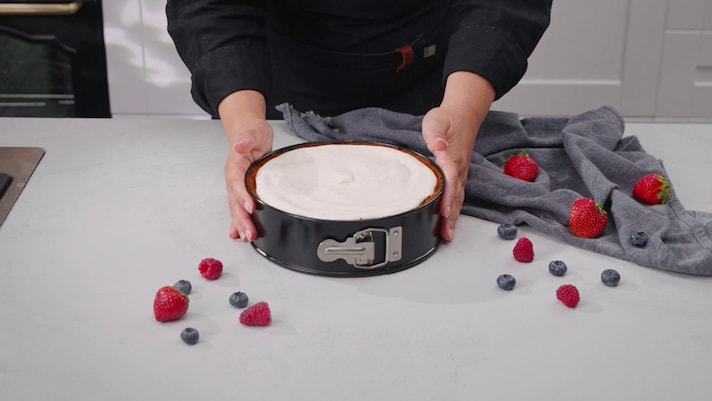
Who hasn't broken a cheesecake at least once when removing it from the pan? It's the most common mistake, especially because the cake often ends up sticking to the edges, making it impossible to remove without losing a few pieces. To avoid this accident, you need to pay attention to two key elements. First, choose the right pan, which, for cheesecakes, is a springform pan, which is excellent because it allows you to remove the cake without moving it (pans like those for bundt cakes would end up destroying it). The second key element is to place baking paper between the cake and the pan when you're preparing the base: you can line the inside of the pan, or cut a disc of paper to place on the bottom that extends about 1 cm up the edge and then a strip of paper that extends a few centimeters from the edge of the pan. Remember to never wet the baking paper, because moisture causes the base to lose its crispiness: if you want it to adhere well to the pan, it's best to butter it before applying it.
;Resize,width=767;)
