
If your pantry looks like a snack aisle got tired and collapsed, and your energy level matches your ingredient count, this dessert is calling your name. We’re talking three humble ingredients, no oven drama, and a fridge that does the heavy lifting.
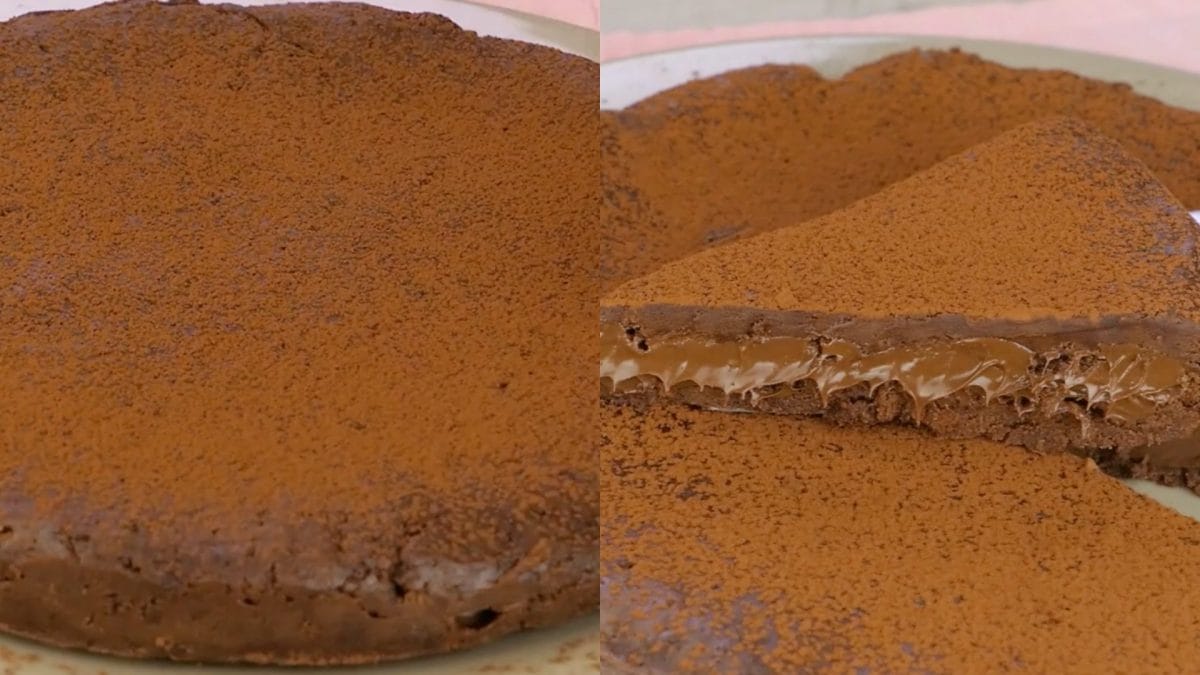
This chocolate tart skips the usual flour-egg-butter song and dance and dives straight into a bold. This dessert features a rich flavor with a creamy hazelnut center and cookie layers that mean business. All you have to do is crush cookies, swirl them in yogurt, spread that hazelnut joy, layer it up, and let it chill.
Great as a no-fuss dessert after dinner, a sweet afternoon pick-me-up, or a show-off piece at your next “I didn’t even try that hard” gathering.
What Is a 3-Ingredient Chocolate Cake?
This isn’t your grandma’s Sunday sponge cake, nor is it one of those intense, twelve-step tortes with a custard thesis layered in the middle. This chocolate cake is modern minimalism on a dessert plate: hazelnut spread, cookies, and plain yogurt form. It’s an ideal solution for dessert emergencies (you know the ones) and lazy-day indulgences.
While there’s no ancient pastry lineage to trace here, the concept rides on the wave of European no-bake treats, such as fridge cakes, biscuit tortes, and icebox layer bars. Some say it echoes Italian “salame di cioccolato” in spirit, minus the boozy crunch.
Pro Tips for the Best 3-Ingredient Chocolate Cake
- Use a food processor for cookie crumbs with texture. Too fine? You’ll get sludge. Too chunky? It won’t hold.
- Cold yogurt makes the mixture stiff and harder to mix. Let it warm up a bit so it blends smoothly.
- Choose Your Cookies Wisely. Digestives, graham crackers, or chocolate biscuits all work. Avoid overly oily cookies or ones with gooey centers.
- If your hazelnut is too stiff, microwave it for 15 seconds. It should spread, not fight you.
Can I Use Greek Yogurt Instead of Plain?
Yes, but keep in mind Greek yogurt is thicker and tangier, which changes both the texture and flavor. Your cake will be firmer and a bit more tart, which can actually be a nice contrast to the rich hazelnut spread. If your yogurt’s extra thick, consider loosening it with a splash of milk.
What Cookies Work Best for This Recipe?
Sturdy, dry cookies are your best bet. You want cookies that crush well and don’t turn to paste when mixed. Avoid sandwich cookies or anything cream-filled, it throws off the texture and balance.
Can I Use Another Type of Spread?
Peanut butter, almond butter, or cookie butter can be used in place of hazelnut spread. Each variation brings a different vibe, peanut butter adds saltiness, cookie butter gets extra spiced and dessert-y. You do you.
Can I Add Toppings?
Crushed hazelnuts, a drizzle of melted chocolate, a pinch of sea salt, even a few berries if you’re feeling healthy-adjacent. Just keep in mind that too many wet toppings may make the surface soggy.
Can I Freeze a 3-Ingredient Chocolate Cake?
Yes, though with some caveats. Wrap it tightly in plastic and freeze for up to a month. When you’re ready to serve, let it thaw in the fridge for a few hours. It’s best enjoyed slightly chilled, not rock-hard or too soft.
Ingredients
How to Make 3-Ingredient Chocolate Cake
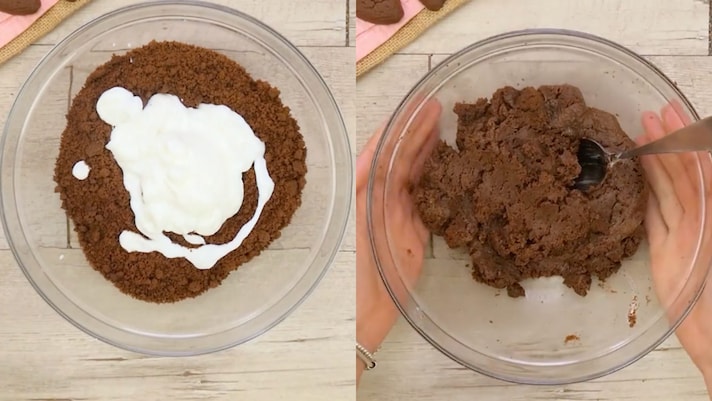
Toss the cookies into a food processor or zip-top bag and crush them until they resemble coarse sand. You want them uniform enough to mix, but not dust-like. In a bowl, combine the crushed cookies and plain yogurt. Stir until the mixture is evenly combined. It should hold its shape when pressed, but not be too wet.
Toss the cookies into a food processor or zip-top bag and crush them until they resemble coarse sand. You want them uniform enough to mix, but not dust-like. In a bowl, combine the crushed cookies and plain yogurt. Stir until the mixture is evenly combined. It should hold its shape when pressed, but not be too wet.
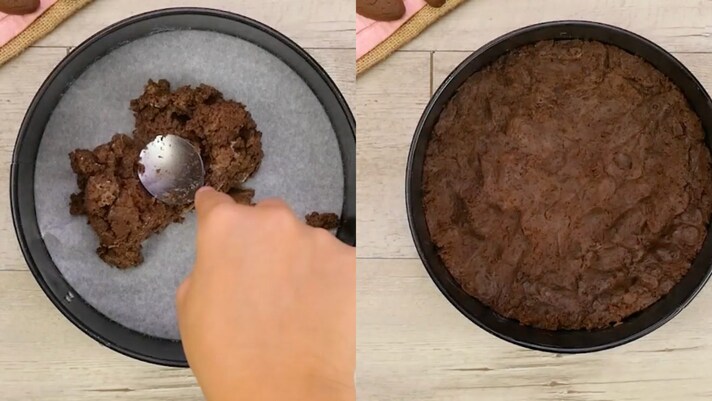
Press half the cookie-yogurt mixture into the bottom of a springform pan lined with parchment paper. Use the back of a spoon or a flat-bottomed glass to press it down firmly.
Press half the cookie-yogurt mixture into the bottom of a springform pan lined with parchment paper. Use the back of a spoon or a flat-bottomed glass to press it down firmly.
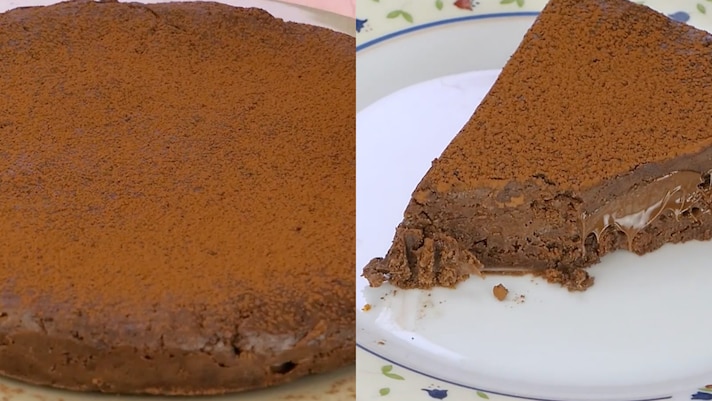
Dust the top with cocoa powder for a finishing touch. Then cover and refrigerate for at least 60 minutes. The longer it chills, the firmer and better it gets. Once firm, release it from the pan, slice with a sharp knife, and serve.
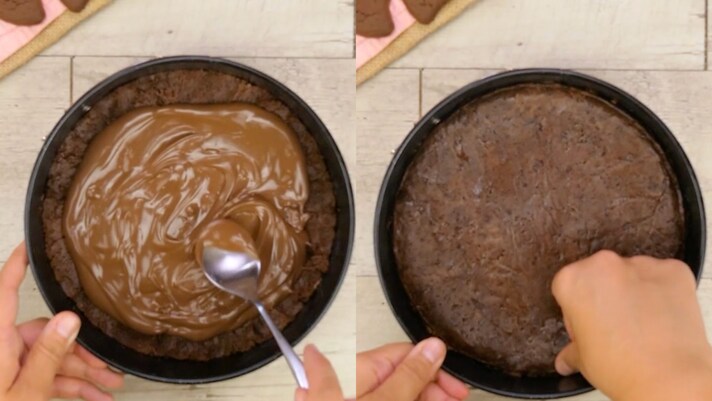
Spread a generous layer of hazelnut spread over the base. Add the remaining cookie-yogurt mixture on top of the hazelnut layer. Press it down gently to seal in the filling and even out the top.
Dust the top with cocoa powder for a finishing touch. Then cover and refrigerate for at least 60 minutes. The longer it chills, the firmer and better it gets. Once firm, release it from the pan, slice with a sharp knife, and serve.
;Resize,width=767;)
