
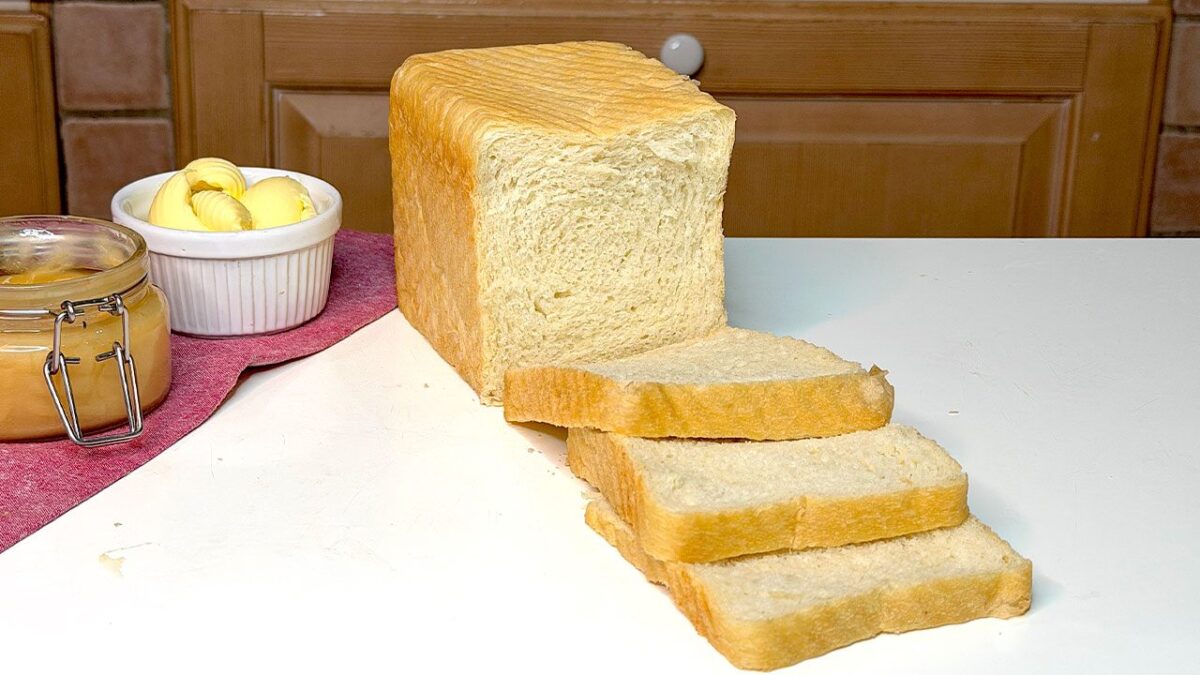
There's something especially satisfying about slicing into a freshly baked loaf of homemade sandwich bread. The crust is thin and delicate, the inside is wonderfully soft, and every slice is just right for toast, grilled cheese, or a classic sandwich.
This recipe creates a beautifully tender Pullman loaf using a simple yeast dough enriched with butter and a little extra virgin olive oil. The dough is mixed until smooth and elastic, allowed to rise, then rolled and baked in a covered loaf pan.
The lid is what gives the bread its distinctive square shape. Instead of rising into a rounded dome, the dough fills the pan, creating a loaf with straight sides and an even crumb.
It's the kind of everyday bread that's worth making from scratch, especially when you want soft, uniform slices for the whole family.
What Is Pullman Sandwich Bread?
Pullman bread is a type of sandwich loaf traditionally baked in a long, rectangular pan fitted with a sliding lid.
The covered pan restricts the dough's upward expansion during baking, giving the finished bread its characteristic flat top and square cross-section.
It's also known as pain de mie, a French term associated with soft, fine-crumbed bread that has a relatively thin crust.
Although the names are often used interchangeably, recipes can vary in their ingredients and proportions.
This homemade version combines wheat flour, water, fresh yeast, butter, olive oil, and salt to create a soft, versatile loaf suitable for everyday use.
Why Everyone Will Love This Recipe
The texture is the biggest reason to make this bread at home. Butter and olive oil help create a soft, tender crumb that's perfect for sandwiches without being overly rich.
The dough is also straightforward to prepare. A stand mixer handles most of the kneading, making it easier to develop the elasticity needed for a smooth, well-structured loaf.
Another advantage is the shape. Baking with the lid on produces a neat, rectangular loaf that slices evenly, making it ideal for lunchbox sandwiches, French toast, and toasted sandwiches.
And unlike many sweetened sandwich bread recipes, this version contains no added sugar. Its mild flavor works just as well with savory fillings as it does with butter and jam.
Tips for Making the Best Homemade Sandwich Bread
- Use the right pan. A Pullman loaf pan with a fitted lid is essential for the classic square shape. The dough needs enough room to rise without being excessively compressed.
- Add the butter gradually. Incorporating softened butter a little at a time allows it to blend evenly into the dough without interfering too much with gluten development.
- Watch the dough, not just the clock. Rising times depend on room temperature and yeast activity. The dough should become visibly larger and airy before shaping.
- Cool completely before slicing. Cutting warm sandwich bread can compress the soft crumb and make the slices gummy.
Frequently Asked Questions
What Is the Difference Between Sandwich Bread and Pullman Bread?
Sandwich bread is a broad term for soft bread intended for slicing and making sandwiches. Pullman bread is a specific type of sandwich loaf baked in a covered rectangular pan, which creates its distinctive square shape.
Can You Make Sandwich Bread Without a Pullman Loaf Pan?
Yes, although the finished loaf will have a different shape. A regular loaf pan can produce soft sandwich bread, but the dough will rise into a rounded top instead of forming a flat, square loaf. Baking time may also vary.
Why Is My Homemade Sandwich Bread Dense?
Dense sandwich bread can result from insufficient kneading, underproofing, or using too much flour. The dough should be smooth and elastic before its first rise, and it needs enough time to expand properly before baking.
Can You Use Instant Yeast Instead of Fresh Yeast?
Yes. The 8 g of fresh yeast in this recipe can be replaced with approximately 2½–3 g of instant yeast, or roughly ¾ teaspoon. Instant yeast can generally be mixed directly into the flour rather than dissolved in water first.
Why Is My Pullman Bread Not Perfectly Square?
The dough may not have risen enough before baking, or the pan may be too large for the amount of dough. A properly sized Pullman pan and adequate proofing are important for achieving the classic square shape.
How Do You Know When Sandwich Bread Is Fully Baked?
The most reliable method is to check the internal temperature with an instant-read thermometer. For this recipe, the center should reach approximately 205°F (96°C). The bread should also feel firm and fully set when removed from the pan.
How to Store
Allow the homemade sandwich bread to cool completely on a wire rack before storing it.
Once cool, place the loaf in a bread bag or airtight container and keep it at room temperature in a cool, dry place for approximately 2–3 days.
For the best texture, slice the bread only as needed. Keeping the loaf whole helps prevent the exposed crumb from drying out too quickly.
Avoid refrigerating the bread unless necessary, as refrigeration can accelerate staling.
If the bread begins to lose some of its softness, lightly toasting the slices can improve their texture.
How to Freeze
Homemade sandwich bread freezes very well, making it ideal for preparing in advance.
Once the loaf has cooled completely, slice it into even pieces. Arrange the slices in a freezer-safe bag, placing small sheets of parchment paper between them if you want to separate individual portions easily.
Remove as much air as possible before sealing and freeze for up to 3 months for the best quality.
When needed, remove the desired number of slices and let them thaw at room temperature, or place them directly into the toaster.
You can also freeze the entire loaf, tightly wrapped, although pre-slicing makes everyday use much more convenient.
Ingredients
How to make Homemade Sandwich Bread

Begin by pouring the room-temperature water into a small bowl or measuring jug. Add the fresh yeast and stir gently until it dissolves completely.
Begin by pouring the room-temperature water into a small bowl or measuring jug. Add the fresh yeast and stir gently until it dissolves completely.

Place the flour in the bowl of a stand mixer fitted with the dough hook. Pour in the water and yeast mixture, then begin mixing on low speed until the ingredients come together into a rough, even dough.
Place the flour in the bowl of a stand mixer fitted with the dough hook. Pour in the water and yeast mixture, then begin mixing on low speed until the ingredients come together into a rough, even dough.

Continue kneading until the flour has absorbed the water and no dry patches remain. The dough may look slightly firm at this stage, but it will become smoother as the remaining ingredients are incorporated.
Continue kneading until the flour has absorbed the water and no dry patches remain. The dough may look slightly firm at this stage, but it will become smoother as the remaining ingredients are incorporated.

Add the softened butter a little at a time, allowing each addition to become fully absorbed before adding more.
Add the softened butter a little at a time, allowing each addition to become fully absorbed before adding more.

Once the butter has been incorporated, add the fine salt, followed by the extra virgin olive oil.
Once the butter has been incorporated, add the fine salt, followed by the extra virgin olive oil.

Continue mixing becomes smooth, elastic, and cohesive. It should pull together into a soft ball and feel supple rather than dry or crumbly.
Continue mixing becomes smooth, elastic, and cohesive. It should pull together into a soft ball and feel supple rather than dry or crumbly.

Place the dough in a lightly covered bowl and leave it to rise in a warm, draft-free area for approximately 1 hour and 30 minutes, or until it has visibly expanded and feels airy.
Place the dough in a lightly covered bowl and leave it to rise in a warm, draft-free area for approximately 1 hour and 30 minutes, or until it has visibly expanded and feels airy.

Once the first rise is complete, transfer the dough to a lightly floured work surface.
Gently press it into a rectangle, releasing any very large air pockets without flattening the dough excessively.
Once the first rise is complete, transfer the dough to a lightly floured work surface.
Gently press it into a rectangle, releasing any very large air pockets without flattening the dough excessively.

Starting from one short side, roll the rectangle into a tight log, keeping the roll even from end to end. Pinch the seam gently to seal it.
Starting from one short side, roll the rectangle into a tight log, keeping the roll even from end to end. Pinch the seam gently to seal it.

Lightly grease the inside of the pan and its lid if recommended by the manufacturer, then place the dough inside.
Lightly grease the inside of the pan and its lid if recommended by the manufacturer, then place the dough inside.

Cover the pan loosely while the dough completes its second rise, leaving the lid off or partially open so the rising dough can be monitored.
Cover the pan loosely while the dough completes its second rise, leaving the lid off or partially open so the rising dough can be monitored.

Allow the dough to rise for approximately 2 hours, or until it has expanded enough to fill most of the pan. The exact point at which the lid should be closed depends on the pan's dimensions and the amount of dough.
Allow the dough to rise for approximately 2 hours, or until it has expanded enough to fill most of the pan. The exact point at which the lid should be closed depends on the pan's dimensions and the amount of dough.

Preheat the oven to 350°F (180°C) using the conventional, non-fan setting.
Place the covered Pullman loaf pan in the oven and bake for approximately 40 minutes.
During baking, the dough will expand inside the covered pan, developing its characteristic rectangular shape and a relatively thin crust.
Preheat the oven to 350°F (180°C) using the conventional, non-fan setting.
Place the covered Pullman loaf pan in the oven and bake for approximately 40 minutes.
During baking, the dough will expand inside the covered pan, developing its characteristic rectangular shape and a relatively thin crust.

Once baked, remove the pan from the oven and carefully take the bread out of the mold.
Once baked, remove the pan from the oven and carefully take the bread out of the mold.

Transfer the loaf immediately to a wire rack so air can circulate around it and prevent moisture from collecting underneath.
Allow the homemade sandwich bread to cool completely before slicing. This resting time is essential for the crumb to set properly and retain its soft, even structure.
Transfer the loaf immediately to a wire rack so air can circulate around it and prevent moisture from collecting underneath.
Allow the homemade sandwich bread to cool completely before slicing. This resting time is essential for the crumb to set properly and retain its soft, even structure.

Once cool, cut the loaf into slices of your preferred thickness using a serrated bread knife.
Once cool, cut the loaf into slices of your preferred thickness using a serrated bread knife.

The finished Pullman sandwich bread should have a delicate crust, a soft and fluffy interior, and neat, uniform slices that are perfect for sandwiches, breakfast toast, grilled cheese, and French toast.
The finished Pullman sandwich bread should have a delicate crust, a soft and fluffy interior, and neat, uniform slices that are perfect for sandwiches, breakfast toast, grilled cheese, and French toast.


