

Ingredients
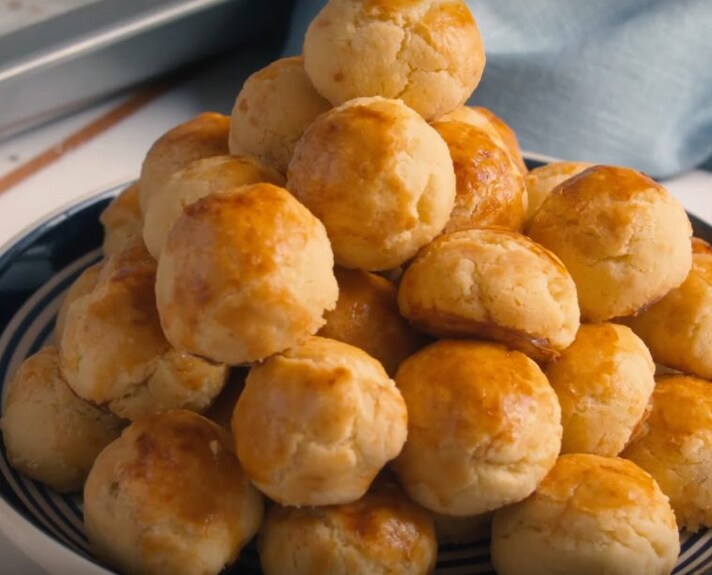
This might not look like the typical Pineapple Tarts you expected when opening this recipe, but you will be pleasantly surprised. In Chinese culture (and especially in Singapore and Malaysia), Homemade Pineapple Tarts have a rich history, especially around the Chinese New Year. During this time, families would get together and bake for days and days, to produce enough of these Homemade Pineapple Tarts, which is also called Nastar. It’s not difficult to make either. You simply create a biscuit (or cookie) dough and fill it with pineapple. Imagine small, buttery and crumbly bites filled with a sweet pineapple filling. Once you start with one of these melt-in-the mouth bites, it’ll be hard to stop!

What are Pineapple Tarts
Pineapple Tarts go by many name. In the native language they're known as Nastar, while in Malaysia and Singapore, they’re called pineapple tarts. You might even hear some calling them pineapple cakes, pineapple pastries, pineapple cookies. Whatever you call them, these are the best. It’s a light crumbly dough, filled with a sweet (slightly tart) pineapple jam. Each bite just melts in your mouth!
Recipe Tips for the Best Pineapple Tarts
– If you can’t find pineapple jam at your local supermarket, you can make your own. Simply cook down 5 pounds of pineapple flesh, (pureed) with 1 ½ cups sugar and 1 tbsp lemon juice until it thickens. Cool down and use in the recipe. You can store the filling in the fridge.
– Because of the high moisture content, pineapple tarts tend to become moldy fast. It’s important not to use a jam that’s too liquid. This will cause the pineapple tarts to mold. Rather go for a dryer jam. Also store the tarts away from sunlight in an airtight container (at room temperature). Alternatively, you can keep it in the refrigerator for up to 6 months.
– While the round balls are the traditional shape of these pineapple tarts, there are other ways to make it. You can press out shapes from the cook dough, and place the filling on top, baking it without closing the filling.
– You can make the pineapple filling a few months in advance and store it in the freezer.
– The butter in this recipe is what makes the tarts soft and crumbly. Be careful not to over knead the dough, as this will cause it to become dry and cracked.
How to store Homemade Pineapple Tarts
Homemade Pineapple Tarts can be safely stored (cooked and uncooked) in the refrigerator for up to 3 months. To freeze, place the tarts on a baking sheet lined with parchment paper and place in the freezer. Once the tarts are frozen, you can transfer them to a freezer-safe container or plastic bag. When you want to eat them, you can simply let the cooked tarts thaw at room temperature. For the unbaked tarts, you can brush them with an egg wash, and bake, adding about 5 minutes to the total baking time.
Are Pineapple Tarts caloric?
When it comes to cookies, you will only get away with so much calorie cutting. While these cookies do contain fruit, they still contain a significant amount of butter and flour, so save these for special occasions!
How to make Pineapple Tarts
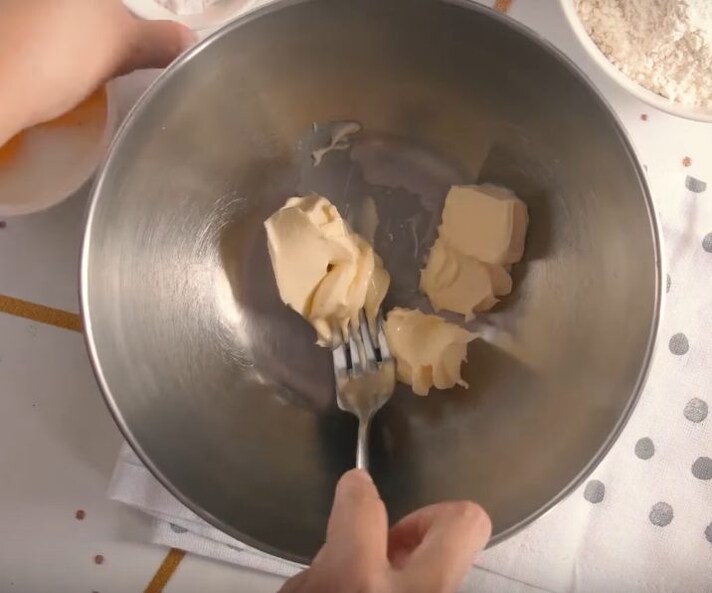
Preheat the oven to 180°C/350°F. Whisk softened butter with powdered sugar and egg yolks until smooth.
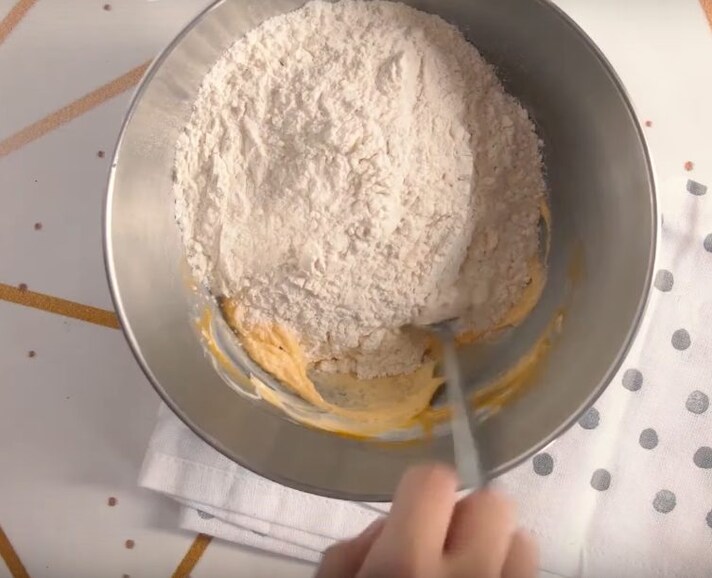
Add salt and flour.
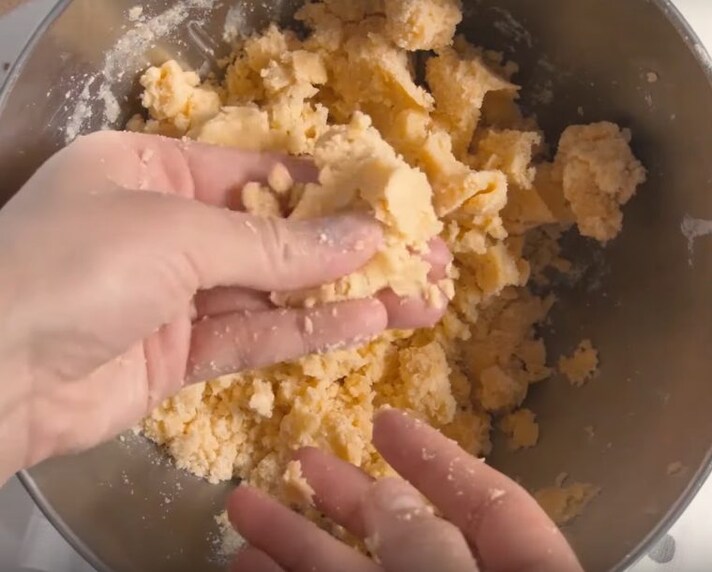
Knead the dough with your hands until smooth.

Wrap the dough in plastic and chill in the fridge for 1 hour. Cut the chilled dough into small pieces and roll each into a ball.
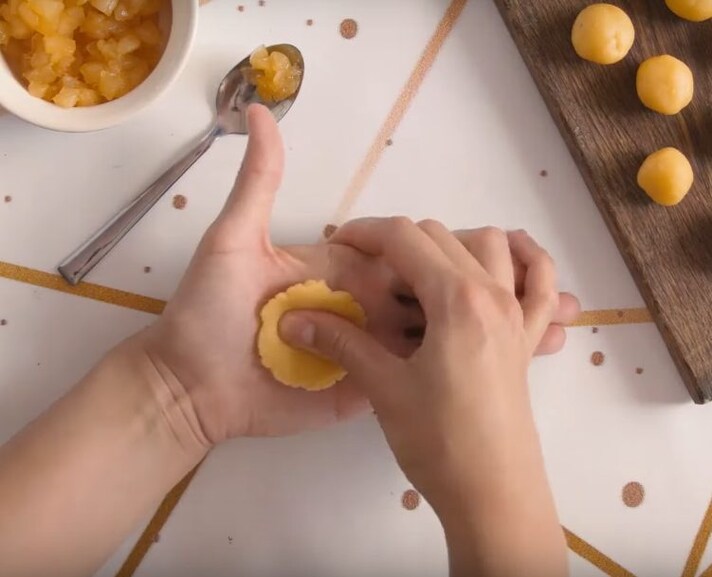
Flatten the ball with your fingers.
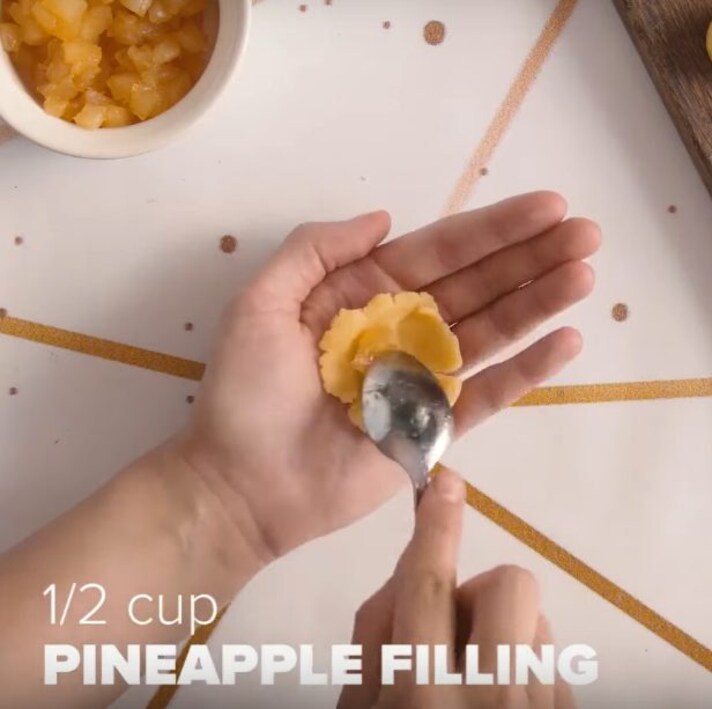
Place some pineapple filling in the middle.
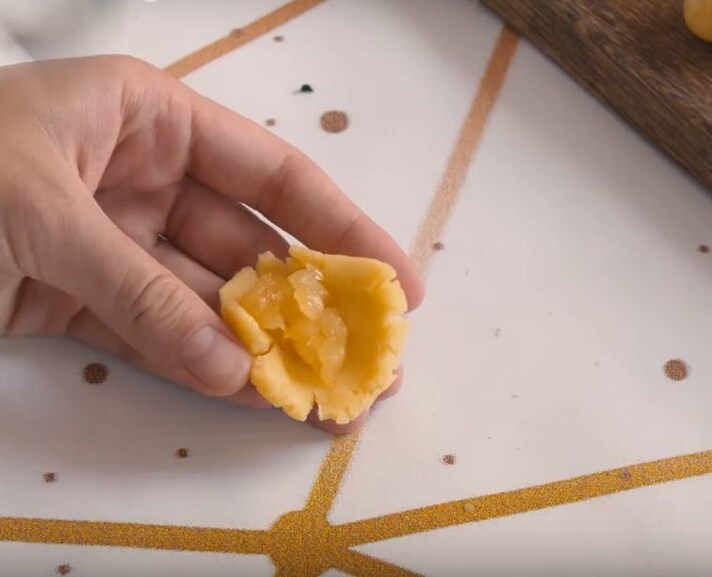
Wrap the dough around the filling and roll into a ball again.

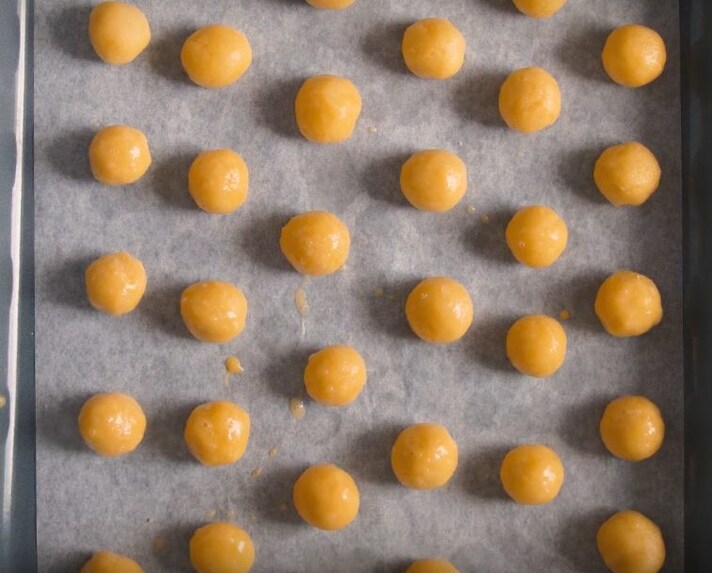
Place the tarts on a baking sheet lined with parchment paper.
Brush each ball with egg wash and bake for 20 minutes.

Leave to cool down before serving.
;Resize,width=767;)
