
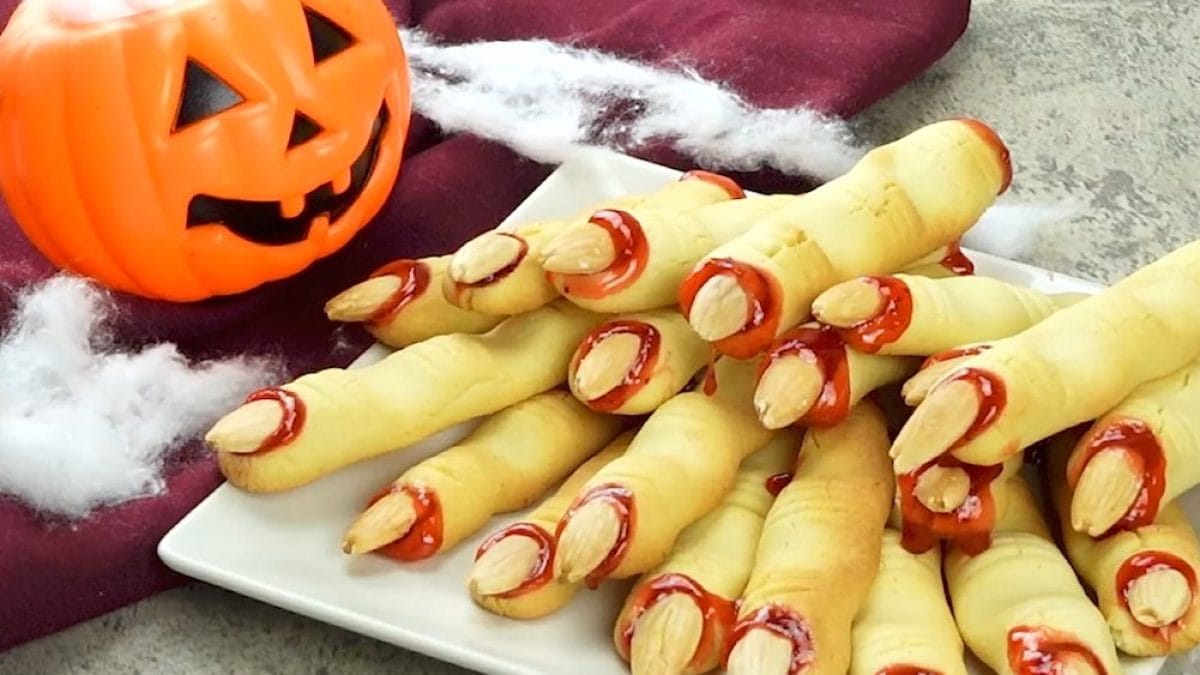
These witch fingers are spooky looking cookies that are buttery and delicious. With a finger shape, strawberry jam, and toasted sliced almond, these cookies look like wonky severed witch fingers that are perfect to adorn any Halloween table for a snack or dessert.
To make the witch fingers, you first make a dough with flour, salt, icing sugar, butter, and egg. Then, they get shaped into fingers and fitted with almond slices for nails before being baked in the oven. After that, all they need is the addition of strawberry jam which gives the fingers an extra creepy look along with the delicious strawberry flavor.
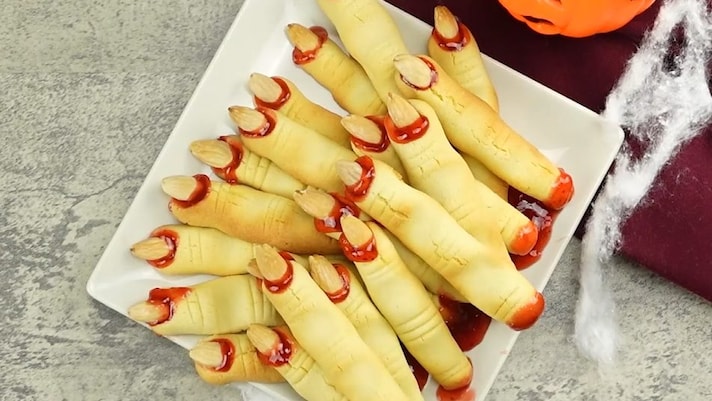
What are Witch Fingers?
Witch fingers are butter-based cookies that look like witch fingers as they have a creepy shape. They are garnished with almond slices and strawberry jam, which has the appearance of blood on the cookies.
Pro Tips
- Using cold cubed butter gives the dough an extra crumbly texture.
- Use a kitchen scale to ensure that the cookies are even sizes.
- You will know the cookies are baked through when they are solid and are light golden on their bottoms.
- If you don’t love strawberry jam, you could replace it with another red jam such as currant jelly or raspberry jam.
Frequently Asked Questions
Are Witches Fingers a Good Halloween Snack?
Yes, although these witch fingers may look scary, they are the perfect Halloween snack or dessert with their buttery and sweet flavor, and the taste of toasted almonds.
Can I Make Witch Fingers Nut-Free?
Yes, you can! If anyone you plan to serve them to are allergic to almonds or other nuts, you could replace them with something that has a similar size and shape such as unhulled pumpkin seeds.
Can I Use Different Jam in Witch Fingers?
Yes, if you don’t have strawberry jam, you could use another type of red jam such as raspberry jam. If you use raspberry jam, make sure it is seedless for the best look and texture.
How to Store Witch Fingers
These witch finger cookies should be stored in an airtight container at room temperature where they should stay fresh for up to 1 week.
Ingredients
How to Make Witch Fingers
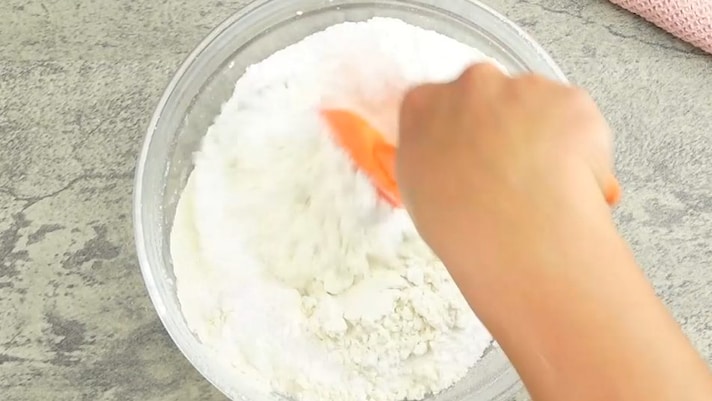
In a bowl, stir the flour with the salt and icing sugar.
In a bowl, stir the flour with the salt and icing sugar.
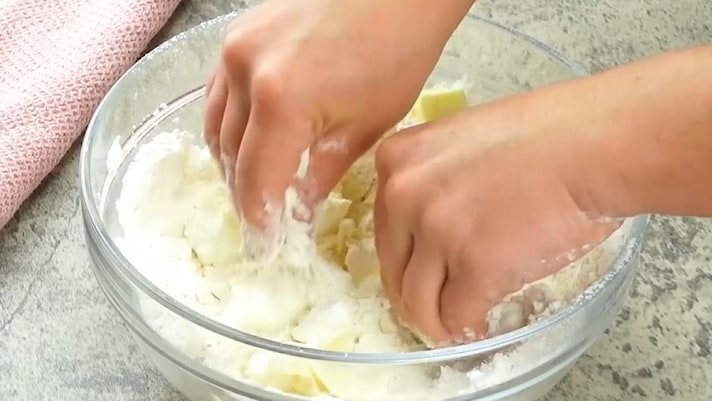
Add the butter and knead the dough until it is crumbly.
Add the butter and knead the dough until it is crumbly.
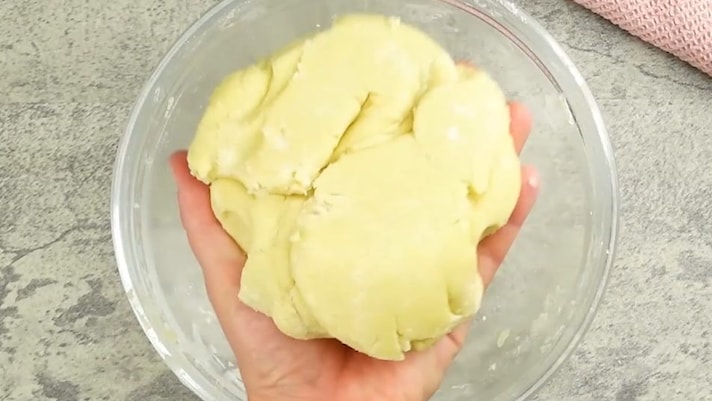
Add the egg and knead until a smooth dough forms.
Add the egg and knead until a smooth dough forms.
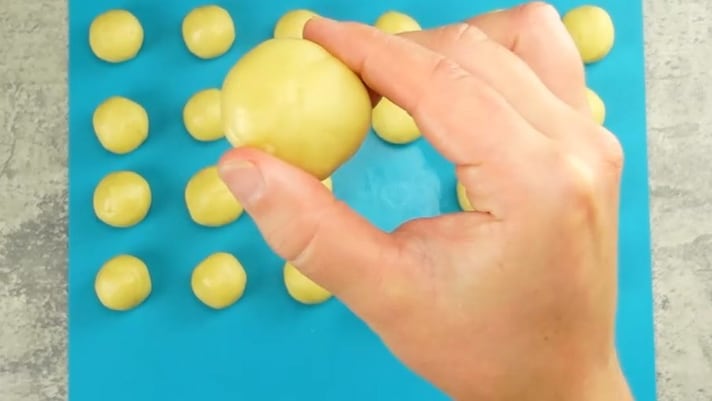
Divide the dough into 20 gram balls.
Divide the dough into 20 gram balls.
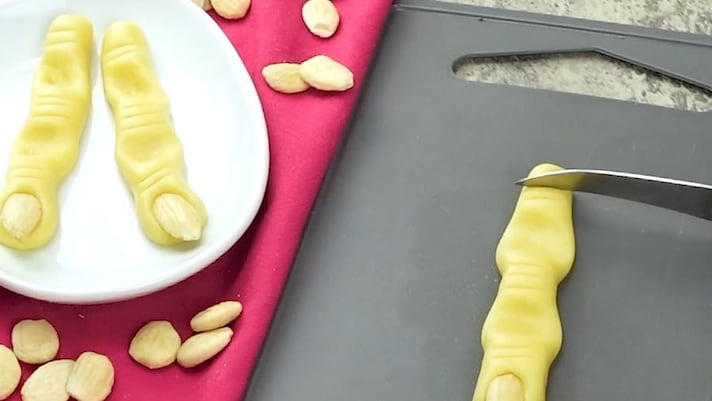
Shape each ball of dough into a finger, put an almond slice at the end of each cookie, and cut slits into it. Place them on a parchment-lined baking sheet and bake them in a 356 F (180 C) oven for 20 minutes.
Shape each ball of dough into a finger, put an almond slice at the end of each cookie, and cut slits into it. Place them on a parchment-lined baking sheet and bake them in a 356 F (180 C) oven for 20 minutes.
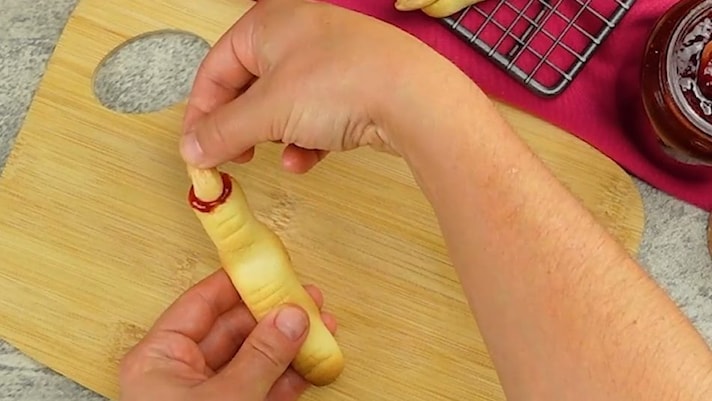
Remove the almond from each cookie, add some strawberry jam, and place another almond slice on top.
Remove the almond from each cookie, add some strawberry jam, and place another almond slice on top.
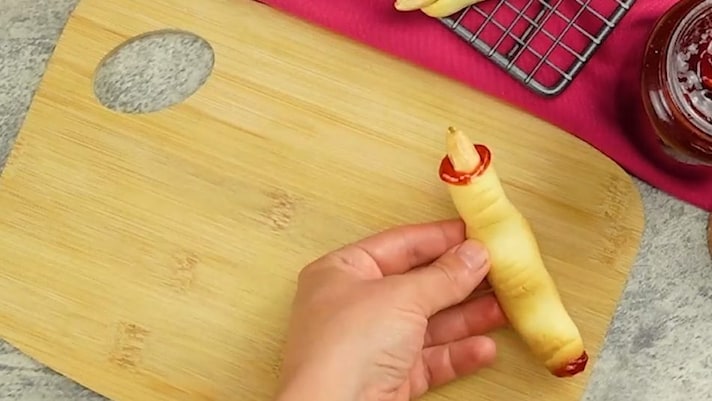
Place some jam on the end of each cookie.
Place some jam on the end of each cookie.
Serve immediately!
Serve immediately!
;Resize,width=767;)
